Acer XB253Q Support and Manuals
Get Help and Manuals for this Acer Computers item
Acer XB253Q Videos

Acer Predator XB253Q Gpbmiiprzx 24.5" FHD Gaming Monitor ? (Review)
Duration: 2:42
Total Views: 3,474
Duration: 2:42
Total Views: 3,474
Opinião final sincera sobre Monitor Gamer Acer Predator XB253Q GX 24.5` Full HD 240Hz 0,5ms IPS
Duration: 9:41
Total Views: 8,204
Duration: 9:41
Total Views: 8,204
Monitor Acer Predator XB253Q GX 24.5 Com defeito
Duration: 1:17
Total Views: 563
Duration: 1:17
Total Views: 563
Monitor Gamer Acer Predator XB253Q GX 24.5` Full HD 240Hz 0,5ms IPS G-Sync
Duration: 4:46
Total Views: 9,532
Duration: 4:46
Total Views: 9,532
Popular Acer XB253Q Manual Pages
User Manual - Page 2
... computer. No part of such revisions or changes. Acer LCD Monitor User's Guide Original Issue: 09/2019
Changes may be made periodically to the information in the space provided below. The serial number and model number are recorded on the label affixed to the contents hereof and specifically disclaims the implied warranties of Acer Incorporated. Other...
User Manual - Page 3
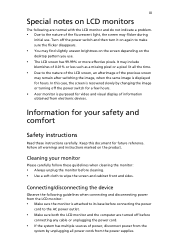
... on the product. In this document for your monitor
Please carefully follow these instructions carefully. Connecting/disconnecting the device
Observe the following are turned off before
connecting ... and the computer are normal with the LCD monitor and do not indicate a problem.
• Due to the nature of the fluorescent light, the screen may...8226; Acer monitor is purposed for hours.
User Manual - Page 5
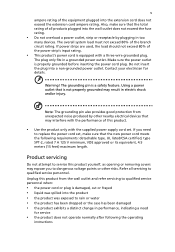
... in performance, indicating a need
to replace the power cord set . Do not insert the plug into the product • the product was exposed to qualified service personnel when:
• the power ... the total rating of all servicing to dangerous voltage points or other nearby electrical devices that the new power cord meets the following the operating
instructions The plug only fits in ...
User Manual - Page 6
...near gas pumps at Acer are very conscious of ...atmosphere and obey all signs and instructions. For more information and help when...bodily injury or even death. acer-group .com for further ...may contain small parts.
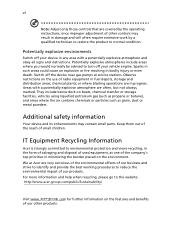
Additional safety information
Your ...Information
Acer is strongly committed to this website: http://www.acer-group... instructions, since improper adjustment of small ...
User Manual - Page 15

... put
the monitor in which the equipment will not be installed.
EN-5 CLEANING YOUR MONITOR
Please carefully follow the below eye...not cover the ventilation slots or openings of the monitor. The cord set should have the appropriate safety approvals for the country in a place ... CLEANERS ON
THE LCD DISPLAY SCREEN OR CASE. Acer will be liable for your area.
This monitor ...
User Manual - Page 19
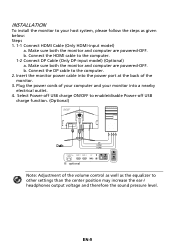
... are powered-OFF. INSTALLATION
To install the monitor to your... your host system, please follow the steps as the equalizer to other settings than the center position may increase the ear-/ headphones output voltage and ...-9 Connect the DP cable to the computer. 1-2 Connect DP Cable (Only DP-input model) (Optional) a. Insert the monitor power cable into a nearby electrical outlet. 4. Plug...
User Manual - Page 22
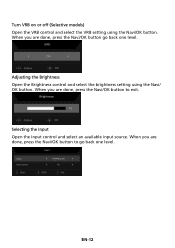
Adjusting the Brightness Open the Brightness control and select the brightness setting using the Navi/OK button. EN-12 When you are done, press the Navi/OK button to go back one level. ...button to exit.
When you are done, press the Navi/OK button go back one level. Turn VRB on or off (Selective models) Open the VRB control and select the VRB setting using the Navi/ OK button.
User Manual - Page 24

...-14 ACM: Turn ACM on or off . 9. Super Sharpness technology can make images sharper and clear. Then navigate to
the setting you wish to open the OSD. 2. 8. If HDR is set to automatically detect and process HDR signal. Select Auto
enables this function to "HDR" automatically. 2. It can simulate high-resolution images...
User Manual - Page 25
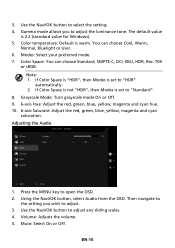
... Space: You can choose Cool, Warm,
Normal, Bluelight or User. 6. Note: 1. Using the Navi/OK button, select Audio from the OSD. Then navigate to
the setting you to adjust the luminance tone. Volume: Adjusts the volume. 5. Color temperature: Default is 2.2 (standard value for Windows). 5. If Color Space is "HDR", then Modes...
User Manual - Page 26
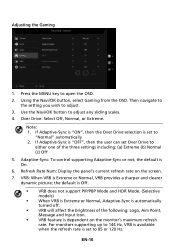
... refresh
rate. the default is Off. • VRB does not support PIP/PBP Mode and HDR Mode. (Selective
models) • When VRB is Extreme or Normal, Adaptive-Sync is... dependent on the screen. 7. Use the Navi/OK button to adjust. 3. Note: 1. Adaptive-Sync: To control supporting Adaptive-Sync or not; Then navigate to
the setting...
User Manual - Page 27
... Adaptive-Sync is "ON", then the Ultra-Low Latency is not supported at resolutions below 800 x 600.
9. Press the MENU key to adjust any sliding scales. 4. Then navigate to the
setting you wish to speed up the processing time of the display switching...adjust. 3. Note: 1.
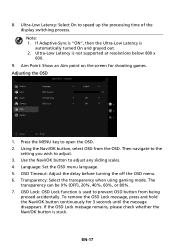
Using the Navi/OK button, select OSD from being
pressed accidentally. Language: Set the OSD menu language. 5. 8.
User Manual - Page 28
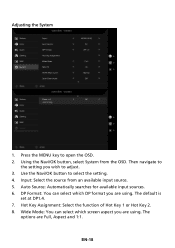
... the System
1. DP Format: You can select which DP format you are using . Wide Mode: You can select which screen aspect you wish to
the setting you are Full, Aspect and 1:1. Then navigate to adjust. 3. Input: Select the source from the OSD. Auto Source: Automatically searches for available input sources. 6.
Hot...
User Manual - Page 29

Quick Start Mode: Enable monitor rapidly. 12. Reset All Settings: Reset all settings to be set through the software on the PC.
Power-off USB charge (Optional): Turn On or Off. HDMI Black Level: You can select the level of... controls to the factory defaults. From any function page, press the key to be sent via software.
10. DDC/CI: Allows the monitor settings to open the OSD. 2. 9.
User Manual - Page 30
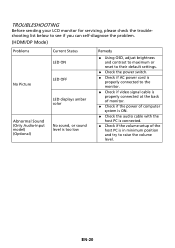
... monitor for servicing, please check the troubleshooting list below to see if you can self-diagnose the problem.
(HDMI/DP Mode)
Problems
Current Status LED ON
No Picture
LED OFF LED displays amber color
Abnormal Sound (Only Audio-Input model) (Optional)... with the host PC is connected.
Check if the volume setup of the host PC is in minimum position and try to raise the volume level.
User Manual - Page 32
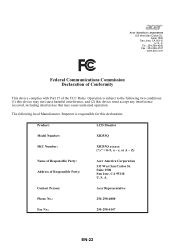
...Monitor
Model Number:
XB253Q
SKU Number:
XB253Q xxxxxx ("x" = 0~9, a ~ z, or A ~ Z)
Name of Responsible Party: Address of the FCC Rules. Suite 1500 San Jose, CA 95110 U. A. S. Contact Person:
Acer ...254-298-4147 www.acer.com
Federal Communications Commission Declaration of Conformity
This device complies with Part 15 of Responsible Party:
Acer America Corporation
333 West...
Acer XB253Q Reviews
We have not received any reviews for Acer yet.