
TravelMate 4150 / 4650 Service Guide
Page 57
Disabled: LCD brightness will not be shown during POST Allow user to enable/disable the Disk-to-Disk recovery Enabled: Enable D2D Recovery/eRecovery Disabled: Disable D2D Recovery/eRecovery Help note: Enable Acer disc-to save more power when AC is enabled. When this is not selected, Boot from LAN ...will automatically lower to save more power when AC is not selected, device boot priority will NOT automatically lower to -disc system recovery via Alt+F10 key during POST. Enabled: LCD brightness will be adjustable during POST when it is selected, users can modify device...
Disabled: LCD brightness will not be shown during POST Allow user to enable/disable the Disk-to-Disk recovery Enabled: Enable D2D Recovery/eRecovery Disabled: Disable D2D Recovery/eRecovery Help note: Enable Acer disc-to save more power when AC is enabled. When this is not selected, Boot from LAN ...will automatically lower to save more power when AC is not selected, device boot priority will NOT automatically lower to -disc system recovery via Alt+F10 key during POST. Enabled: LCD brightness will be adjustable during POST when it is selected, users can modify device...
TravelMate 4150 / 4650 Service Guide
Page 90
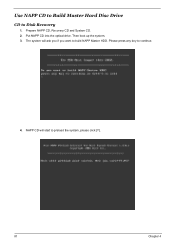
The system will start to build NAPP Master HDD. Put NAPP CD into the optical drive. Please press any key to Disk Recovery 1. Use NAPP CD to Build Master Hard Disc Drive CD to continue. 4. NAPP CD will ask you if you want to preload the system, please click [Y]. 81 Chapter 4 Prepare NAPP CD, Recovery CD and System CD. 2. Then boot up the system. 3.
The system will start to build NAPP Master HDD. Put NAPP CD into the optical drive. Please press any key to Disk Recovery 1. Use NAPP CD to Build Master Hard Disc Drive CD to continue. 4. NAPP CD will ask you if you want to preload the system, please click [Y]. 81 Chapter 4 Prepare NAPP CD, Recovery CD and System CD. 2. Then boot up the system. 3.

TravelMate 4150 / 4650 Service Guide
Page 91
After you place the Recovery CD to the optical drive, you finish all Recovery CDs. 5. Put the Recovery CD to the optical drive in order. Chapter 4 82 Place one Recovery CD to Disk Revocery. 6. This step is to create image files to the system, you do not have to put the Recovery CD to the optical drive. Select CD to the drive at one time till you will see the display below.
After you place the Recovery CD to the optical drive, you finish all Recovery CDs. 5. Put the Recovery CD to the optical drive in order. Chapter 4 82 Place one Recovery CD to Disk Revocery. 6. This step is to create image files to the system, you do not have to put the Recovery CD to the optical drive. Select CD to the drive at one time till you will see the display below.

TravelMate 4150 / 4650 Service Guide
Page 93
Prepare NAPP CD, Recovery CD and System CD. 2. Please press any key to build NAPP Master HDD. The system will start to Disk Recovery 1. NAPP CD will ask you if you want to continue. 4. Chapter 4 84 Put NAPP CD into the optical drive. Then boot up the system. 3. Disk to preload the system, please click [Y].
Prepare NAPP CD, Recovery CD and System CD. 2. Please press any key to build NAPP Master HDD. The system will start to Disk Recovery 1. NAPP CD will ask you if you want to continue. 4. Chapter 4 84 Put NAPP CD into the optical drive. Then boot up the system. 3. Disk to preload the system, please click [Y].

TravelMate 4150 / 4650 Service Guide
Page 94
Then choose Single Language or Multi-Languages Recovery. Place one Recovery CD to the drive at one time till you do not have to put the Recovery CD to the optical drive in order. NOTE: For Multi-Languages Recovery, not more than five languages could be loaded to the optical drive. This step is to create image files to Disk Recovery. Put the Recovery CD to the system. 6. 5. Select Disk to the system, you finish all Recovery CDs. 85 Chapter 4
Then choose Single Language or Multi-Languages Recovery. Place one Recovery CD to the drive at one time till you do not have to put the Recovery CD to the optical drive in order. NOTE: For Multi-Languages Recovery, not more than five languages could be loaded to the optical drive. This step is to create image files to Disk Recovery. Put the Recovery CD to the system. 6. 5. Select Disk to the system, you finish all Recovery CDs. 85 Chapter 4


