

User Manual
Page 2
.... Such changes will be incorporated in new editions of purchase information in the space provided below. Acer LCD Monitor User Guide Model number Serial number Date of purchase Place of purchase Acer and the Acer logo are used herein for a particular purpose. This company makes no representations or warranties, either expressed or implied, with respect to notify any person of Acer Incorporated. No part of this...
.... Such changes will be incorporated in new editions of purchase information in the space provided below. Acer LCD Monitor User Guide Model number Serial number Date of purchase Place of purchase Acer and the Acer logo are used herein for a particular purpose. This company makes no representations or warranties, either expressed or implied, with respect to notify any person of Acer Incorporated. No part of this...

User Manual
Page 3
... base before connecting the power cord to make sure the flicker disappears. • You may flicker during initial use . • The LCD screen has 99.99% or more effective pixels. English Special notes on LCD monitors The following guidelines when connecting and disconnecting power from the power supplies. Connecting/disconnecting the device Observe the following are turned off before connecting any cable or unplugging the power cord. • If the system has multiple sources of power...
... base before connecting the power cord to make sure the flicker disappears. • You may flicker during initial use . • The LCD screen has 99.99% or more effective pixels. English Special notes on LCD monitors The following guidelines when connecting and disconnecting power from the power supplies. Connecting/disconnecting the device Observe the following are turned off before connecting any cable or unplugging the power cord. • If the system has multiple sources of power...

User Manual
Page 4
... listening To protect your dealer or local power company. • Do not allow anything to rest on a vibrating surface. • Never use this product near you need to block out noisy surroundings. • Turn the volume down if you plug the power cord into is provided. • Never push... slots as they may touch dangerous voltage points or short-out parts that the power outlet you can hear it clearly and comfortably and without distortion. • After setting the volume level, do not place the product on the power cord. When you . English Accessibility Be sure that ...
... listening To protect your dealer or local power company. • Do not allow anything to rest on a vibrating surface. • Never use this product near you need to block out noisy surroundings. • Turn the volume down if you plug the power cord into is provided. • Never push... slots as they may touch dangerous voltage points or short-out parts that the power outlet you can hear it clearly and comfortably and without distortion. • After setting the volume level, do not place the product on the power cord. When you . English Accessibility Be sure that ...

User Manual
Page 5
... good protection from the wall outlet and refer servicing to qualified service personnel when: • the power cord or plug is properly grounded before inserting the power cord plug. Unplug this product. • Use the product only with the supplied power supply cord set , make sure that the total rating of the branch circuit rating. English people will walk on the cord. • If an extension cord is a safety feature. The...
... good protection from the wall outlet and refer servicing to qualified service personnel when: • the power cord or plug is properly grounded before inserting the power cord plug. Unplug this product. • Use the product only with the supplied power supply cord set , make sure that the total rating of the branch circuit rating. English people will walk on the cord. • If an extension cord is a safety feature. The...

User Manual
Page 6
...instructions Do not throw this website: http://www.acer-group.com/public/Sustainability/sustainability Visit www.acer-group.com for video and visual display of other products. Switch off the device near gas pumps at Acer are very conscious of the environmental effects of our business and strive to identify and provide the best working..., visit http://www.acer-group.com/public/Sustainability/sustainability Acer monitor is strongly committed to turn off your vehicle engine. IT Equipment Recycling Information Acer is purposed for further information on the use of the company's ...
...instructions Do not throw this website: http://www.acer-group.com/public/Sustainability/sustainability Visit www.acer-group.com for video and visual display of other products. Switch off the device near gas pumps at Acer are very conscious of the environmental effects of our business and strive to identify and provide the best working..., visit http://www.acer-group.com/public/Sustainability/sustainability Acer monitor is strongly committed to turn off your vehicle engine. IT Equipment Recycling Information Acer is purposed for further information on the use of the company's ...

User Manual
Page 7
...; stand up and walk around regularly to remove the strain on the recorded image and does not constitute a malfunction. Nevertheless, some pixels may lead to computer use . This has no effect on your sitting height to achieve maximum comfort. This product has been shipped enabled for power management: • Activate display's Sleep mode within 5 minutes of user inactivity. • Wake the monitor...
...; stand up and walk around regularly to remove the strain on the recorded image and does not constitute a malfunction. Nevertheless, some pixels may lead to computer use . This has no effect on your sitting height to achieve maximum comfort. This product has been shipped enabled for power management: • Activate display's Sleep mode within 5 minutes of user inactivity. • Wake the monitor...

User Manual
Page 8
... display. • Adjust the display brightness and/or contrast to a comfortable level for enhanced text readability and graphics clarity. • Eliminate glare and reflections by: • placing your display in such a way that the side faces the window or any light source • minimizing room light by looking at bright light sources, such as open windows, for extended periods of time. Developing good work habits to make...
... display. • Adjust the display brightness and/or contrast to a comfortable level for enhanced text readability and graphics clarity. • Eliminate glare and reflections by: • placing your display in such a way that the side faces the window or any light source • minimizing room light by looking at bright light sources, such as open windows, for extended periods of time. Developing good work habits to make...
User Manual
Page 11
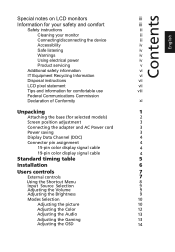
...the base (for selected models) 2 Screen position adjustment 3 Connecting the adapter and AC Power cord 3 Power saving 3 Display Data Channel (DDC) 4 Connector pin assignment 4 15-pin color display signal cable 4 19-pin color display signal cable 4 Standard timing table 5 Installation 6 Users controls 7 External controls 77 Using the Shortcut Menu 8 Input Source Selection 9 Adjusting the Volume 9 Adjusting the B rightness 9 Modes Selection 10 Adjusting the picture 10 Adjusting the Color 12 Adjusting the Audio 13 Adjusting the Gaming 13 Adjusting the OSD...
...the base (for selected models) 2 Screen position adjustment 3 Connecting the adapter and AC Power cord 3 Power saving 3 Display Data Channel (DDC) 4 Connector pin assignment 4 15-pin color display signal cable 4 19-pin color display signal cable 4 Standard timing table 5 Installation 6 Users controls 7 External controls 77 Using the Shortcut Menu 8 Input Source Selection 9 Adjusting the Volume 9 Adjusting the B rightness 9 Modes Selection 10 Adjusting the picture 10 Adjusting the Color 12 Adjusting the Audio 13 Adjusting the Gaming 13 Adjusting the OSD...

User Manual
Page 12
Adjusting the System 15 Product Information 16 Save Settings to User mode only) 16 English Troubleshooting 17 VGA Mode 17 HDMI Mode (Optional) 18
Adjusting the System 15 Product Information 16 Save Settings to User mode only) 16 English Troubleshooting 17 VGA Mode 17 HDMI Mode (Optional) 18

User Manual
Page 13
LCD monitor Quick start guide Audio cable (Optional) D-sub cable (Optional) HDMI cable (Optional) AC Power cord AC Adapter 1 English Unpacking Please check that the following items are present when you unpack the box, and save the packing materials in case you need to ship or transport the monitor in the future.
LCD monitor Quick start guide Audio cable (Optional) D-sub cable (Optional) HDMI cable (Optional) AC Power cord AC Adapter 1 English Unpacking Please check that the following items are present when you unpack the box, and save the packing materials in case you need to ship or transport the monitor in the future.

User Manual
Page 14
English Attaching the base (for selected models) Note: Take care when performing the installation to avoid injuring yourself. 2 use a cloth to avoid scratching the screen. 1 Attach the monitor stand arm to the base. 2 Ensure that the base is locked onto the monitor stand arm. • Secure the base to the monitor stand arm by turning the white screw using the integrated tab or a suitable coin. (for selected models) Note: Remove the monitor and monitor base from its packaging. Carefully place the monitor face-down on a stable surface --
English Attaching the base (for selected models) Note: Take care when performing the installation to avoid injuring yourself. 2 use a cloth to avoid scratching the screen. 1 Attach the monitor stand arm to the base. 2 Ensure that the base is locked onto the monitor stand arm. • Secure the base to the monitor stand arm by turning the white screw using the integrated tab or a suitable coin. (for selected models) Note: Remove the monitor and monitor base from its packaging. Carefully place the monitor face-down on a stable surface --

User Manual
Page 15
... will be switched to 15 degrees up or 5 degrees down. Mode On Standby/Power saving LED light Blue Blinking Blue The power saving mode will be adjusted to "power saving" mode by the blinking blue light. No user-adjustment is required. • Plug one end of your area. • The monitor has a universal power supply that the power cord you can be installed. The recovery time from the display controller, as indicated by the control signal from "power saving" mode back to the Adapter, and plug the...
... will be switched to 15 degrees up or 5 degrees down. Mode On Standby/Power saving LED light Blue Blinking Blue The power saving mode will be adjusted to "power saving" mode by the blinking blue light. No user-adjustment is required. • Plug one end of your area. • The monitor has a universal power supply that the power cord you can be installed. The recovery time from the display controller, as indicated by the control signal from "power saving" mode back to the Adapter, and plug the...

User Manual
Page 16
Description 1 Red 2 Green 3 Blue 4 Monitor ground 5 DDC-return 6 R-ground 7 G-ground 8 B-ground PIN No. for example, supported resolutions and corresponding timing. Description 9 +5 V 10 Logic ground 11 Monitor ground 12 DDC-serial data 13 H-sync 14 V-sync 15 DDC-serial clock 19-pin color display signal cable 19 171513 11 9 7 5 3 1 18161412 10 8 6 4 2 PIN No. Description 2 TMDS Data2 Shield 4 TMDS Data1+ 6 TMDS Data1- 8 TMDS Data0 Shield 10 TMDS Clock...
Description 1 Red 2 Green 3 Blue 4 Monitor ground 5 DDC-return 6 R-ground 7 G-ground 8 B-ground PIN No. for example, supported resolutions and corresponding timing. Description 9 +5 V 10 Logic ground 11 Monitor ground 12 DDC-serial data 13 H-sync 14 V-sync 15 DDC-serial clock 19-pin color display signal cable 19 171513 11 9 7 5 3 1 18161412 10 8 6 4 2 PIN No. Description 2 TMDS Data2 Shield 4 TMDS Data1+ 6 TMDS Data1- 8 TMDS Data0 Shield 10 TMDS Clock...

User Manual
Page 17
Mode 1 VGA 2 MAC 3 VESA 4 SVGA 5 6 XGA 7 8 VESA 9 SXGA 10 VESA 11 WXGA 12 WXGA+ 13 WSXGA+ 14 15 Resolution 640x480 640x480 720x400 800x600 800x600 1024x768 1024x768 1152x864 1280x1024 1280x720 1280x800 1440x900 1680x1050 1920x1080 1920x1080 Refresh Rate 60 Hz 66.7 Hz 70 Hz 56 Hz 60 Hz 60 Hz 70 Hz 75 Hz 60 Hz 60 Hz 60 Hz 60 Hz 60 Hz 60 Hz 75 Hz 5 English Standard timing table No.
Mode 1 VGA 2 MAC 3 VESA 4 SVGA 5 6 XGA 7 8 VESA 9 SXGA 10 VESA 11 WXGA 12 WXGA+ 13 WSXGA+ 14 15 Resolution 640x480 640x480 720x400 800x600 800x600 1024x768 1024x768 1152x864 1280x1024 1280x720 1280x800 1440x900 1680x1050 1920x1080 1920x1080 Refresh Rate 60 Hz 66.7 Hz 70 Hz 56 Hz 60 Hz 60 Hz 70 Hz 75 Hz 60 Hz 60 Hz 60 Hz 60 Hz 60 Hz 60 Hz 75 Hz 5 English Standard timing table No.

User Manual
Page 18
...: Steps 1 Connect cable(s) a Make sure both the monitor and computer are switched off. In order to prevent damage to the adapter. English Installation To install the monitor on the monitor first, then the computer. d Connect the audio cable (Optional, only Audio-input Model)to the computer. 2 Connect the adapter a Connect the AC cord to the monitor, do not lift the monitor by its base. 6 This sequence is only for audio output model. b Connect the VGA video cable to diagnose the problem.
...: Steps 1 Connect cable(s) a Make sure both the monitor and computer are switched off. In order to prevent damage to the adapter. English Installation To install the monitor on the monitor first, then the computer. d Connect the audio cable (Optional, only Audio-input Model)to the computer. 2 Connect the adapter a Connect the AC cord to the monitor, do not lift the monitor by its base. 6 This sequence is only for audio output model. b Connect the VGA video cable to diagnose the problem.

User Manual
Page 19
... Game mode control b. When the Function Menu is active, press this key selected or move to enter next function in the OSD. No. Press to view Main page. When the Function Menu is active, press this button will enter a selection in the Function Menu. a. Icon 1 2 3 4 5 6 Item Power button/ indicator OSD function Input Volume Brightness Mode Description Turns the monitor on . b. When the Function Menu is active, this button selected...
... Game mode control b. When the Function Menu is active, press this key selected or move to enter next function in the OSD. No. Press to view Main page. When the Function Menu is active, press this button will enter a selection in the Function Menu. a. Icon 1 2 3 4 5 6 Item Power button/ indicator OSD function Input Volume Brightness Mode Description Turns the monitor on . b. When the Function Menu is active, this button selected...
User Manual
Page 23
Position: Adjust the horizontal position of the picture. 14. H. Clock: Adjust ADC Clock Fast Lock. Focus: Adjust clk phase to activate the Auto Adjustment function. Position: Adjust the vertical position of the picture. 13. Auto Config: Press this button to ADC. 15. The Auto adjustment function is used to set the HPos, VPos, Clock and Focus. (Only available on VGA port.) 12. V. 11.
Position: Adjust the horizontal position of the picture. 14. H. Clock: Adjust ADC Clock Fast Lock. Focus: Adjust clk phase to activate the Auto Adjustment function. Position: Adjust the vertical position of the picture. 13. Auto Config: Press this button to ADC. 15. The Auto adjustment function is used to set the HPos, VPos, Clock and Focus. (Only available on VGA port.) 12. V. 11.

User Manual
Page 26
If FreeSync turned on, then VRB will be "Off". If Input Timing When VRB is "On", Brightness, Blue Light and ACM cannot be adjusted unless it is set to Normal or Extreme, the dynamic picture fine lines will become more clearly, but the brightness will be reduced, and default will be enabled at the same time. VRB: When VRB is "Off". VRB Setting VRB and FreeSync cannot be "Off". VRB is enabled when Input Timing = 75Hz.
If FreeSync turned on, then VRB will be "Off". If Input Timing When VRB is "On", Brightness, Blue Light and ACM cannot be adjusted unless it is set to Normal or Extreme, the dynamic picture fine lines will become more clearly, but the brightness will be reduced, and default will be enabled at the same time. VRB: When VRB is "Off". VRB Setting VRB and FreeSync cannot be "Off". VRB is enabled when Input Timing = 75Hz.

User Manual
Page 29
... graphics adapter and monitor is missing, off the monitor. 17 Check if the video signal cable is properly connected to the monitor. VGA Mode Problem No picture visible LED status Blue Off Remedy Using the OSD menu, adjust brightness and contrast to maximum or reset to see if you can self-diagnose the problem. Using the OSD menu, adjust focus, clock, H-position and V-position with non-standard signals. Wait for servicing, please check the troubleshooting list below to their default settings. Blinking Blue Check if the power cord is properly connected...
... graphics adapter and monitor is missing, off the monitor. 17 Check if the video signal cable is properly connected to the monitor. VGA Mode Problem No picture visible LED status Blue Off Remedy Using the OSD menu, adjust brightness and contrast to maximum or reset to see if you can self-diagnose the problem. Using the OSD menu, adjust focus, clock, H-position and V-position with non-standard signals. Wait for servicing, please check the troubleshooting list below to their default settings. Blinking Blue Check if the power cord is properly connected...

User Manual
Page 30
Blinking Blue Check if the video signal cable is switched on and in power saving/standby mode. 18 Check if the AC power cord is properly connected to their default settings. Check if the computer system is properly connected at the back of monitor. Check the power switch. English HDMI Mode (Optional) Problem No picture visible LED status Blue Off Remedy Using the OSD menu, adjust brightness and contrast to maximum or reset to the monitor.
Blinking Blue Check if the video signal cable is switched on and in power saving/standby mode. 18 Check if the AC power cord is properly connected to their default settings. Check if the computer system is properly connected at the back of monitor. Check the power switch. English HDMI Mode (Optional) Problem No picture visible LED status Blue Off Remedy Using the OSD menu, adjust brightness and contrast to maximum or reset to the monitor.

