

PD525 Service Guide
Page 10
Connection Ports Item 1 2 3 4 5 6 7 8 9 10 Description PC Analog Signal / HDTV / Component Video Input Connector Monitor Loop-through Output Connector USB Connector RS232 Connector S-Video Input Connector Composite Video Input Connector Audio Input Connector Remote Control Receiver KensingtonTM Lock Port DVI-D Input Connector (for Digital signal with HDCP function) (Optional) Chapter 1 4
Connection Ports Item 1 2 3 4 5 6 7 8 9 10 Description PC Analog Signal / HDTV / Component Video Input Connector Monitor Loop-through Output Connector USB Connector RS232 Connector S-Video Input Connector Composite Video Input Connector Audio Input Connector Remote Control Receiver KensingtonTM Lock Port DVI-D Input Connector (for Digital signal with HDCP function) (Optional) Chapter 1 4

PD525 Service Guide
Page 11
Remote Control Item 1 2 3 4 5 6 7 8 9 10 11 12 13 14 15 16 Description Transmit Indicator Light Power Empowering Key Menu Four Directional Select Keys Laser Button Mute Keystone + Keystone Page Up Page Down Re-Sync Hide Source Freeze Laser Pointer 5 Chapter 1
Remote Control Item 1 2 3 4 5 6 7 8 9 10 11 12 13 14 15 16 Description Transmit Indicator Light Power Empowering Key Menu Four Directional Select Keys Laser Button Mute Keystone + Keystone Page Up Page Down Re-Sync Hide Source Freeze Laser Pointer 5 Chapter 1

PD525 Service Guide
Page 50
... to DVI Cable PC (Personal Computer) with analog and digital signal output DVD Player for Video Signal and Audio Signal PD525 Remote Control 45 Chapter 4 Function Troubleshooting 5. Remote Control Troubleshooting Equipment Needed Item PD525 Projector VESA VGA Cable/VESA DVI to solve some complicated problems of component repairing and professional problems. The Troubleshooting section...
... to DVI Cable PC (Personal Computer) with analog and digital signal output DVD Player for Video Signal and Audio Signal PD525 Remote Control 45 Chapter 4 Function Troubleshooting 5. Remote Control Troubleshooting Equipment Needed Item PD525 Projector VESA VGA Cable/VESA DVI to solve some complicated problems of component repairing and professional problems. The Troubleshooting section...

PD525 Service Guide
Page 55
...and ensure there is no broken issue on the cable. - B. Function Cannot Be Adjust. - Use the Remote control for the OSD function test. (Check the Keypad board and Keypad cable if the Remote control works as well) - It might has the noise issue if the volume select to test again. (... - Check the Speaker wire that has broken issue or not. - Check the Main board. Use the Remote control for the OSD function Adjustment test. (Check the Keypad board and Keypad cable if the Remote control works as well) - Check the Main board. Ensure the Signal cable and Source are work fine...
...and ensure there is no broken issue on the cable. - B. Function Cannot Be Adjust. - Use the Remote control for the OSD function test. (Check the Keypad board and Keypad cable if the Remote control works as well) - It might has the noise issue if the volume select to test again. (... - Check the Speaker wire that has broken issue or not. - Check the Main board. Use the Remote control for the OSD function Adjustment test. (Check the Keypad board and Keypad cable if the Remote control works as well) - Check the Main board. Ensure the Signal cable and Source are work fine...

PD525 Service Guide
Page 56
Use a known Remote control for the function test. (Replace the Remote control if the new Remote control works fine with a known good Remote control. 51 Chapter 4 Remote Control Troubleshooting A. Remote Control No Function. - Check the Main board if the Unit works fine with the Unit.) - Check the Laser function of Remote control. (Replace the battery if there is no Laser output from the Remote control.) -
Use a known Remote control for the function test. (Replace the Remote control if the new Remote control works fine with a known good Remote control. 51 Chapter 4 Remote Control Troubleshooting A. Remote Control No Function. - Check the Main board if the Unit works fine with the Unit.) - Check the Laser function of Remote control. (Replace the battery if there is no Laser output from the Remote control.) -

PD525 Service Guide
Page 64
... No. Please check and ensure the unit is work as well. Test Signal : 1024 x 768 @ 75Hz Test Pattern : Full white pattern - Item Keypad Function 1 (Including Remote Control) 2 Factory Reset 3 R, G, B and white color contrast 4 Screen Uniformity 5 Dead Pixel (Bright pixel) 6 Dead Pixel (Dark pixel) Description - Please select "Factory Reset" function of keypad...
... No. Please check and ensure the unit is work as well. Test Signal : 1024 x 768 @ 75Hz Test Pattern : Full white pattern - Item Keypad Function 1 (Including Remote Control) 2 Factory Reset 3 R, G, B and white color contrast 4 Screen Uniformity 5 Dead Pixel (Bright pixel) 6 Dead Pixel (Dark pixel) Description - Please select "Factory Reset" function of keypad...
PD525 User's Guide
Page 1
... Notice 2 Precautions ...2 Introduction 4 Product Features 4 Package Overview 5 Product Overview 6 Main Unit ...6 Control Panel ...7 Connection Ports ...8 Remote Control with Laser Pointer 9 Installation 10 Connecting the Projector 10 Powering On/Off the Projector 11 Powering On the Projector 11 Powering Off the...the Projector Image Height 13 Adjusting the Projector Zoom / Focus 14 Adjusting Projected Image Size 14 User Controls 15 Control Panel & Remote Control 15 On-Screen Display Menus 17 How to operate ...17 Language ...18 Color (Computer/Video Mode 19 Image (Computer/Video...
... Notice 2 Precautions ...2 Introduction 4 Product Features 4 Package Overview 5 Product Overview 6 Main Unit ...6 Control Panel ...7 Connection Ports ...8 Remote Control with Laser Pointer 9 Installation 10 Connecting the Projector 10 Powering On/Off the Projector 11 Powering On the Projector 11 Powering Off the...the Projector Image Height 13 Adjusting the Projector Zoom / Focus 14 Adjusting Projected Image Size 14 User Controls 15 Control Panel & Remote Control 15 On-Screen Display Menus 17 How to operate ...17 Language ...18 Color (Computer/Video Mode 19 Image (Computer/Video...

PD525 User's Guide
Page 4
.../p, 576i/p, 720p, 1080i) ‹ High-tech DVI connection for digital signal with HDCP function and supports 480p, 576p, 720p and 1080i (Optional) ‹ Full function remote control with laser pointer ‹ User friendly multilingual on screen display menu ‹ Advanced digital keystone correction and high quality full screen image re-scaling...
.../p, 576i/p, 720p, 1080i) ‹ High-tech DVI connection for digital signal with HDCP function and supports 480p, 576p, 720p and 1080i (Optional) ‹ Full function remote control with laser pointer ‹ User friendly multilingual on screen display menu ‹ Advanced digital keystone correction and high quality full screen image re-scaling...

PD525 User's Guide
Page 5
Projector with lens cap Power Cord 1.8m VGA Cable 1.8m Composite Video Cable 2.0m USB Cable 1.8m S-Video Cable 1.8m Audio Cable Jack /Jack VGA to make sure your dealer immediately if anything is complete. English Check to Component/ 1.8m HDTV Adapter Remote Control with all the items shown below. Introduction Package Overview This projector comes with Laser Pointer 2 x Battery Carrying Case User's Guide Quick Start Card 5 ... Contact your unit is missing.
Projector with lens cap Power Cord 1.8m VGA Cable 1.8m Composite Video Cable 2.0m USB Cable 1.8m S-Video Cable 1.8m Audio Cable Jack /Jack VGA to make sure your dealer immediately if anything is complete. English Check to Component/ 1.8m HDTV Adapter Remote Control with all the items shown below. Introduction Package Overview This projector comes with Laser Pointer 2 x Battery Carrying Case User's Guide Quick Start Card 5 ... Contact your unit is missing.

PD525 User's Guide
Page 6
Elevator Button 5. Connection Ports 8. Control Panel 7 6 Remote Control Receiver 7. Focus Ring 2. Zoom Ring 3. Elevator Foot 6. Introduction Product Overview Main Unit 6 8 1 4 5 3 2 9 English ... 6 1. Zoom Lens 4. Power Socket 9.
Elevator Button 5. Connection Ports 8. Control Panel 7 6 Remote Control Receiver 7. Focus Ring 2. Zoom Ring 3. Elevator Foot 6. Introduction Product Overview Main Unit 6 8 1 4 5 3 2 9 English ... 6 1. Zoom Lens 4. Power Socket 9.

PD525 User's Guide
Page 8
Audio Input Connector 9. S-Video Input Connector 7. KensingtonTM Lock Port English ... 8 Remote Control Receiver 10. Composite Video Input Connector 8. RS232 Connector 6. USB Connector 5. DVI-I Input Connector (for Digital singal with HDCP function) (Optional) 2. Monitor Loop-through Output Connector 4. Introduction Connection Ports 5 7 8 6 3 4 9 10 1 2 1. PC Analog Signal/HDTV/Component Video Input Connector 3.
Audio Input Connector 9. S-Video Input Connector 7. KensingtonTM Lock Port English ... 8 Remote Control Receiver 10. Composite Video Input Connector 8. RS232 Connector 6. USB Connector 5. DVI-I Input Connector (for Digital singal with HDCP function) (Optional) 2. Monitor Loop-through Output Connector 4. Introduction Connection Ports 5 7 8 6 3 4 9 10 1 2 1. PC Analog Signal/HDTV/Component Video Input Connector 3.

PD525 User's Guide
Page 9
Re-Sync 13. Freeze 16. Empowering Key 4. Menu 5. Laser Button 7. Zoom 8. Page Up 11. Source 15. English Four Directional Select Keys 6. Page Down 12. Hide 14. Laser Pointer 9 ... Transmit Indicator Light 2. Keystone 10. Power 3. Keystone + 9. Introduction Remote Control with Laser Pointer 16 1 2 3 5 4 8 6 10 7 11 9 12 14 13 15 1.
Re-Sync 13. Freeze 16. Empowering Key 4. Menu 5. Laser Button 7. Zoom 8. Page Up 11. Source 15. English Four Directional Select Keys 6. Page Down 12. Hide 14. Laser Pointer 9 ... Transmit Indicator Light 2. Keystone 10. Power 3. Keystone + 9. Introduction Remote Control with Laser Pointer 16 1 2 3 5 4 8 6 10 7 11 9 12 14 13 15 1.

PD525 User's Guide
Page 11
... the power cord and signal cable are securely connected. ™ If you connect multiple sources at the same time, using the "Source" button on the remote control or control panel to switch. ™Turn on your source automatically. ™ If the screen displays "No Signal", please make sure the signal cables...
... the power cord and signal cable are securely connected. ™ If you connect multiple sources at the same time, using the "Source" button on the remote control or control panel to switch. ™Turn on your source automatically. ™ If the screen displays "No Signal", please make sure the signal cables...

PD525 User's Guide
Page 15
... Using the Control Panel Power/Standby 4 Refer to control the functions: Remote Control and Control Panel. English User Controls Control Panel & Remote Control There are two ways for you to the "Power On/Off the Projector" section on screen display (OSD) menu. To exit OSD, press "Menu" ...
... Using the Control Panel Power/Standby 4 Refer to control the functions: Remote Control and Control Panel. English User Controls Control Panel & Remote Control There are two ways for you to the "Power On/Off the Projector" section on screen display (OSD) menu. To exit OSD, press "Menu" ...

PD525 User's Guide
Page 16
... Power 4 Refer to the "Power On/Off the Projector" section on screen display menu. to select items or make adjustments to Laser Button 4 Aim the remote at the viewing screen, press and hold this button to page down. This function is only available when the projector is connected to select display...
... Power 4 Refer to the "Power On/Off the Projector" section on screen display menu. to select items or make adjustments to Laser Button 4 Aim the remote at the viewing screen, press and hold this button to page down. This function is only available when the projector is connected to select display...

PD525 User's Guide
Page 17
...source. Main Menu Sub Menu Settings 17 ... English To open the OSD menu, press "Menu" on the Remote Control or press "Menu/Enter"on the Control Panel again. Use keys to be adjusted in the main ...menu. To exit OSD, press "Menu" on the Remote Control or press "Menu/Enter"on the Control Panel. 2. Select the next item to select the desired item...key. 4. When OSD is displayed, use keys to the main menu. 6. Press "Menu" on the Remote Control or press "Menu/Enter"on the Control Panel, the screen will return to select any item in...
...source. Main Menu Sub Menu Settings 17 ... English To open the OSD menu, press "Menu" on the Remote Control or press "Menu/Enter"on the Control Panel again. Use keys to be adjusted in the main ...menu. To exit OSD, press "Menu" on the Remote Control or press "Menu/Enter"on the Control Panel. 2. Select the next item to select the desired item...key. 4. When OSD is displayed, use keys to the main menu. 6. Press "Menu" on the Remote Control or press "Menu/Enter"on the Control Panel, the screen will return to select any item in...

PD525 User's Guide
Page 18
User Controls Language (Computer / Video Mode) Language Choose the multilingual OSD menu . or key to Press "Menu" on the Remote Control or press "Menu/Enter"on the Control Panel to finalize the selection. Use the select your prefered language. English ... 18
User Controls Language (Computer / Video Mode) Language Choose the multilingual OSD menu . or key to Press "Menu" on the Remote Control or press "Menu/Enter"on the Control Panel to finalize the selection. Use the select your prefered language. English ... 18

PD525 User's Guide
Page 26
... Management (Computer / Video Mode) Source Lock When source lock is turned off, the projector will take effect. 4Acer : The default start-up screen of Acer projector. 4User : The user customized start -up 30 hours before you exit the OSD menu, the new setting will search for next channel. Lamp Reminding...Reset Press the button after choosing "Yes "to turn the lamp hour counter to hide warning message when the changing lamp message is turned on remote control for other signals if the current input signal is lost. Start-up Screen Use this function to show or to 0 hours. Lamp ...
... Management (Computer / Video Mode) Source Lock When source lock is turned off, the projector will take effect. 4Acer : The default start-up screen of Acer projector. 4User : The user customized start -up 30 hours before you exit the OSD menu, the new setting will search for next channel. Lamp Reminding...Reset Press the button after choosing "Yes "to turn the lamp hour counter to hide warning message when the changing lamp message is turned on remote control for other signals if the current input signal is lost. Start-up Screen Use this function to show or to 0 hours. Lamp ...
PD525 User's Guide
Page 28
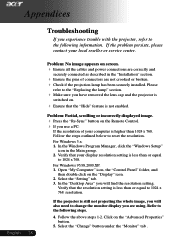
... connectors are using. Problem: Partial, scrolling or incorrectly displayed image. 4 Press the "Re-Sync" button on . 4 Ensure that the "Hide" feature is switched on the Remote Control. 4 If you will find the resolution setting. If the projector is still not projecting the whole image, you will also need to change the...
... connectors are using. Problem: Partial, scrolling or incorrectly displayed image. 4 Press the "Re-Sync" button on . 4 Ensure that the "Hide" feature is switched on the Remote Control. 4 If you will find the resolution setting. If the projector is still not projecting the whole image, you will also need to change the...

PD525 User's Guide
Page 33
... Composite video RCA input ƒ One S-Video input - Appendices Specifications The specs specified below are subject to Acer accounced marketing specs. Audio Input: One phone jack for VGA output - RS232: One RS232 connector for remote computer control - Storage Temperature: -4~140oF (-20~60oC) Humidity: 80% maximum (Non-condensing) - English Regarding the...24.6 to 300 inches (0.625 to 7.62 meters) Diagonal - 3.94 to 40 feet (1.2 to12.2 meters) - Input Frequency 50/60Hz - USB:One USB connector for remote computer control - NTSC 3.58/NTSC 4.43/PAL/SECAM and HDTV compatible -
... Composite video RCA input ƒ One S-Video input - Appendices Specifications The specs specified below are subject to Acer accounced marketing specs. Audio Input: One phone jack for VGA output - RS232: One RS232 connector for remote computer control - Storage Temperature: -4~140oF (-20~60oC) Humidity: 80% maximum (Non-condensing) - English Regarding the...24.6 to 300 inches (0.625 to 7.62 meters) Diagonal - 3.94 to 40 feet (1.2 to12.2 meters) - Input Frequency 50/60Hz - USB:One USB connector for remote computer control - NTSC 3.58/NTSC 4.43/PAL/SECAM and HDTV compatible -


