User Manual (3D)
Page 3
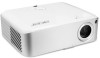
... has integrated DLP and NVIDIA 3D (Optional) technology. English 3 The Acer projector you have connected your projector to a computer, please read "Watching 3D DVD or Blu-ray content" on page 11. In order to do not wish to view 3D content, you should turn off , otherwise the image may not be shown a reminder that 3D is a power switch on page...
... has integrated DLP and NVIDIA 3D (Optional) technology. English 3 The Acer projector you have connected your projector to a computer, please read "Watching 3D DVD or Blu-ray content" on page 11. In order to do not wish to view 3D content, you should turn off , otherwise the image may not be shown a reminder that 3D is a power switch on page...
User Manual (3D)
Page 4
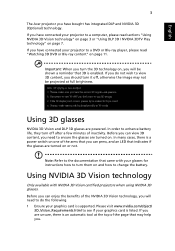
... have installed the drivers, you will open the setup Wizard if you haven't previously set up the 3D environment. 3 Follow the onscreen instructions to set up a 3D environment Once you have the NVIDIA 3D glasses and IR-transmitter. This will need to set up the environment. 1 Position the infra-red transmitter so that it has maximum coverage. Plug the USB cable...
... have installed the drivers, you will open the setup Wizard if you haven't previously set up the 3D environment. 3 Follow the onscreen instructions to set up a 3D environment Once you have the NVIDIA 3D glasses and IR-transmitter. This will need to set up the environment. 1 Position the infra-red transmitter so that it has maximum coverage. Plug the USB cable...
User Manual (3D)
Page 7
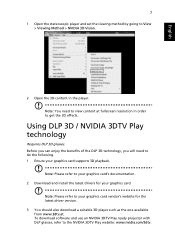
... view content at . To download software and use an NVIDIA 3DTV Play ready projector with DLP glasses, refer to get the 3D effects. Using DLP 3D / NVIDIA 3DTV Play technology Requires DLP 3D glasses. English 7 1 Open the stereoscopic player and set the viewing method by going to your graphics card vendor's website for your graphics card supports 3D playback. Note: Please refer to View > Viewing...
... view content at . To download software and use an NVIDIA 3DTV Play ready projector with DLP glasses, refer to get the 3D effects. Using DLP 3D / NVIDIA 3DTV Play technology Requires DLP 3D glasses. English 7 1 Open the stereoscopic player and set the viewing method by going to your graphics card vendor's website for your graphics card supports 3D playback. Note: Please refer to View > Viewing...
User Manual
Page 5
... was spilled into the projector's lens when the lamp is something wrong with all servicing to normal condition. Unplug this product yourself, as inside of your projector. Your device and its enhancements may result in following the operating instructions Note: Adjust only those controls that is necessary. • Locations where temperatures may become excessively high, such as opening or removing covers may expose you to...
... was spilled into the projector's lens when the lamp is something wrong with all servicing to normal condition. Unplug this product yourself, as inside of your projector. Your device and its enhancements may result in following the operating instructions Note: Adjust only those controls that is necessary. • Locations where temperatures may become excessively high, such as opening or removing covers may expose you to...
User Manual
Page 6
... cycle before turning main power off the lamp, press HIDE on . • Do not block the projector lens with dirt or dust. • Do not look into the air outlet grille when projector is showing warning message. • When changing the lamp, please allow unit to cool down, and follow all changing instructions. • Reset the "Lamp Hour Reset" function from the Onscreen display "Management" menu after replacing the lamp module...
... cycle before turning main power off the lamp, press HIDE on . • Do not block the projector lens with dirt or dust. • Do not look into the air outlet grille when projector is showing warning message. • When changing the lamp, please allow unit to cool down, and follow all changing instructions. • Reset the "Lamp Hour Reset" function from the Onscreen display "Management" menu after replacing the lamp module...
User Manual
Page 8
... First things first Usage Notes Do: • Turn off , please ensure the projector completes its life, it shows warning messages. • Reset the "Lamp Hour Reset" function from AC outlet if the product is not being used for ventilation. • Use abrasive cleaners, waxes or solvents to clean the unit. • Use under "Replacing the Lamp". If this user's guide to excessive dust and dirt. • Near...
... First things first Usage Notes Do: • Turn off , please ensure the projector completes its life, it shows warning messages. • Reset the "Lamp Hour Reset" function from AC outlet if the product is not being used for ventilation. • Use abrasive cleaners, waxes or solvents to clean the unit. • Use under "Replacing the Lamp". If this user's guide to excessive dust and dirt. • Near...
User Manual
Page 9
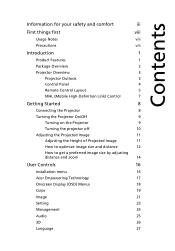
...3 Control Panel 4 Remote Control Layout 5 MHL (Mobile High-Definition Link) Control 7 Getting Started 8 Connecting the Projector 8 Turning the Projector On/Off 9 Turning on the Projector 9 Turning the projector off 10 Adjusting the Projected Image 11 Adjusting the Height of Projected Image 11 How to optimize image size and distance 12 How to get a preferred image size by adjusting distance and zoom 14 User Controls 16 Installation menu 16 Acer Empowering Technology 17 Onscreen Display (OSD) Menus 18 Color 19 Image 21 Setting 23 Management 25 Audio 25...
...3 Control Panel 4 Remote Control Layout 5 MHL (Mobile High-Definition Link) Control 7 Getting Started 8 Connecting the Projector 8 Turning the Projector On/Off 9 Turning on the Projector 9 Turning the projector off 10 Adjusting the Projected Image 11 Adjusting the Height of Projected Image 11 How to optimize image size and distance 12 How to get a preferred image size by adjusting distance and zoom 14 User Controls 16 Installation menu 16 Acer Empowering Technology 17 Onscreen Display (OSD) Menus 18 Color 19 Image 21 Setting 23 Management 25 Audio 25...
User Manual
Page 11
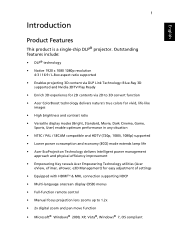
... (ECO) mode extends lamp life • Acer EcoProjeciton Technology delivers Intelligent power management approach and physical efficiency improvement • Empowering Key reveals Acer Empowering Technology utilities (Acer eView, eTimer, ePower, e3D Management) for easy adjustment of settings • Equipped with HDMITM & MHL connection supporting HDCP • Multi-language onscreen display (OSD) menus • Full-function remote control • Manual focus projection lens zooms up to 1.2x • 2x digital zoom and...
... (ECO) mode extends lamp life • Acer EcoProjeciton Technology delivers Intelligent power management approach and physical efficiency improvement • Empowering Key reveals Acer Empowering Technology utilities (Acer eView, eTimer, ePower, e3D Management) for easy adjustment of settings • Equipped with HDMITM & MHL connection supporting HDCP • Multi-language onscreen display (OSD) menus • Full-function remote control • Manual focus projection lens zooms up to 1.2x • 2x digital zoom and...

User Manual
Page 14
Adjusts the image to compensate for the OSD menu operation or exit the OSD menu. • Confirm your selection. Changes the active source. Unique Acer functions: e3D, eView, eTimer, ePower Management. Temp Indicator LED. Use to select items or make adjustments to your selection of items. Lamp Indicator LED. See the contents in "Turning the Projector On/ Off" section. English 4 Control Panel 1 2 3 4 # Function 1 RESYNC 2 MENU 3 LAMP 4 POWER 5 KEYSTONE 6 SOURCE 7 Four directional select keys 8 TEMP 9 Empowering key 5 6 7 8 9 5 Description...
Adjusts the image to compensate for the OSD menu operation or exit the OSD menu. • Confirm your selection. Changes the active source. Unique Acer functions: e3D, eView, eTimer, ePower Management. Temp Indicator LED. Use to select items or make adjustments to your selection of items. Lamp Indicator LED. See the contents in "Turning the Projector On/ Off" section. English 4 Control Panel 1 2 3 4 # Function 1 RESYNC 2 MENU 3 LAMP 4 POWER 5 KEYSTONE 6 SOURCE 7 Four directional select keys 8 TEMP 9 Empowering key 5 6 7 8 9 5 Description...

User Manual
Page 15
... menu. • Confirm your selection of items. 12 KEYSTONE Adjusts the image to compensate for distortion caused by tilting the projector (± 40 degrees). Refer to the "Turning the Projector On/Off" section. 3 3D Press "3D" to the projector. Press "HIDE" to hide the image, press again to display the image. 5 ASPECT RATIO To choose the desired aspect ratio (Auto, 4:3, 16:9, L.Box). 6 SOURCE Changes...
... menu. • Confirm your selection of items. 12 KEYSTONE Adjusts the image to compensate for distortion caused by tilting the projector (± 40 degrees). Refer to the "Turning the Projector On/Off" section. 3 3D Press "3D" to the projector. Press "HIDE" to hide the image, press again to display the image. 5 ASPECT RATIO To choose the desired aspect ratio (Auto, 4:3, 16:9, L.Box). 6 SOURCE Changes...

User Manual
Page 19
... the screen displays "No Signal", please make sure the signal cables are securely connected. English 9 Turning the Projector On/Off Turning on the Projector 1 Remove the lens cap.(Illustration #1) 2 Ensure that the power cord and signal cable are securely connected. • If you connect to multiple sources at the same time, use the "Source" button on either control panel or the remote control or direct source key on the remote control to switch between inputs. 2 Power button 1 Lens cap The Power indicator LED will flash red. 3 Turn on the projector by pressing "Power" button...
... the screen displays "No Signal", please make sure the signal cables are securely connected. English 9 Turning the Projector On/Off Turning on the Projector 1 Remove the lens cap.(Illustration #1) 2 Ensure that the power cord and signal cable are securely connected. • If you connect to multiple sources at the same time, use the "Source" button on either control panel or the remote control or direct source key on the remote control to switch between inputs. 2 Power button 1 Lens cap The Power indicator LED will flash red. 3 Turn on the projector by pressing "Power" button...

User Manual
Page 20
... shuts down and the LED lamp indicator turns solid red, contact your local reseller or service center. The lamp with automatically turn off , press the power button. This onscreen message indicates that the projector has overheated. Warning indicators: • "Projector Overheated. This message appears: "Please press the power button again to unplug the power cord. English 10 Turning the projector off 1 To turn the projector off , the projector will automatically shut down, and the LED temp indicator will turn solid red. This onscreen message indicates that the fan...
... shuts down and the LED lamp indicator turns solid red, contact your local reseller or service center. The lamp with automatically turn off , press the power button. This onscreen message indicates that the projector has overheated. Warning indicators: • "Projector Overheated. This message appears: "Please press the power button again to unplug the power cord. English 10 Turning the projector off 1 To turn the projector off , the projector will automatically shut down, and the LED temp indicator will turn solid red. This onscreen message indicates that the fan...
User Manual
Page 26
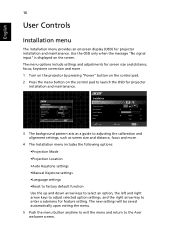
.... 1 Turn on the projector by pressing "Power" button on the control pad. 2 Press the menu button on the screen. Use the OSD only when the message "No signal input" is displayed on the control pad to enter a submenu for feature setting. The menu options include settings and adjustments for screen size and distance, focus, keystone correction and more . 4 The Installation menu includes the following options: •Projection Mode •Projection Location •Auto Keystone settings •Manual Keystone settings •Language settings •Reset to factory default function Use...
.... 1 Turn on the projector by pressing "Power" button on the control pad. 2 Press the menu button on the screen. Use the OSD only when the message "No signal input" is displayed on the control pad to enter a submenu for feature setting. The menu options include settings and adjustments for screen size and distance, focus, keystone correction and more . 4 The Installation menu includes the following options: •Projection Mode •Projection Location •Auto Keystone settings •Manual Keystone settings •Language settings •Reset to factory default function Use...

User Manual
Page 30
... for color temperature optimization. B Bias Adjusts the blue bias for color temperature optimization. Ind. White Peaking Increases the brightness of red and green. Note: "Saturation" and "Tint" functions are near 100%. (video sources only) Film Mode Sets the image optimized to automatically optimize the display of dark scenery. With greater gamma value, dark scenery looks brighter. Hue Adjusts the color balance of whites that delivers enhanced color saturation for color temperature...
... for color temperature optimization. B Bias Adjusts the blue bias for color temperature optimization. Ind. White Peaking Increases the brightness of red and green. Note: "Saturation" and "Tint" functions are near 100%. (video sources only) Film Mode Sets the image optimized to automatically optimize the display of dark scenery. With greater gamma value, dark scenery looks brighter. Hue Adjusts the color balance of whites that delivers enhanced color saturation for color temperature...

User Manual
Page 33
... Setting Setting Closed Caption Auto Screen Reset Security Off Off Press Press 23 Closed Caption Auto Screen Reset Security Security Timeout(Min.) User Password Administrator Password Security Off Off Change Change ** Always request password while projector turns on. ** Select Adjust Exit Select Adjust Main Menu Selects a preferred closed captioning mode from 10 minute to 990 minutes. • When the time is up move of electronic screen will request user to enter password when switch on...
... Setting Setting Closed Caption Auto Screen Reset Security Off Off Press Press 23 Closed Caption Auto Screen Reset Security Security Timeout(Min.) User Password Administrator Password Security Off Off Change Change ** Always request password while projector turns on. ** Select Adjust Exit Select Adjust Main Menu Selects a preferred closed captioning mode from 10 minute to 990 minutes. • When the time is up move of electronic screen will request user to enter password when switch on...

User Manual
Page 35
... Lamp Hour Reset Off Off Instant Off Yes Press 25 ECO Mode High Altitude Turn Off Mode Auto Shutdown Lamp Hour Elapse Lamp Reminding Lamp Hour Reset Select Adjust Main Menu Choose "On" to return normal mode. Press the button and choose "Yes" to restore the volume. Choose "Off" to dim the projector lamp which will automatically shutdown when there is no signal input after the allocated time. (default is pressed again within 2 minutes. Audio Audio...
... Lamp Hour Reset Off Off Instant Off Yes Press 25 ECO Mode High Altitude Turn Off Mode Auto Shutdown Lamp Hour Elapse Lamp Reminding Lamp Hour Reset Select Adjust Main Menu Choose "On" to return normal mode. Press the button and choose "Yes" to restore the volume. Choose "Off" to dim the projector lamp which will automatically shutdown when there is no signal input after the allocated time. (default is pressed again within 2 minutes. Audio Audio...
User Manual
Page 38
... remote control or control or incorrectly panel. 28 Appendices English Troubleshooting If you experience a problem with your local reseller or service center. Please refer to the "Replacing the Lamp" section. • Make sure you have removed the lens cap and the projector is lower than or equal to WUXGA-RB (1920 x 1200). • Click the "Change" button under the "Models" box. • Verify that the resolution setting...
... remote control or control or incorrectly panel. 28 Appendices English Troubleshooting If you experience a problem with your local reseller or service center. Please refer to the "Replacing the Lamp" section. • Make sure you have removed the lens cap and the projector is lower than or equal to WUXGA-RB (1920 x 1200). • Click the "Change" button under the "Models" box. • Verify that the resolution setting...

User Manual
Page 39
... more information. • Change the display color depth settings on the projector lens. • Make sure the projection screen is unstable • Adjust the "Tracking" to 10.0 meters) from the projector. Refer to flickering bar the "Image" section for detailed information. • If you are using an Apple® Mac® OS based notebook: In System Preferences, open Display and select Video Mirroring "On". 5 Image is within the...
... more information. • Change the display color depth settings on the projector lens. • Make sure the projection screen is unstable • Adjust the "Tracking" to 10.0 meters) from the projector. Refer to flickering bar the "Image" section for detailed information. • If you are using an Apple® Mac® OS based notebook: In System Preferences, open Display and select Video Mirroring "On". 5 Image is within the...

User Manual
Page 40
... the projector so that it will not turn off the projector, then to "Image -> Auto Keystone" and choose "Off" on the OSD, if "Keystone" button is reversed • Adjust the zoom ring on the top of its useful life, it is centered on the screen. If this happens, the projector will burn out and may make a loud popping sound. Go to all controls unplug the power cord and...
... the projector so that it will not turn off the projector, then to "Image -> Auto Keystone" and choose "Off" on the OSD, if "Keystone" button is reversed • Adjust the zoom ring on the top of its useful life, it is centered on the screen. If this happens, the projector will burn out and may make a loud popping sound. Go to all controls unplug the power cord and...

User Manual
Page 47
... Aspect ratio Displayable colors Projection lens Projection screen size (diagonal) Projection distance Throw ratio Horizontal scan rate Vertical refresh scan rate Lamp type Keystone correction Audio Weight Dimensions (W x D x H) Digital Zoom Power supply Power consumption Operating temperature I/O connectors DLP® Native: 1080P (1920 x 1080), Maximum: UXGA (1600 x 1200), WSXGA+ (1680 x 1050), 1080P (1920 x 1080), WUXGA-RB (1920 x 1200) IBM PC and compatibles, Apple Macintosh, iMac and VESA standards: SXGA, XGA, VGA, SVGA, SXGA...
... Aspect ratio Displayable colors Projection lens Projection screen size (diagonal) Projection distance Throw ratio Horizontal scan rate Vertical refresh scan rate Lamp type Keystone correction Audio Weight Dimensions (W x D x H) Digital Zoom Power supply Power consumption Operating temperature I/O connectors DLP® Native: 1080P (1920 x 1080), Maximum: UXGA (1600 x 1200), WSXGA+ (1680 x 1050), 1080P (1920 x 1080), WUXGA-RB (1920 x 1200) IBM PC and compatibles, Apple Macintosh, iMac and VESA standards: SXGA, XGA, VGA, SVGA, SXGA...


