
User Manual
Page 17
ly for certain models) 5 Video 6 16:9 display 6 Using the system utilities 7 Acer Bio-Protection (only for surround/multi-channel sound (on- Contents Information for your safety and comfort iii Safety instructions ...keys and embedded numeric keypad* 3 Windows keys 4 Audio 5 Acer PureZone (only for certain models) 5 Tuba (only for certain models) 5 Using Dolby Home Theater for certain models) 7 Acer GridVista (dual-display compatible) 8 Acer Backup Manager 9 Power management 10 Acer eRecovery Management 11 Burn backup discs 12 Restore 13 Restore Windows ...
ly for certain models) 5 Video 6 16:9 display 6 Using the system utilities 7 Acer Bio-Protection (only for surround/multi-channel sound (on- Contents Information for your safety and comfort iii Safety instructions ...keys and embedded numeric keypad* 3 Windows keys 4 Audio 5 Acer PureZone (only for certain models) 5 Tuba (only for certain models) 5 Using Dolby Home Theater for certain models) 7 Acer GridVista (dual-display compatible) 8 Acer Backup Manager 9 Power management 10 Acer eRecovery Management 11 Burn backup discs 12 Restore 13 Restore Windows ...
User Manual
Page 19
... statement 48 Modem notices (only for selected models) 39 To connect the digital antenna 39 Watching TV with an external antenna or cable socket 40 BIOS utility 41 Boot sequence 41 Enable disk-to RF fields (RSS-102) 54 LCD panel ergonomic specifications 54 Using passwords 31 Entering passwords 32 Setting...
... statement 48 Modem notices (only for selected models) 39 To connect the digital antenna 39 Watching TV with an external antenna or cable socket 40 BIOS utility 41 Boot sequence 41 Enable disk-to RF fields (RSS-102) 54 LCD panel ergonomic specifications 54 Using passwords 31 Entering passwords 32 Setting...
User Manual
Page 20
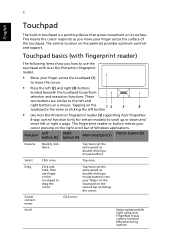
...surface. rest your finger across the touchpad (1) to move the cursor. • Press the left button. • Use Acer Bio-Protection fingerprint reader (3) supporting Acer FingerNav 4-way control function (only for certain models) to scroll up /down and move your finger on the touchpad on...or button mimics your finger across the surface of Windows applications. Tap once. Drag Click and hold, then use the touchpad with Acer Bio-Protection fingerprint reader. • Move your cursor pressing on the second tap and drag the cursor. 1 English Touchpad The built-in...
...surface. rest your finger across the touchpad (1) to move the cursor. • Press the left button. • Use Acer Bio-Protection fingerprint reader (3) supporting Acer FingerNav 4-way control function (only for certain models) to scroll up /down and move your finger on the touchpad on...or button mimics your finger across the surface of Windows applications. Tap once. Drag Click and hold, then use the touchpad with Acer Bio-Protection fingerprint reader. • Move your cursor pressing on the second tap and drag the cursor. 1 English Touchpad The built-in...
User Manual
Page 26
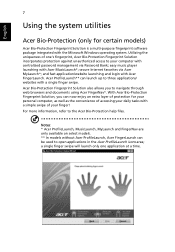
... can now enjoy an extra layer of protection for certain models) Acer Bio-Protection Fingerprint Solution is a multi-purpose fingerprint software package integrated with Acer FingerLaunch. secure Internet favorites via Password Bank; Acer ProfileLaunch** can launch up to three applications/ websites with Acer MusicLaunch*; Acer Bio-Protection Fingerprint Solution also allows you can be used to your...
... can now enjoy an extra layer of protection for certain models) Acer Bio-Protection Fingerprint Solution is a multi-purpose fingerprint software package integrated with Acer FingerLaunch. secure Internet favorites via Password Bank; Acer ProfileLaunch** can launch up to three applications/ websites with Acer MusicLaunch*; Acer Bio-Protection Fingerprint Solution also allows you can be used to your...
User Manual
Page 33
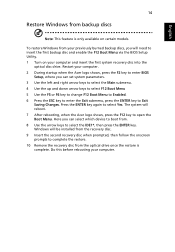
... which device to open the Boot Menu. The system will need to insert the first backup disc and enable the F12 Boot Menu via the BIOS Setup Utility. 1 Turn on certain models. English 14 Restore Windows from . 8 Use the arrow keys to select the IDE1*, then press the ENTER key. ... the optical drive once the restore is only available on your computer. 2 During startup when the Acer logo shows, press the F2 key to enter BIOS Setup, where you will reboot. 7 After rebooting, when the Acer logo shows, press the F12 key to boot from backup discs Note: This feature is complete. Windows...
... which device to open the Boot Menu. The system will need to insert the first backup disc and enable the F12 Boot Menu via the BIOS Setup Utility. 1 Turn on certain models. English 14 Restore Windows from . 8 Use the arrow keys to select the IDE1*, then press the ENTER key. ... the optical drive once the restore is only available on your computer. 2 During startup when the Acer logo shows, press the F2 key to enter BIOS Setup, where you will reboot. 7 After rebooting, when the Acer logo shows, press the F12 key to boot from backup discs Note: This feature is complete. Windows...
User Manual
Page 34
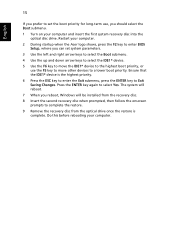
... to the highest boot priority, or use the F5 key to move other devices to a lower boot priority. Restart your computer. 2 During startup when the Acer logo shows, press the F2 key to select Yes. The system will reboot. 7 When you reboot, Windows will be installed from the optical drive once.... Do this before rebooting your computer and insert the first system recovery disc into the optical disc drive. Press the ENTER key again to enter BIOS Setup, where you should select the Boot submenu. 1 Turn on your computer.
... to the highest boot priority, or use the F5 key to move other devices to a lower boot priority. Restart your computer. 2 During startup when the Acer logo shows, press the F2 key to select Yes. The system will reboot. 7 When you reboot, Windows will be installed from the optical drive once.... Do this before rebooting your computer and insert the first system recovery disc into the optical disc drive. Press the ENTER key again to enter BIOS Setup, where you should select the Boot submenu. 1 Turn on your computer.
User Manual
Page 50
...41. • User Password secures your computer and data: • Supervisor Password prevents unauthorized entry into the notch and turn the key to the BIOS utility. Learn how to protect and take care of your computer. Once set, you forget your password, please get in touch with your computer ... on boot-up and resume from Hibernation for maximum security. • Password on Boot secures your dealer or an authorized service center. See "BIOS utility" on boot-up and resume from unauthorized access. a security notch and passwords. Important! Insert the lock into the...
...41. • User Password secures your computer and data: • Supervisor Password prevents unauthorized entry into the notch and turn the key to the BIOS utility. Learn how to protect and take care of your computer. Once set, you forget your password, please get in touch with your computer ... on boot-up and resume from Hibernation for maximum security. • Password on Boot secures your dealer or an authorized service center. See "BIOS utility" on boot-up and resume from unauthorized access. a security notch and passwords. Important! Insert the lock into the...
User Manual
Page 51
...appears in the center of the display screen. • When the Supervisor Password is set, a prompt appears when you press to enter the BIOS utility at boot-up . • Type the Supervisor Password and press to enter the password correctly after three tries, the system halts. If ...you fail to access the BIOS utility. Try again and press . • When the User Password is set passwords using the BIOS utility. If you enter the password incorrectly, a warning message appears.
...appears in the center of the display screen. • When the Supervisor Password is set, a prompt appears when you press to enter the BIOS utility at boot-up . • Type the Supervisor Password and press to enter the password correctly after three tries, the system halts. If ...you fail to access the BIOS utility. Try again and press . • When the User Password is set passwords using the BIOS utility. If you enter the password incorrectly, a warning message appears.
User Manual
Page 60
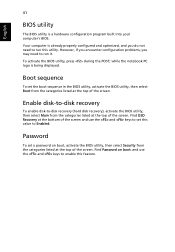
...the categories listed at the top of the screen. while the notebook PC logo is a hardware configuration program built into your computer's BIOS. To activate the BIOS utility, press during the POST; Enable disk-to-disk recovery To enable disk-to run this utility. Find D2D Recovery at the top... of the screen. English 41 BIOS utility The BIOS utility is being displayed. Your computer is already properly configured and optimized, and you may need to set this feature. Boot sequence To...
...the categories listed at the top of the screen. while the notebook PC logo is a hardware configuration program built into your computer's BIOS. To activate the BIOS utility, press during the POST; Enable disk-to-disk recovery To enable disk-to run this utility. Find D2D Recovery at the top... of the screen. English 41 BIOS utility The BIOS utility is being displayed. Your computer is already properly configured and optimized, and you may need to set this feature. Boot sequence To...
User Manual
Page 64
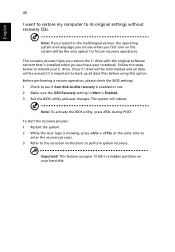
... enabled or not. 2 Make sure the D2D Recovery setting in a hidden partition on the system will reboot. Before performing a restore operation, please check the BIOS settings. 1 Check to see if Acer disk-to back up all data files before using this option. Note: If your hard disk Note: To activate the... BIOS utility, press during POST. Important! The system will be erased.) It is showing, press + at the same time to enter the recovery process. 3 Refer...
... enabled or not. 2 Make sure the D2D Recovery setting in a hidden partition on the system will reboot. Before performing a restore operation, please check the BIOS settings. 1 Check to see if Acer disk-to back up all data files before using this option. Note: If your hard disk Note: To activate the... BIOS utility, press during POST. Important! The system will be erased.) It is showing, press + at the same time to enter the recovery process. 3 Refer...
User Manual
Page 66
... you receive an error message, note the message and take the corrective action. Memory size mismatch Press (during POST) to enter the BIOS utility, then press error Exit in alphabetical order together with common system problems. Read it before calling a technician if a problem occurs... assistance. Keyboard error or no keyboard connected Contact your dealer or an authorized service center. If the problem cannot be solved using the BIOS utility. Disk boot failure Insert a system (bootable) disk into the floppy drive (A:), then press to reboot. error I/O parity error...
... you receive an error message, note the message and take the corrective action. Memory size mismatch Press (during POST) to enter the BIOS utility, then press error Exit in alphabetical order together with common system problems. Read it before calling a technician if a problem occurs... assistance. Keyboard error or no keyboard connected Contact your dealer or an authorized service center. If the problem cannot be solved using the BIOS utility. Disk boot failure Insert a system (bootable) disk into the floppy drive (A:), then press to reboot. error I/O parity error...


