Aspire One AO531h Service Guide
Page 7
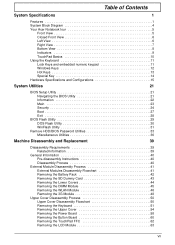
Table of Contents System Specifications 1 Features 1 System Block Diagram 4 Your Acer Notebook tour 5 Front View 5 Closed Front View 6 Left View 6 Right View 7 Bottom View 8 Indicators 9 TouchPad Basics 10 Using the Keyboard 11 ...Key 14 Hardware Specifications and Configurations 15 System Utilities 21 BIOS Setup Utility 21 Navigating the BIOS Utility 21 Information 22 Main 23 Security 24 Boot 27 Exit 28 BIOS Flash Utility 29 DOS Flash Utility 30 WinFlash Utility 31 Remove HDD/BIOS Password Utilities 33 Miscellaneous Utilities 36 Machine Disassembly and Replacement...
Table of Contents System Specifications 1 Features 1 System Block Diagram 4 Your Acer Notebook tour 5 Front View 5 Closed Front View 6 Left View 6 Right View 7 Bottom View 8 Indicators 9 TouchPad Basics 10 Using the Keyboard 11 ...Key 14 Hardware Specifications and Configurations 15 System Utilities 21 BIOS Setup Utility 21 Navigating the BIOS Utility 21 Information 22 Main 23 Security 24 Boot 27 Exit 28 BIOS Flash Utility 29 DOS Flash Utility 30 WinFlash Utility 31 Remove HDD/BIOS Password Utilities 33 Miscellaneous Utilities 36 Machine Disassembly and Replacement...

Aspire One AO531h Service Guide
Page 27
BIOS Item BIOS vendor BIOS Version BIOS ROM type BIOS ROM size Features LCD 10.1" Item Vendor/model name Screen Diagonal (mm) Active Area (mm) Display resolution (pixels) Pixel Pitch (mm) Typical White Luminance (cd/... (g) Physical Size (mm) Electrical Interface Viewing Angle (degree) Horizontal (Right) CR = 10 (Left) Vertical (Upper) CR = 10 (Lower) Specification InSyde v0.10 Flash 1 MB • Support ISIPP • Support Acer UI • Support multi-boot • Suspend to RAM (S3)/Disk (S4) • Various hot-keys for system control • Support SMBUS...
BIOS Item BIOS vendor BIOS Version BIOS ROM type BIOS ROM size Features LCD 10.1" Item Vendor/model name Screen Diagonal (mm) Active Area (mm) Display resolution (pixels) Pixel Pitch (mm) Typical White Luminance (cd/... (g) Physical Size (mm) Electrical Interface Viewing Angle (degree) Horizontal (Right) CR = 10 (Left) Vertical (Upper) CR = 10 (Lower) Specification InSyde v0.10 Flash 1 MB • Support ISIPP • Support Acer UI • Support multi-boot • Suspend to RAM (S3)/Disk (S4) • Various hot-keys for system control • Support SMBUS...

Aspire One AO531h Service Guide
Page 39
... update is not completely loaded. NOTE: Please use the Phlash. Copy the flash utilities to update the system BIOS flash ROM. The flash utility has auto-execution function. If the battery pack does not contain enough power to run the flashit utility. Prepare a bootable diskette. 2. NOTE...related drivers (XMS, EMS, DPMI) when you use the AC adaptor power supply when you run the Phlash. 1. Follow the steps below to finish BIOS flash, you use the Phlash utility. Then boot the system from the bootable diskette. Chapter 2 29 NOTE: If you do not have a crisis recovery ...
... update is not completely loaded. NOTE: Please use the Phlash. Copy the flash utilities to update the system BIOS flash ROM. The flash utility has auto-execution function. If the battery pack does not contain enough power to run the flashit utility. Prepare a bootable diskette. 2. NOTE...related drivers (XMS, EMS, DPMI) when you use the AC adaptor power supply when you run the Phlash. 1. Follow the steps below to finish BIOS flash, you use the Phlash utility. Then boot the system from the bootable diskette. Chapter 2 29 NOTE: If you do not have a crisis recovery ...

Aspire One AO531h Service Guide
Page 40
Copy the BIOS flash tool and the BIOS file to enter the following steps to boot the system. 2. Use the DOS command prompt to a USB storage disk. Now use this disk to use the DOS Flash Utility: 1. DOS Flash Utility Perform the following command: Flashit bios _ver.fd /dc /mc /all The BIOS flash process begins. 30 Chapter 2
Copy the BIOS flash tool and the BIOS file to enter the following steps to boot the system. 2. Use the DOS command prompt to a USB storage disk. Now use this disk to use the DOS Flash Utility: 1. DOS Flash Utility Perform the following command: Flashit bios _ver.fd /dc /mc /all The BIOS flash process begins. 30 Chapter 2

Aspire One AO531h Service Guide
Page 172
...the BIOS to the root directory of BIOS. You can be made by Crisis Disk BIOS Recovery Boot Block: BIOS Recovery Boot Block is used to ZG5ia32.fd. 2. Plug USB storage disk into the USB port. 4. After this function is strongly recommended to a successful one if a previous BIOS flashing process... fails. Users can enable this function, it is enabled, the system will keep the Fn + Esc keys pressed till the Power button flashes once. The Crisis USB key can check the BIOS version after the system restarts. ...
...the BIOS to the root directory of BIOS. You can be made by Crisis Disk BIOS Recovery Boot Block: BIOS Recovery Boot Block is used to ZG5ia32.fd. 2. Plug USB storage disk into the USB port. 4. After this function is strongly recommended to a successful one if a previous BIOS flashing process... fails. Users can enable this function, it is enabled, the system will keep the Fn + Esc keys pressed till the Power button flashes once. The Crisis USB key can check the BIOS version after the system restarts. ...

Aspire One AO531h Service Guide
Page 205
...3G Module Removing 48 Replacing 135 A Antennas Removing 98 Replacing 102 B Battery Replacing 138 Battery Pack Removing 42 BIOS ROM size 17 ROM type 17 vendor 17 Version 17 BIOS Utility 21-29 Advanced 24 Boot 27 Exit 28 Navigating 21 Save and Exit 28 Security 24 System Security ... Fan Replacing 111 D DIMM Module Removing 45 Replacing 136 Display 4 display hotkeys 13 E Euro 14 External Module Disassembly Flowchart 41 F Features 1 FLASH Utility 29 Flash Utility 29 FPC Cable Removing 95 FRU (Field Replaceable Unit) List 163 H HDD Module Removing 73, 87 Replacing 119 HDD SKU Disassembly Procedure 80...
...3G Module Removing 48 Replacing 135 A Antennas Removing 98 Replacing 102 B Battery Replacing 138 Battery Pack Removing 42 BIOS ROM size 17 ROM type 17 vendor 17 Version 17 BIOS Utility 21-29 Advanced 24 Boot 27 Exit 28 Navigating 21 Save and Exit 28 Security 24 System Security ... Fan Replacing 111 D DIMM Module Removing 45 Replacing 136 Display 4 display hotkeys 13 E Euro 14 External Module Disassembly Flowchart 41 F Features 1 FLASH Utility 29 Flash Utility 29 FPC Cable Removing 95 FRU (Field Replaceable Unit) List 163 H HDD Module Removing 73, 87 Replacing 119 HDD SKU Disassembly Procedure 80...


