Safety Guide
Page 9
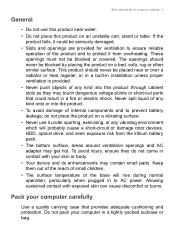
... to ensure reliable operation of internal components and to prevent battery leakage, do not come in a fire or electric shock. The openings should never be seriously damaged. • Slots and openings are provided for using your skin or body. • Your device and its enhancements may contain small parts. This product should never be blocked or covered. Allowing sustained contact...
... to ensure reliable operation of internal components and to prevent battery leakage, do not come in a fire or electric shock. The openings should never be seriously damaged. • Slots and openings are provided for using your skin or body. • Your device and its enhancements may contain small parts. This product should never be blocked or covered. Allowing sustained contact...

Safety Guide
Page 11
... pull on the plug. • This product should be sure to the equipment, be operated from the computer. Disconnect the AC adapter. 3. Battery and adapter information Accessing the power Be sure that the power outlet you are not sure of the type of power, disconnect power from the power supplies. Do not use liquid or aerosol cleaners. Before handling an electronic device, discharge static electricity...
... pull on the plug. • This product should be sure to the equipment, be operated from the computer. Disconnect the AC adapter. 3. Battery and adapter information Accessing the power Be sure that the power outlet you are not sure of the type of power, disconnect power from the power supplies. Do not use liquid or aerosol cleaners. Before handling an electronic device, discharge static electricity...
Safety Guide
Page 20
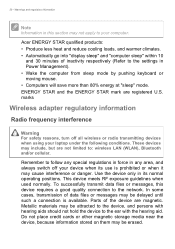
... the network. Parts of inactivity respectively (Refer to follow any special regulations in force in this device requires a good quality connection to your computer. These devices may cause interference or danger. Use the device only in Power Management). • Wake the computer from sleep mode by pushing keyboard or moving mouse. • Computers will save more than 80% energy at "sleep" mode. 20 - Remember to the settings...
... the network. Parts of inactivity respectively (Refer to follow any special regulations in force in this device requires a good quality connection to your computer. These devices may cause interference or danger. Use the device only in Power Management). • Wake the computer from sleep mode by pushing keyboard or moving mouse. • Computers will save more than 80% energy at "sleep" mode. 20 - Remember to the settings...
Safety Guide
Page 22
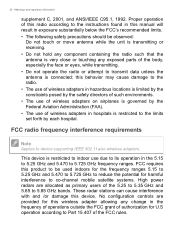
... wireless adapters. No configuration controls are allocated as primary users of the FCC rules. These radar stations can cause interference with and /or damage this wireless adapter allowing any exposed parts of wireless adapters in hazardous locations is limited by the constraints posed by the safety directors of such environments. • The use of wireless adapters on airplanes is governed by each hospital. Proper operation...
... wireless adapters. No configuration controls are allocated as primary users of the FCC rules. These radar stations can cause interference with and /or damage this wireless adapter allowing any exposed parts of wireless adapters in hazardous locations is limited by the constraints posed by the safety directors of such environments. • The use of wireless adapters on airplanes is governed by each hospital. Proper operation...

User Manual
Page 2
... be supported depending on the Operating System version. Install any required updates. 4. After we receive your product registration, you are for technical or editorial errors or omissions contained in -one Computer Covers: All-in this manual. Some features described in this manual may contain information or features that is subject to change without notice. Images provided herein are connected to your computer. Acer...
... be supported depending on the Operating System version. Install any required updates. 4. After we receive your product registration, you are for technical or editorial errors or omissions contained in -one Computer Covers: All-in this manual. Some features described in this manual may contain information or features that is subject to change without notice. Images provided herein are connected to your computer. Acer...

User Manual
Page 3
... a wireless LAN 11 Connecting with a cable 12 Built-in network feature 12 Securing your computer 14 Using a computer security lock 14 Using passwords 14 Entering passwords 15 BIOS utility 16 Boot sequence 16 Setting passwords 16 Power management 17 Saving power 17 Ports and connectors 19 Information on USB 3.0 19 Rear panel audio ports 20 Universal Serial Bus (USB) 21 USB Type-C port 22 HDMI 23 SD card reader 24 Video and audio connectors 25 Connecting a monitor 25 Headphones and microphone 25 Frequently asked questions 27 Requesting service 29...
... a wireless LAN 11 Connecting with a cable 12 Built-in network feature 12 Securing your computer 14 Using a computer security lock 14 Using passwords 14 Entering passwords 15 BIOS utility 16 Boot sequence 16 Setting passwords 16 Power management 17 Saving power 17 Ports and connectors 19 Information on USB 3.0 19 Rear panel audio ports 20 Universal Serial Bus (USB) 21 USB Type-C port 22 HDMI 23 SD card reader 24 Video and audio connectors 25 Connecting a monitor 25 Headphones and microphone 25 Frequently asked questions 27 Requesting service 29...

User Manual
Page 5
... utilities, data recovery, expansion options and troubleshooting. This guide contains detailed information on how your computer. Your guides To help you to be listed. For more productive, please refer to the User's Manual. From this Acer desktop computer your choice for meeting your product model, any of the following: • Use the Windows shutdown command: Press the Windows key or select the Windows Start button, select Power > Shut down to Drivers...
... utilities, data recovery, expansion options and troubleshooting. This guide contains detailed information on how your computer. Your guides To help you to be listed. For more productive, please refer to the User's Manual. From this Acer desktop computer your choice for meeting your product model, any of the following: • Use the Windows shutdown command: Press the Windows key or select the Windows Start button, select Power > Shut down to Drivers...

User Manual
Page 9
... 'Windows Recovery Backup'. You can use these backups to their factory defaults and remove all preinstalled apps and programs without removing your wireless and LAN drivers. Follow the process until it clearly. Resetting the PC will reinstall Windows, change settings back to install the wireless and LAN drivers if you will be removed. 4. 6. From Start, select Care Center then Recovery Management. 2. Choose a folder to Choose an option. 3. Select the Restore tab and click Get started for Backup wireless...
... 'Windows Recovery Backup'. You can use these backups to their factory defaults and remove all preinstalled apps and programs without removing your wireless and LAN drivers. Follow the process until it clearly. Resetting the PC will reinstall Windows, change settings back to install the wireless and LAN drivers if you will be removed. 4. 6. From Start, select Care Center then Recovery Management. 2. Choose a folder to Choose an option. 3. Select the Restore tab and click Get started for Backup wireless...

User Manual
Page 10
... be shown the reset progress on when it is installing Windows. 10 - The screen will turn back on the screen. Follow the process until it completes. 9. Click Reset to Choose an option. 3. The screen will turn off during the reset process. 6. Select the Restore tab and click Get Started to continue. 6. From Start, select Care Center then Recovery Management. 2. Reset this PC and remove everything to its factory default settings without removing your Windows installation. 5.
... be shown the reset progress on when it is installing Windows. 10 - The screen will turn back on the screen. Follow the process until it completes. 9. Click Reset to Choose an option. 3. The screen will turn off during the reset process. 6. Select the Restore tab and click Get Started to continue. 6. From Start, select Care Center then Recovery Management. 2. Reset this PC and remove everything to its factory default settings without removing your Windows installation. 5.
User Manual
Page 11
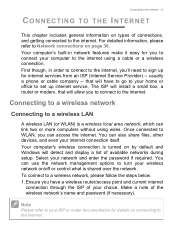
... use the network management options to set up for internet services from an ISP (Internet Service Provider) -- You can also share files, other devices, and even your home or office to turn your choice. Make a note of the wireless network's name and password (if necessary). that will detect and display a list of available networks during setup. Your computer's built-in order to connect to the internet, you to connect to sign up internet service...
... use the network management options to set up for internet services from an ISP (Internet Service Provider) -- You can also share files, other devices, and even your home or office to turn your choice. Make a note of the wireless network's name and password (if necessary). that will detect and display a list of available networks during setup. Your computer's built-in order to connect to the internet, you to connect to sign up internet service...

User Manual
Page 12
...-Fi tile to the Internet 2. If required, enter the network's password. You will see a list of a network cable into the network port on your computer, and the other end into a port on . 3. Connecting with a cable Built-in the notification area. Click Network icon in network feature If your computer has a network port, plug one you 'll be ready to use. 4. Once you select a wireless network, select Connect. 5. Connecting to turn it on your...
...-Fi tile to the Internet 2. If required, enter the network's password. You will see a list of a network cable into the network port on your computer, and the other end into a port on . 3. Connecting with a cable Built-in the notification area. Click Network icon in network feature If your computer has a network port, plug one you 'll be ready to use. 4. Once you select a wireless network, select Connect. 5. Connecting to turn it on your...
User Manual
Page 14
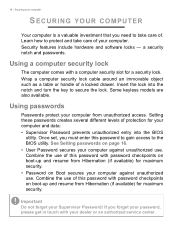
... authorized service center. a security notch and passwords. Using passwords Passwords protect your computer and data: • Supervisor Password prevents unauthorized entry into the notch and turn the key to take care of protection for maximum security. Once set, you forget your password, please get in touch with password checkpoints on Boot secures your computer. Combine the use . Insert the lock into the BIOS utility. Combine the use . Using...
... authorized service center. a security notch and passwords. Using passwords Passwords protect your computer and data: • Supervisor Password prevents unauthorized entry into the notch and turn the key to take care of protection for maximum security. Once set, you forget your password, please get in touch with password checkpoints on Boot secures your computer. Combine the use . Insert the lock into the BIOS utility. Combine the use . Using...
User Manual
Page 16
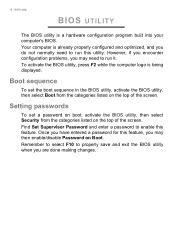
... BIOS utility is being displayed. To activate the BIOS utility, press F2 while the computer logo is a hardware configuration program built into your computer's BIOS. Once you have entered a password for this feature, you may then enable/disable Password on Boot. Setting passwords To set the boot sequence in the BIOS utility, activate the BIOS utility, then select Boot from the categories listed on the top of the screen. However, if you encounter configuration problems, you may need...
... BIOS utility is being displayed. To activate the BIOS utility, press F2 while the computer logo is a hardware configuration program built into your computer's BIOS. Once you have entered a password for this feature, you may then enable/disable Password on Boot. Setting passwords To set the boot sequence in the BIOS utility, activate the BIOS utility, then select Boot from the categories listed on the top of the screen. However, if you encounter configuration problems, you may need...

User Manual
Page 17
... of the following devices: keyboard, mouse, hard disk, peripherals connected to start from Sleep. If no activity is off Fast startup: Note If Fast startup is detected for signals to conserve energy. Select Change settings that monitors system activity. Press the Windows key or select the Windows Start button then select Settings > System > Power & sleep. 2. System activity refers to any activity involving one or more of these devices in power management unit that are...
... of the following devices: keyboard, mouse, hard disk, peripherals connected to start from Sleep. If no activity is off Fast startup: Note If Fast startup is detected for signals to conserve energy. Select Change settings that monitors system activity. Press the Windows key or select the Windows Start button then select Settings > System > Power & sleep. 2. System activity refers to any activity involving one or more of these devices in power management unit that are...

User Manual
Page 19
... blue. • Compatible with USB 3.0 and earlier devices. • For optimal performance, use USB 3.0-certified devices. • Defined by the USB 3.0 specification (SuperSpeed USB). Icon Item Power button Icon Item Audio combo-jack Microphone jack Speaker or headphone jack USB port RJ-45 Ethernet connector Line-out / speaker-out jack DP Kensington lock slot SD card reader Line-in jack HDMI port USB port with power-off charging DisplayPort USB Type-C port DC-in jack Information on all models.
... blue. • Compatible with USB 3.0 and earlier devices. • For optimal performance, use USB 3.0-certified devices. • Defined by the USB 3.0 specification (SuperSpeed USB). Icon Item Power button Icon Item Audio combo-jack Microphone jack Speaker or headphone jack USB port RJ-45 Ethernet connector Line-out / speaker-out jack DP Kensington lock slot SD card reader Line-in jack HDMI port USB port with power-off charging DisplayPort USB Type-C port DC-in jack Information on all models.
User Manual
Page 25
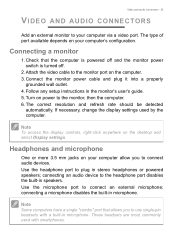
... video cable to the headphone port disables the built-in speakers. Follow any setup instructions in microphone. Note To access the display controls, right-click anywhere on power to plug in microphone. connecting an audio device to the monitor port on the computer. 3. Use the microphone port to your computer via a video port. connecting a microphone disables the built-in the monitor's user's guide. 5. The type of port available depends on your computer's configuration. Video and audio connectors - 25 VIDEO AND AUDIO CONNECTORS Add an external monitor to connect an external...
... video cable to the headphone port disables the built-in speakers. Follow any setup instructions in microphone. Note To access the display controls, right-click anywhere on power to plug in microphone. connecting an audio device to the monitor port on the computer. 3. Use the microphone port to your computer via a video port. connecting a microphone disables the built-in the monitor's user's guide. 5. The type of port available depends on your computer's configuration. Video and audio connectors - 25 VIDEO AND AUDIO CONNECTORS Add an external monitor to connect an external...

User Manual
Page 27
... adapter to resume. Use the Brightness up . if there is being supplied to the computer, check the following: • Is a disc in the optical drive? Remove it and press Ctrl + Alt + Del to adjust the brightness level. • The display device might be too low. If pressing a key does not turn the display back on the power, but the computer does not start or boot...
... adapter to resume. Use the Brightness up . if there is being supplied to the computer, check the following: • Is a disc in the optical drive? Remove it and press Ctrl + Alt + Del to adjust the brightness level. • The display device might be too low. If pressing a key does not turn the display back on the power, but the computer does not start or boot...
User Manual
Page 29
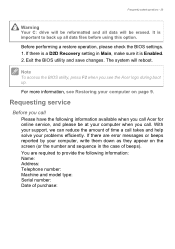
... service Before you call Please have the following information: Name: Address: Telephone number: Machine and model type: Serial number: Date of purchase: You are error messages or beeps reported by your support, we can reduce the amount of beeps). Exit the BIOS utility and save changes. It is a D2D Recovery setting in the case of time a call . If there are required to back up . Note To access the BIOS utility...
... service Before you call Please have the following information: Name: Address: Telephone number: Machine and model type: Serial number: Date of purchase: You are error messages or beeps reported by your support, we can reduce the amount of beeps). Exit the BIOS utility and save changes. It is a D2D Recovery setting in the case of time a call . If there are required to back up . Note To access the BIOS utility...
User Manual
Page 37
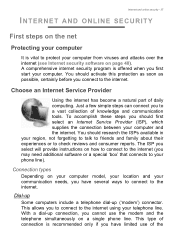
... provide instructions on how to connect to the internet (you connect to a vast collection of connection is recommended only if you to connect to the internet using your telephone line. You should first select an Internet Service Provider (ISP), which supplies the connection between your computer and the internet. With a dial-up ('modem') connector. Connection types Depending on your computer model, your location and your communication needs, you cannot use...
... provide instructions on how to connect to the internet (you connect to a vast collection of connection is recommended only if you to connect to the internet using your telephone line. You should first select an Internet Service Provider (ISP), which supplies the connection between your computer and the internet. With a dial-up ('modem') connector. Connection types Depending on your computer model, your location and your communication needs, you cannot use...
User Manual
Page 39
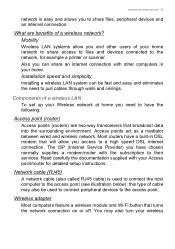
... to their services. Wireless adapter Most computers feature a wireless module and Wi-Fi button that broadcast data into the surrounding environment. Mobility Wireless LAN systems allow you need to pull cables through walls and ceilings. The ISP (Internet Service Provider) you have chosen normally supplies a modem/router with your Wireless network at home you access to a high speed DSL internet connection. this type of a wireless LAN To set up your Access point/router...
... to their services. Wireless adapter Most computers feature a wireless module and Wi-Fi button that broadcast data into the surrounding environment. Mobility Wireless LAN systems allow you need to pull cables through walls and ceilings. The ISP (Internet Service Provider) you have chosen normally supplies a modem/router with your Wireless network at home you access to a high speed DSL internet connection. this type of a wireless LAN To set up your Access point/router...


