Acer AO725 Battery

Related Manual Pages


Similar Questions

Battery Will Not Charge
I have a ACER CB315-2H series laptop and the battery will not charge. It was bought in August of 202...
I have a ACER CB315-2H series laptop and the battery will not charge. It was bought in August of 202...
(Posted by ds647822 1 year ago)


How Do I Remove Battery From Acer Aspire 725-c61kk
windows 7 home basic MFG date 2012/04/26
windows 7 home basic MFG date 2012/04/26
(Posted by rizalegua 10 years ago)
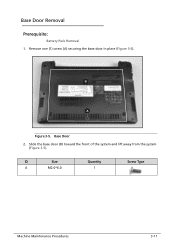
756 Battery Removal
How do I remove the battery? No apparent latch/lock.
How do I remove the battery? No apparent latch/lock.
(Posted by richypi 11 years ago)