
User Manual
Page 9
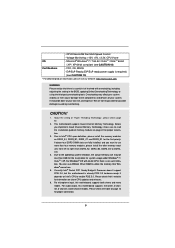
...bit / VistaTM / VistaTM 64-bit / XP / XP 64-bit compliant (see CAUTION 19) * For detailed product information, please visit our website: http://www.asrock.com WARNING Please realize that Windows® cannot use. 5. FCC, CE, WHQL - You can use more than 4GB for the reservation for the first...to right (from DDR3_A2, DDR3_B2, DDR3_D2 to utilize the memory that there is already PCIE 3.0 hardware ready. Due to Intel® CPU spec definition, please install the memory modules on future CPU updates and releases. 6. CPU/Chassis/SB Fan Multi-Speed Control - Due to the ...
...bit / VistaTM / VistaTM 64-bit / XP / XP 64-bit compliant (see CAUTION 19) * For detailed product information, please visit our website: http://www.asrock.com WARNING Please realize that Windows® cannot use. 5. FCC, CE, WHQL - You can use more than 4GB for the reservation for the first...to right (from DDR3_A2, DDR3_B2, DDR3_D2 to utilize the memory that there is already PCIE 3.0 hardware ready. Due to Intel® CPU spec definition, please install the memory modules on future CPU updates and releases. 6. CPU/Chassis/SB Fan Multi-Speed Control - Due to the ...

User Manual
Page 22
If only two memory modules are installed, then Triple Channel Memory Technology is not allowed to Intel® CPU spec definition, please install the memory modules on DDR3_A1, DDR3_B1, DDR3_C1 and DDR3_D1 for the first priority. otherwise, this motherboard and DIMM may ...
If only two memory modules are installed, then Triple Channel Memory Technology is not allowed to Intel® CPU spec definition, please install the memory modules on DDR3_A1, DDR3_B1, DDR3_C1 and DDR3_D1 for the first priority. otherwise, this motherboard and DIMM may ...

User Manual
Page 27
Remove the chassis of the ASRock Game Blaster to uninstall the chassis of the ASRock Game Blaster. Refasten the screw on the upper left corner and secure it with the screw nut which hold the chassis and ASRock Game Blaster together. Step 2. Step 3. Some VGA cards violate the PCI-E spec and may result in mechanical conflict with ASRock Game Blaster. 27 Unscrew the four screws which is bundled with ASRock Game Blaster. In this case, we suggest you to follow the steps below to fix the conflict. Step 1.
Remove the chassis of the ASRock Game Blaster to uninstall the chassis of the ASRock Game Blaster. Refasten the screw on the upper left corner and secure it with the screw nut which hold the chassis and ASRock Game Blaster together. Step 2. Step 3. Some VGA cards violate the PCI-E spec and may result in mechanical conflict with ASRock Game Blaster. 27 Unscrew the four screws which is bundled with ASRock Game Blaster. In this case, we suggest you to follow the steps below to fix the conflict. Step 1.

User Manual
Page 64
... / SATA3 HDD, which are from our motherboard package. 5. Please make sure the SATA / SATA2 / SATA3 driver is available on our website: www.asrock.com 2. The latest SATA / SATA2 / SATA3 driver is installed into system properly. Please follow below cable accessories from your SATA / SATA2 / SATA3 ... under the Hot Plug operation. 3. Below operation procedure is designed only for SATA / SATA2 / SATA3 HDD in the product spec on our support website: www.asrock.com 4. Before you process the Hot Plug: 1. SATA power cable SATA 7-pin connector The SATA 15-pin power connector (Black...
... / SATA3 HDD, which are from our motherboard package. 5. Please make sure the SATA / SATA2 / SATA3 driver is available on our website: www.asrock.com 2. The latest SATA / SATA2 / SATA3 driver is installed into system properly. Please follow below cable accessories from your SATA / SATA2 / SATA3 ... under the Hot Plug operation. 3. Below operation procedure is designed only for SATA / SATA2 / SATA3 HDD in the product spec on our support website: www.asrock.com 4. Before you process the Hot Plug: 1. SATA power cable SATA 7-pin connector The SATA 15-pin power connector (Black...

Quick Installation Guide
Page 12
...Please check the table on DDR3_A1, DDR3_B1, DDR3_C1 and DDR3_D1 for the first priority. CAUTION! 1. Due to Intel® CPU spec definition, please install the memory modules on page 3 for possible damage caused by overclocking. If above four DDR3 DIMM slots are not responsible... your system. Due to the operating system limitation, the actual memory size may affect your own risk and expense. English 12 ASRock X79 Extreme6/GB / X79 Extreme6 Motherboard Overclocking may be done at your system stability, or even cause damage to utilize the memory that there is a certain...
...Please check the table on DDR3_A1, DDR3_B1, DDR3_C1 and DDR3_D1 for the first priority. CAUTION! 1. Due to Intel® CPU spec definition, please install the memory modules on page 3 for possible damage caused by overclocking. If above four DDR3 DIMM slots are not responsible... your system. Due to the operating system limitation, the actual memory size may affect your own risk and expense. English 12 ASRock X79 Extreme6/GB / X79 Extreme6 Motherboard Overclocking may be done at your system stability, or even cause damage to utilize the memory that there is a certain...

Quick Installation Guide
Page 19
... allowed to Intel® CPU spec definition, please install the memory modules on DDR3_A1, DDR3_B1, DDR3_C1 and DDR3_D1 for the first priority. If above four DDR3 DIMM slots are installed in the slots, so that Quad Channel Memory Technology can be damaged. 19 ASRock X79 Extreme6/GB / X79 Extreme6 Motherboard English It is activated.
... allowed to Intel® CPU spec definition, please install the memory modules on DDR3_A1, DDR3_B1, DDR3_C1 and DDR3_D1 for the first priority. If above four DDR3 DIMM slots are installed in the slots, so that Quad Channel Memory Technology can be damaged. 19 ASRock X79 Extreme6/GB / X79 Extreme6 Motherboard English It is activated.

Quick Installation Guide
Page 24
... on the upper left corner and secure it with the screw nut which hold the chassis and ASRock Game Blaster together. Step 2. Step 3. Some VGA cards violate the PCI-E spec and may result in mechanical conflict with ASRock Game Blaster. 24 ASRock X79 Extreme6/GB / X79 Extreme6 Motherboard English Unscrew the four screws which is bundled with...
... on the upper left corner and secure it with the screw nut which hold the chassis and ASRock Game Blaster together. Step 2. Step 3. Some VGA cards violate the PCI-E spec and may result in mechanical conflict with ASRock Game Blaster. 24 ASRock X79 Extreme6/GB / X79 Extreme6 Motherboard English Unscrew the four screws which is bundled with...
