User Manual
Page 4
...; XP / XP 64-bit Without RAID Functions 53 2.21.2 Installing Windows® 7 / 7 64-bit / VistaTM / VistaTM 64-bit Without RAID Functions 54 3 UEFI SETUP UTILITY 55 3.1 Introduction 55 3.1.1 UEFI Menu Bar 55 3.1.2 Navigation Keys 56 3.2 Main Screen 56 3.3 Advanced Screen 57 3.3.1 CPU Con guration 58 3.3.2 Integrated Clock Chip Con guration 60 3.3.3 DRAM...
...; XP / XP 64-bit Without RAID Functions 53 2.21.2 Installing Windows® 7 / 7 64-bit / VistaTM / VistaTM 64-bit Without RAID Functions 54 3 UEFI SETUP UTILITY 55 3.1 Introduction 55 3.1.1 UEFI Menu Bar 55 3.1.2 Navigation Keys 56 3.2 Main Screen 56 3.3 Advanced Screen 57 3.3.1 CPU Con guration 58 3.3.2 Integrated Clock Chip Con guration 60 3.3.3 DRAM...

User Manual
Page 7
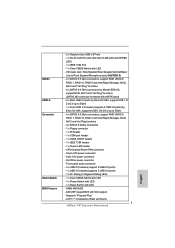
Supports "Plug and Play" - SLI/XFire power connector - AMI UEFI Legal BIOS with LED - 64Mb AMI BIOS - ACPI 1.1 Compliance Wake Up Events 7 CPU/Chassis/Power FAN connector - 24 pin ATX power connector - 8 pin 12V power ...
Supports "Plug and Play" - SLI/XFire power connector - AMI UEFI Legal BIOS with LED - 64Mb AMI BIOS - ACPI 1.1 Compliance Wake Up Events 7 CPU/Chassis/Power FAN connector - 24 pin ATX power connector - 8 pin 12V power ...

User Manual
Page 55
...match what you see on the menu bar, and then press to con gure your required item. 55 Because the UEFI software is constantly being updated, the following UEFI setup screens and descriptions are for reference purpose only, and they may also restart by pressing the reset button on the..., otherwise, POST will continue with the following selections: Main To set up the system time/date information Advanced To set up the advanced UEFI features H/W Monitor To display current hardware status Boot To set up the default system device to locate and load the Operating System Security To...
...match what you see on the menu bar, and then press to con gure your required item. 55 Because the UEFI software is constantly being updated, the following UEFI setup screens and descriptions are for reference purpose only, and they may also restart by pressing the reset button on the..., otherwise, POST will continue with the following selections: Main To set up the system time/date information Advanced To set up the advanced UEFI features H/W Monitor To display current hardware status Boot To set up the default system device to locate and load the Operating System Security To...

User Manual
Page 56
... UTILITY To jump to the Exit Screen or exit the current screen 3.2 Main Screen When you enter the UEFI SETUP UTILITY, the Main screen will appear and display the system overview. 56 Navigation Key(s) Function Description / / + / Moves cursor left or right to select Screens ...
... UTILITY To jump to the Exit Screen or exit the current screen 3.2 Main Screen When you enter the UEFI SETUP UTILITY, the Main screen will appear and display the system overview. 56 Navigation Key(s) Function Description / / + / Moves cursor left or right to select Screens ...

User Manual
Page 57
..., Super IO Con guration, Voltage Con guration, ACPI Con guration and USB Con guration. Select the proper UEFI le to update your UEFI, and reboot your UEFI only in this section may set the con gurations for the following items: CPU Con guration, Integrated Clock ...the system to update system UEFI without preparing an additional oppy diskette or other complicated ash utility. ASRock Instant Flash ASRock Instant Flash is a UEFI flash utility embedded in Flash ROM. If you to malfunction. This convenient UEFI update tool allows you execute ASRock Instant Flash utility, the utility...
..., Super IO Con guration, Voltage Con guration, ACPI Con guration and USB Con guration. Select the proper UEFI le to update your UEFI, and reboot your UEFI only in this section may set the con gurations for the following items: CPU Con guration, Integrated Clock ...the system to update system UEFI without preparing an additional oppy diskette or other complicated ash utility. ASRock Instant Flash ASRock Instant Flash is a UEFI flash utility embedded in Flash ROM. If you to malfunction. This convenient UEFI update tool allows you execute ASRock Instant Flash utility, the utility...

User Manual
Page 69
... 3.0 Controller Use this item to enable or disable the use of USB 2.0 controller. There are not allowed to use only under legacy OS and UEFI setup when [Disabled] is selected. Enables support for the details of these four options: [Enabled] - The default value is recommended to select [Disabled...Controller Use this item to enable or disable the use of USB 3.0 controller. Enables legacy support if USB devices are allowed to use under UEFI setup and Windows / Linux OS. 69 Please refer to select legacy support for USB devices. Legacy USB Support Use this option to below ...
... 3.0 Controller Use this item to enable or disable the use of USB 2.0 controller. There are not allowed to use only under legacy OS and UEFI setup when [Disabled] is selected. Enables support for the details of these four options: [Enabled] - The default value is recommended to select [Disabled...Controller Use this item to enable or disable the use of USB 3.0 controller. Enables legacy support if USB devices are allowed to use under UEFI setup and Windows / Linux OS. 69 Please refer to select legacy support for USB devices. Legacy USB Support Use this option to below ...

User Manual
Page 73
Discard Changes and Exit When you are allowed to load and save the changes and exit the UEFI SETUP UTILITY. User Default In this option, you select this option, it will pop-out the following message, "Discard changes?" Select [OK] to your own ... this option, it will pop-out the following message, "Discard changes and exit setup?" Select [OK] to save three user defaults according to exit the UEFI SETUP UTILITY without saving any changes. Load UEFI Defaults Load UEFI default values for this operation.
Discard Changes and Exit When you are allowed to load and save the changes and exit the UEFI SETUP UTILITY. User Default In this option, you select this option, it will pop-out the following message, "Discard changes?" Select [OK] to your own ... this option, it will pop-out the following message, "Discard changes and exit setup?" Select [OK] to save three user defaults according to exit the UEFI SETUP UTILITY without saving any changes. Load UEFI Defaults Load UEFI default values for this operation.

User Manual
Page 75
...the operating system. 1. Start Windows® installation. 75 Please follow below procedure to launch boot menu at system POST. 4. Set AHCI Mode in UEFI Setup Utility > Advanced > Storage Configuration > SATA Mode. 3. Please make sure to be installed on a HDD Larger Than 2TB This motherboard ...is adopting UEFI BIOS that allows Windows® OS to use Windows® VistaTM 64-bit (with SP1 or above) or Windows® 7 64-bit. 2. Installing...
...the operating system. 1. Start Windows® installation. 75 Please follow below procedure to launch boot menu at system POST. 4. Set AHCI Mode in UEFI Setup Utility > Advanced > Storage Configuration > SATA Mode. 3. Please make sure to be installed on a HDD Larger Than 2TB This motherboard ...is adopting UEFI BIOS that allows Windows® OS to use Windows® VistaTM 64-bit (with SP1 or above) or Windows® 7 64-bit. 2. Installing...
Quick Installation Guide
Page 7
... LED header - AMI UEFI Legal BIOS with eSATA3 port) - 2 x Rear USB 3.0 ports by Etron EJ168A, support USB 1.0/ 2.0/3.0 up to 5Gb/s - 1 x Front USB 3.0 header (supports 2 USB 3.0 ports) by Marvell SE9120, support NCQ, AHCI and "Hot Plug" functions (SATA3_M2 connector is shared with GUI support - ACPI 1.1 Compliance Wake Up Events 7 ASRock P67 Extreme4 Motherboard English CPU...
... LED header - AMI UEFI Legal BIOS with eSATA3 port) - 2 x Rear USB 3.0 ports by Etron EJ168A, support USB 1.0/ 2.0/3.0 up to 5Gb/s - 1 x Front USB 3.0 header (supports 2 USB 3.0 ports) by Marvell SE9120, support NCQ, AHCI and "Hot Plug" functions (SATA3_M2 connector is shared with GUI support - ACPI 1.1 Compliance Wake Up Events 7 ASRock P67 Extreme4 Motherboard English CPU...

Quick Installation Guide
Page 207
Dr. Debug (7 LED) 1 개 - COM 1 개 - HDMI_SPDIF 헤더 1 개 - LED 가 달린 CMOS 1 개 - GUI AMI UEFI 적합형 BIOS 207 ASRock P67 Extreme4 Motherboard 한 국 어 LED 1 개 - 64Mb AMI BIOS - SATA3 USB 3.0 BIOS - 1 개 LED(ACT/LINK LED 및 SPEED LED RJ-45 LAN 포트 - 1 &#...
Dr. Debug (7 LED) 1 개 - COM 1 개 - HDMI_SPDIF 헤더 1 개 - LED 가 달린 CMOS 1 개 - GUI AMI UEFI 적합형 BIOS 207 ASRock P67 Extreme4 Motherboard 한 국 어 LED 1 개 - 64Mb AMI BIOS - SATA3 USB 3.0 BIOS - 1 개 LED(ACT/LINK LED 및 SPEED LED RJ-45 LAN 포트 - 1 &#...

Quick Installation Guide
Page 283
AMI UEFI Legal BIOS ( 支援 GUI Plug and Play,PnP) - ACPI 1.1 283 ASRock P67 Extreme4 Motherboard 繁體中文 SATA3 USB 3.0 接頭 BIOS - 1 個 RJ-45 LED 指示燈 (ACT/LINK LED 和 SPEED LED) - 1 個 IEEE ...
AMI UEFI Legal BIOS ( 支援 GUI Plug and Play,PnP) - ACPI 1.1 283 ASRock P67 Extreme4 Motherboard 繁體中文 SATA3 USB 3.0 接頭 BIOS - 1 個 RJ-45 LED 指示燈 (ACT/LINK LED 和 SPEED LED) - 1 個 IEEE ...

Quick Installation Guide
Page 304
Installing OS on a large size HDD (>2TB). Set AHCI Mode in UEFI Setup Utility > Advanced > Storage Configuration > SATA Mode. 3. Start Windows® installation. Press F11 to use Windows® VistaTM 64-bit (with SP1 or ...above) or Windows® 7 64-bit. 2. Please make sure to launch boot menu at system POST. 4. Normally it is adopting UEFI BIOS that allows Windows® OS to be installed on a HDD Larger Than 2TB This motherboard is an optical drive.) 5. Choose the item...
Installing OS on a large size HDD (>2TB). Set AHCI Mode in UEFI Setup Utility > Advanced > Storage Configuration > SATA Mode. 3. Start Windows® installation. Press F11 to use Windows® VistaTM 64-bit (with SP1 or ...above) or Windows® 7 64-bit. 2. Please make sure to launch boot menu at system POST. 4. Normally it is adopting UEFI BIOS that allows Windows® OS to be installed on a HDD Larger Than 2TB This motherboard is an optical drive.) 5. Choose the item...


