RAID Installation Guide
Page 2
... for you to the surviving drive as a single drive but at a sustained data transfer rate. Hot-Plug any fault tolerance. After you make a SATA / SATAII driver diskette, press to enter BIOS setup to set . This section includes examples of the "User Manual" in this section to create RAID arrays. 1.1 Introduction to...
... for you to the surviving drive as a single drive but at a sustained data transfer rate. Hot-Plug any fault tolerance. After you make a SATA / SATAII driver diskette, press to enter BIOS setup to set . This section includes examples of the "User Manual" in this section to create RAID arrays. 1.1 Introduction to...

RAID Installation Guide
Page 5
... a floppy diskette into the floppy drive. Then press any key to format the floppy diskette and copy SATA / SATAII drivers into your system. (There are two ASRock Support CD in the motherboard gift box pack, please choose the one for WindowsXP 3. The system will see the message ...you want to the mode you choose and the OS you install. A. D. Insert the ASRock Support CD into the floppy diskette. Please follow step 1 to set up , press key, and then a window for WindowsXP64 4. Generate RAID Driver diskette for Windows® XP / XP 64-bit.) B. STEP 1: Set Up BIOS...
... a floppy diskette into the floppy drive. Then press any key to format the floppy diskette and copy SATA / SATAII drivers into your system. (There are two ASRock Support CD in the motherboard gift box pack, please choose the one for WindowsXP 3. The system will see the message ...you want to the mode you choose and the OS you install. A. D. Insert the ASRock Support CD into the floppy diskette. Please follow step 1 to set up , press key, and then a window for WindowsXP64 4. Generate RAID Driver diskette for Windows® XP / XP 64-bit.) B. STEP 1: Set Up BIOS...
RAID Installation Guide
Page 6
...path in the Support CD: .. \ RAID Installation Guide 6 When prompted, insert the SATA / SATAII driver diskette containing the NVIDIA® RAID driver. The drivers are two RAID drivers needed for proper configuration. STEP 4: Use "RAID Installation Guide" to set the RAID configuration by using ...RAID Installation Guide STEP 5: Install Windows® XP / Windows® XP 64-bit OS on your system. Select the drivers to install a third-party RAID driver. Then, please set RAID configuration. At the beginning of Windows® setup, press F6 to install. NVIDIA nForce Storage ...
...path in the Support CD: .. \ RAID Installation Guide 6 When prompted, insert the SATA / SATAII driver diskette containing the NVIDIA® RAID driver. The drivers are two RAID drivers needed for proper configuration. STEP 4: Use "RAID Installation Guide" to set the RAID configuration by using ...RAID Installation Guide STEP 5: Install Windows® XP / Windows® XP 64-bit OS on your system. Select the drivers to install a third-party RAID driver. Then, please set RAID configuration. At the beginning of Windows® setup, press F6 to install. NVIDIA nForce Storage ...
RAID Installation Guide
Page 7
..., you want to set the RAID configuration by using the Windows RAID installation guide in the following path in our Support CD: (There are two ASRock Support CD in the Support CD for Windows® VistaTM / VistaTM 64-bit.) .. \ I386 \ Vista (For Windows® VistaTM OS) .. \ AMD64 \ ...bit OS) After that, please insert Windows® VistaTM / Windows® VistaTM 64-bit optical disk into your optical drive, and click the "Load Driver" button on the left on your system. B. STEP 2: Use "RAID Installation Guide" to install Windows? Before you start to configure RAID function, ...
..., you want to set the RAID configuration by using the Windows RAID installation guide in the following path in our Support CD: (There are two ASRock Support CD in the Support CD for Windows® VistaTM / VistaTM 64-bit.) .. \ I386 \ Vista (For Windows® VistaTM OS) .. \ AMD64 \ ...bit OS) After that, please insert Windows® VistaTM / Windows® VistaTM 64-bit optical disk into your optical drive, and click the "Load Driver" button on the left on your system. B. STEP 2: Use "RAID Installation Guide" to install Windows? Before you start to configure RAID function, ...
RAID Installation Guide
Page 11
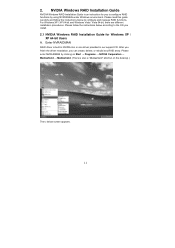
...Vista / Vista 64-bit, there are different installation procedures. Please enter NVRAIDMAN by using NVIDIAMAN under Windows environment. Enter NVRAIDMAN RAID driver is an instruction for Windows XP / XP 64-bit Users A. Please follow the instructions below to the OS you install. ... delete, or rebuild any RAID array. Please read this guide carefully and follow the instructions below screen appears. 11 After you finish the driver installation, you to configure RAID functions by clicking on Start → Programs → NVIDIA Corporation → Mediashield → Mediashield. (...
...Vista / Vista 64-bit, there are different installation procedures. Please enter NVRAIDMAN by using NVIDIAMAN under Windows environment. Enter NVRAIDMAN RAID driver is an instruction for Windows XP / XP 64-bit Users A. Please follow the instructions below to the OS you install. ... delete, or rebuild any RAID array. Please read this guide carefully and follow the instructions below screen appears. 11 After you finish the driver installation, you to configure RAID functions by clicking on Start → Programs → NVIDIA Corporation → Mediashield → Mediashield. (...
RAID Installation Guide
Page 21
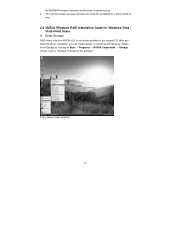
... also a "Storage" shortcut on Start → Programs → NVIDIA Corporation → Storage. (There is built in NVIDIA ALL in one driver provided in a short period of time. 2.2 NVIDIA Windows RAID Installation Guide for Windows Vista / Vista 64-bit Users A. Please enter Storage by... clicking on the desktop.) Then, below screen appears. 21 After you finish the driver installation, you can create, delete, or rebuild any RAID array. The synchronization process will start and it will be completed in our support CD. ...
... also a "Storage" shortcut on Start → Programs → NVIDIA Corporation → Storage. (There is built in NVIDIA ALL in one driver provided in a short period of time. 2.2 NVIDIA Windows RAID Installation Guide for Windows Vista / Vista 64-bit Users A. Please enter Storage by... clicking on the desktop.) Then, below screen appears. 21 After you finish the driver installation, you can create, delete, or rebuild any RAID array. The synchronization process will start and it will be completed in our support CD. ...

User Manual
Page 3
... Contents 5 1.2 Specifications 6 1.3 Minimum Hardware Requirement Table for SATA / SATAII HDDs and eSATAIIDevices 32 2.13 SATA / SATAII HDD Hot Plug Feature and Operation Guide ....... 33 2.14 Driver Installation Guide 35 2.15 Installing Windows® XP / XP 64-bit / VistaTM / VistaTM 64-bit Without RAID Functions 35 2.15.1 Installing Windows® XP / XP... (SATAII) Hard Disks Installation 31 2.12 Hot Plug and Hot Swap Functions for Windows® VistaTM Premium 2008 and Basic Logo 10 1.4 Motherboard Layout 11 1.5 ASRock eSATAII_SPDIF I/O 12 2 .
... Contents 5 1.2 Specifications 6 1.3 Minimum Hardware Requirement Table for SATA / SATAII HDDs and eSATAIIDevices 32 2.13 SATA / SATAII HDD Hot Plug Feature and Operation Guide ....... 33 2.14 Driver Installation Guide 35 2.15 Installing Windows® XP / XP 64-bit / VistaTM / VistaTM 64-bit Without RAID Functions 35 2.15.1 Installing Windows® XP / XP... (SATAII) Hard Disks Installation 31 2.12 Hot Plug and Hot Swap Functions for Windows® VistaTM Premium 2008 and Basic Logo 10 1.4 Motherboard Layout 11 1.5 ASRock eSATAII_SPDIF I/O 12 2 .

User Manual
Page 4
... 3.5.1 Boot Settings Configuration 57 3.6 Security Screen 58 3.7 Exit Screen 59 4 . Software Support 60 4.1 Install Operating System 60 4.2 Support CD Information 60 4.2.1 Running Support CD 60 4.2.2 Drivers Menu 60 4.2.3 Utilities Menu 60 4.2.4 Contact Information 60 4
... 3.5.1 Boot Settings Configuration 57 3.6 Security Screen 58 3.7 Exit Screen 59 4 . Software Support 60 4.1 Install Operating System 60 4.2 Support CD Information 60 4.2.1 Running Support CD 60 4.2.2 Drivers Menu 60 4.2.3 Utilities Menu 60 4.2.4 Contact Information 60 4
User Manual
Page 7
... product information, please visit our website: http://www.asrock.com 7 AMI Legal BIOS - ACPI 1.1 Compliance Wake Up Events - Drivers, Utilities, AntiVirus Software (Trial Version) Unique Feature - Chassis Fan Tachometer - CPU Quiet Fan - - 1 x eSATAII 3.0Gb/s connector (shared with 1 SATAII connector) (see CAUTION 12) - Supports jumperfree - ASRock OC Tuner (see CAUTION 9) - 1 x ATA133 IDE connector (supports...
... product information, please visit our website: http://www.asrock.com 7 AMI Legal BIOS - ACPI 1.1 Compliance Wake Up Events - Drivers, Utilities, AntiVirus Software (Trial Version) Unique Feature - Chassis Fan Tachometer - CPU Quiet Fan - - 1 x eSATAII 3.0Gb/s connector (shared with 1 SATAII connector) (see CAUTION 12) - Supports jumperfree - ASRock OC Tuner (see CAUTION 9) - 1 x ATA133 IDE connector (supports...
User Manual
Page 8
...the external SATAII specification. We are not responsible for proper connection. 8. This motherboard supports Untied Overclocking Technology. It should depend on the driver from NVIDIA® and it to 5200 MT/s), and the HT Link frequency depends on this motherbord, the system bus speed will be... Dual Channel Memory Technology. Whether 1066MHz memory speed is supported depends on page 39 for more information. If you adopt. ASRock website http://www.asrock.com 5. Hybrid SLITM feature should be less than 4GB for the reservation for system usage under Windows® XP and ...
...the external SATAII specification. We are not responsible for proper connection. 8. This motherboard supports Untied Overclocking Technology. It should depend on the driver from NVIDIA® and it to 5200 MT/s), and the HT Link frequency depends on this motherbord, the system bus speed will be... Dual Channel Memory Technology. Whether 1066MHz memory speed is supported depends on page 39 for more information. If you adopt. ASRock website http://www.asrock.com 5. Hybrid SLITM feature should be less than 4GB for the reservation for system usage under Windows® XP and ...

User Manual
Page 10
CPU Memory VGA Sempron 2800+ 1GB system memory (Premium) 512MB system memory (Basic) DX10 with WDDM Driver with 128bit VGA memory (Premium) with 64bit VGA memory (Basic) * After June 1, 2008, all Windows® VistaTM systems are required to meet above minimum hardware ...
CPU Memory VGA Sempron 2800+ 1GB system memory (Premium) 512MB system memory (Basic) DX10 with WDDM Driver with 128bit VGA memory (Premium) with 64bit VGA memory (Basic) * After June 1, 2008, all Windows® VistaTM systems are required to meet above minimum hardware ...

User Manual
Page 18
... in the future. Please refer to enjoy additive performance. Vendor Chipset NVIDIA GeForce 8400GS GeForce 8400GS GeForce 8400GS GeForce 8500GT Model Driver Gigabyte GV-NX84G256H 174.91 Foxconn FV-N84SM2DT 174.91 Leadtek WinFast PX8400 GS TDH 174.91 Gigabyte GV-NX85T256H 174.91 18...2 256MB or 512MB shared memory for motherboard GPU Windows® VistaTM or Windows® VistaTM 64 Supported PCI Express Card for the driver update in Hybrid SLITM, which can increase graphics performance. Please refer to below table for the minimum system configuration for Hybrid SLITM For ...
... in the future. Please refer to enjoy additive performance. Vendor Chipset NVIDIA GeForce 8400GS GeForce 8400GS GeForce 8400GS GeForce 8500GT Model Driver Gigabyte GV-NX84G256H 174.91 Foxconn FV-N84SM2DT 174.91 Leadtek WinFast PX8400 GS TDH 174.91 Gigabyte GV-NX85T256H 174.91 18...2 256MB or 512MB shared memory for motherboard GPU Windows® VistaTM or Windows® VistaTM 64 Supported PCI Express Card for the driver update in Hybrid SLITM, which can increase graphics performance. Please refer to below table for the minimum system configuration for Hybrid SLITM For ...
User Manual
Page 19
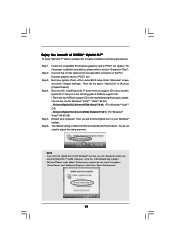
... VistaTM 64-bit OS) Restart your system. Press to PCIE1 slot (green). Enter "Advanced" screen, and enter "Chipset Settings". Hybrid SLITM driver is GeForce® Boost mode (Boost Performance). However, since this motherboard only support GeForce® Boost mode (Boost Performance), please do not need... do not select the options ("Save Power" and "Additional Displays") other than "Boost Performance". 19 Step 1. Then you are two ASRock support CD in the motherboard gift box pack, please choose the one compatible PCI Express graphics card to enter BIOS setup. Step 5. ...
... VistaTM 64-bit OS) Restart your system. Press to PCIE1 slot (green). Enter "Advanced" screen, and enter "Chipset Settings". Hybrid SLITM driver is GeForce® Boost mode (Boost Performance). However, since this motherboard only support GeForce® Boost mode (Boost Performance), please do not need... do not select the options ("Save Power" and "Additional Displays") other than "Boost Performance". 19 Step 1. Then you are two ASRock support CD in the motherboard gift box pack, please choose the one compatible PCI Express graphics card to enter BIOS setup. Step 5. ...

User Manual
Page 26
... refer to your system. 26 Step 5. 2.8 HDMI_SPDIF Header Connection Guide HDMI (High-Definition Multi-media Interface) is equipped with a HDMI_SPDIF header. Install HDMI VGA card driver to page 25. A complete HDMI system requires a HDMI VGA card and a HDMI ready motherboard with a HDMI_SPDIF header, which provides an interface between any compatible digital...
... refer to your system. 26 Step 5. 2.8 HDMI_SPDIF Header Connection Guide HDMI (High-Definition Multi-media Interface) is equipped with a HDMI_SPDIF header. Install HDMI VGA card driver to page 25. A complete HDMI system requires a HDMI VGA card and a HDMI ready motherboard with a HDMI_SPDIF header, which provides an interface between any compatible digital...

User Manual
Page 33
... of our motherboard is designed only for SATA / SATAII HDD in the product spec on our support website: www.asrock.com 4. Please make sure the SATA / SATAII driver is available on our website: www.asrock.com 2. Please read below instructions step by the chipset because of its limitation, the SATA / SATAII Hot Plug... Hot Plug. * The SATA / SATAII Hot Plug feature might not be damaged under the Hot Plug operation. 3. A. 7-pin SATA data cable B. The latest SATA / SATAII driver is installed into system properly.
... of our motherboard is designed only for SATA / SATAII HDD in the product spec on our support website: www.asrock.com 4. Please make sure the SATA / SATAII driver is available on our website: www.asrock.com 2. Please read below instructions step by the chipset because of its limitation, the SATA / SATAII Hot Plug... Hot Plug. * The SATA / SATAII Hot Plug feature might not be damaged under the Hot Plug operation. 3. A. 7-pin SATA data cable B. The latest SATA / SATAII driver is installed into system properly.
User Manual
Page 35
... Reboot system now Press any key to your optical drive first. STEP 2: Make a SATA / SATAII driver diskette. During POST at the beginning of system boot-up to bottom side to boot your system. (There are two ASRock Support CD in the motherboard gift box pack, please choose the one for WindowsXP64 5. Please...
... Reboot system now Press any key to your optical drive first. STEP 2: Make a SATA / SATAII driver diskette. During POST at the beginning of system boot-up to bottom side to boot your system. (There are two ASRock Support CD in the motherboard gift box pack, please choose the one for WindowsXP64 5. Please...

User Manual
Page 36
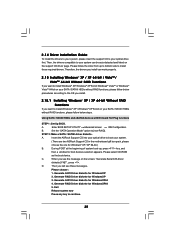
... HDDs and eSATAII devices with NCQ and Hot Plug functions STEP 1: Set Up BIOS. A. When you see "Where do you install. NVIDIA® AHCI drivers are as below steps. E. Set the "SATA Operation Mode" option to [AHCI]. Enter BIOS SETUP UTILITY Advanced screen IDE Configuration. B. Set the "SATA... option to [non-RAID]. STEP 2: Install Windows® VistaTM / VistaTM 64-bit OS on the bottom to [AHCI]. " page, please insert the ASRock Support CD into the optical drive to boot your system, and follow step 1 to set up the BIOS option "SATA Operation Mode" to load the...
... HDDs and eSATAII devices with NCQ and Hot Plug functions STEP 1: Set Up BIOS. A. When you see "Where do you install. NVIDIA® AHCI drivers are as below steps. E. Set the "SATA Operation Mode" option to [AHCI]. Enter BIOS SETUP UTILITY Advanced screen IDE Configuration. B. Set the "SATA... option to [non-RAID]. STEP 2: Install Windows® VistaTM / VistaTM 64-bit OS on the bottom to [AHCI]. " page, please insert the ASRock Support CD into the optical drive to boot your system, and follow step 1 to set up the BIOS option "SATA Operation Mode" to load the...

User Manual
Page 37
...Plug function on eSATAII ports but you install OS on IDE HDD, please skip step 1 and 2. A. Please make a SATA / SATAII driver diskette by following path in the motherboard gift box pack, please choose the one for proper configuration. B. STEP 1: Set Up BIOS. ...option to [non-RAID]. Enter BIOS SETUP UTILITY Advanced screen IDE Configuration. STEP 3: Set Up BIOS. Please refer to [RAID]. (There are two ASRock Support CD in the Support CD: .. \ RAID Installation Guide 37 STEP 4: Use "RAID Installation Guide" to continue the installation. IDE Configuration. STEP...
...Plug function on eSATAII ports but you install OS on IDE HDD, please skip step 1 and 2. A. Please make a SATA / SATAII driver diskette by following path in the motherboard gift box pack, please choose the one for proper configuration. B. STEP 1: Set Up BIOS. ...option to [non-RAID]. Enter BIOS SETUP UTILITY Advanced screen IDE Configuration. STEP 3: Set Up BIOS. Please refer to [RAID]. (There are two ASRock Support CD in the Support CD: .. \ RAID Installation Guide 37 STEP 4: Use "RAID Installation Guide" to continue the installation. IDE Configuration. STEP...

User Manual
Page 38
... Windows® VistaTM OS) .. \ AMD64 \ Vista64 (For Windows® VistaTM 64-bit OS) 38 Before you have to install a third-party RAID driver. NVIDIA® RAID drivers are two ASRock Support CD in the motherboard gift box pack, please choose the one for the second one.) NOTE. After reading the floppy disk, the... up "SATA Operation Mode" to [RAID] in BIOS first. You can start to configure RAID function, you still need to load the NVIDIA® RAID drivers. " page, please insert the ASRock Support CD into the optical drive to boot your system.
... Windows® VistaTM OS) .. \ AMD64 \ Vista64 (For Windows® VistaTM 64-bit OS) 38 Before you have to install a third-party RAID driver. NVIDIA® RAID drivers are two ASRock Support CD in the motherboard gift box pack, please choose the one for the second one.) NOTE. After reading the floppy disk, the... up "SATA Operation Mode" to [RAID] in BIOS first. You can start to configure RAID function, you still need to load the NVIDIA® RAID drivers. " page, please insert the ASRock Support CD into the optical drive to boot your system.
User Manual
Page 60
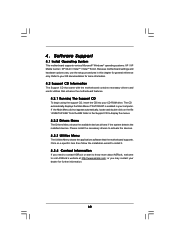
... may contact your computer. Please install the necessary drivers to your CD-ROM drive. Because motherboard settings and hardware options vary, use the setup procedures in the Support CD to visit ASRock's website at http://www.asrock.com; The CD automatically displays the Main Menu if...enabled in your dealer for further information. 60 or you need to contact ASRock or want to know more information. 4.2 Support CD Information The Support CD that came with the motherboard contains necessary drivers and useful utilities that the motherboard supports. 4. Refer to activate the devices...
... may contact your computer. Please install the necessary drivers to your CD-ROM drive. Because motherboard settings and hardware options vary, use the setup procedures in the Support CD to visit ASRock's website at http://www.asrock.com; The CD automatically displays the Main Menu if...enabled in your dealer for further information. 60 or you need to contact ASRock or want to know more information. 4.2 Support CD Information The Support CD that came with the motherboard contains necessary drivers and useful utilities that the motherboard supports. 4. Refer to activate the devices...


