User Manual
Page 5
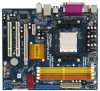
... installation. In this manual will be subject to this manual occur, the updated version will be updated, the content of this manual, chapter 1 and 2 contain introduction of this motherboard, please visit our website for purchasing ASRock ALiveNF7G-GLAN motherboard, a reliable motherboard produced under ASRock's consistently stringent quality control. Introduction Thank you require technical support related to...
... installation. In this manual will be subject to this manual occur, the updated version will be updated, the content of this manual, chapter 1 and 2 contain introduction of this motherboard, please visit our website for purchasing ASRock ALiveNF7G-GLAN motherboard, a reliable motherboard produced under ASRock's consistently stringent quality control. Introduction Thank you require technical support related to...

User Manual
Page 23
... such as system password, date, time, and system setup parameters. To clear and reset the system parameters to clear the CMOS when you just finish updating the BIOS, you must boot up events. Jumper Setting PS2_USB_PW1 1_2 2_3 Short pin2, pin3 to enable (see p.12, No. 15) 1_2 2_3 Default Clear CMOS... to default setup, please turn off the computer and unplug the power cord from the power supply. Note: To select +5VSB, it down before you update the BIOS.
... such as system password, date, time, and system setup parameters. To clear and reset the system parameters to clear the CMOS when you just finish updating the BIOS, you must boot up events. Jumper Setting PS2_USB_PW1 1_2 2_3 Short pin2, pin3 to enable (see p.12, No. 15) 1_2 2_3 Default Clear CMOS... to default setup, please turn off the computer and unplug the power cord from the power supply. Note: To select +5VSB, it down before you update the BIOS.

User Manual
Page 37
... UTILITY when you wish to your system. You may not exactly match what you see on the system chassis. Because the BIOS software is constantly being updated, the following selections: Main To set up the default system device to locate and load the Op- If you start up the system ...time/date information Smart To load the BIOS according to enter the BIOS SETUP UTILITY after POST, restart the system by pressing + + , or by...
... UTILITY when you wish to your system. You may not exactly match what you see on the system chassis. Because the BIOS software is constantly being updated, the following selections: Main To set up the default system device to locate and load the Op- If you start up the system ...time/date information Smart To load the BIOS according to enter the BIOS SETUP UTILITY after POST, restart the system by pressing + + , or by...

User Manual
Page 38
... UTILITY To jump to the Exit Screen or exit the current screen 3.2 Main Screen When you enter the BIOS SETUP UTILITY, the Main screen will appear and display the system overview. Use [+] or [-] to specify the system date. 38 System Date [Day Month/... H/W Monitor Boot Security Exit System Overview System Time System Date [17:00:09] [Mon 02/09/2009] BIOS Version : ALiveNF7G-GLAN P1.0 Processor Type : AMD Phenom(tm) 9750 Quad-Core Processor (64bit) Processor Speed : 2400MHz Microcode Update : 100F23/1000083 L1 Cache Size : 512KB L2 Cache Size : 2048KB L3 Cache Size : 2048KB Total Memory ...
... UTILITY To jump to the Exit Screen or exit the current screen 3.2 Main Screen When you enter the BIOS SETUP UTILITY, the Main screen will appear and display the system overview. Use [+] or [-] to specify the system date. 38 System Date [Day Month/... H/W Monitor Boot Security Exit System Overview System Time System Date [17:00:09] [Mon 02/09/2009] BIOS Version : ALiveNF7G-GLAN P1.0 Processor Type : AMD Phenom(tm) 9750 Quad-Core Processor (64bit) Processor Speed : 2400MHz Microcode Update : 100F23/1000083 L1 Cache Size : 512KB L2 Cache Size : 2048KB L3 Cache Size : 2048KB Total Memory ...
Quick Installation Guide
Page 4
... motherboard specifications and the BIOS software might be updated, the content of the motherboard and step-bystep installation guide. It delivers excellent performance with robust design conforming to ASRock's commitment to this manual will be found in the user manual presented in , 24.4 cm x 20.8 cm) 1 x ASRock ALiveNF7G-GLAN Quick Installation Guide 2 x ASRock ALiveNF7G-GLAN Support CD 1 x Ultra ATA...
... motherboard specifications and the BIOS software might be updated, the content of the motherboard and step-bystep installation guide. It delivers excellent performance with robust design conforming to ASRock's commitment to this manual will be found in the user manual presented in , 24.4 cm x 20.8 cm) 1 x ASRock ALiveNF7G-GLAN Quick Installation Guide 2 x ASRock ALiveNF7G-GLAN Support CD 1 x Ultra ATA...

Quick Installation Guide
Page 19
... a jumper cap to enable (see p.2, No. 15) Default Clear CMOS Note: CLRCMOS1 allows you update the BIOS. However, please do the clear-CMOS action. Short Open Jumper Setting PS2_USB_PW1 Short pin2, pin3 to ...5VSB (standby) for 5 seconds. The data in CMOS. If you need to clear the CMOS when you just finish updating the BIOS, you must boot up events. Note: To select +5VSB, it down before you do not clear the CMOS right ... shows a 3-pin jumper whose pin1 and pin2 are setup. English 19 ASRock ALiveNF7G-GLAN Motherboard When the jumper cap is placed on these 2 pins.
... a jumper cap to enable (see p.2, No. 15) Default Clear CMOS Note: CLRCMOS1 allows you update the BIOS. However, please do the clear-CMOS action. Short Open Jumper Setting PS2_USB_PW1 Short pin2, pin3 to ...5VSB (standby) for 5 seconds. The data in CMOS. If you need to clear the CMOS when you just finish updating the BIOS, you must boot up events. Note: To select +5VSB, it down before you do not clear the CMOS right ... shows a 3-pin jumper whose pin1 and pin2 are setup. English 19 ASRock ALiveNF7G-GLAN Motherboard When the jumper cap is placed on these 2 pins.


