User Manual
Page 6
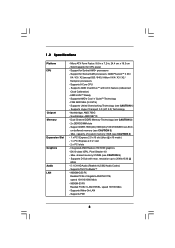
... - shared memory 512MB (see CAUTION 3) - Supports D-Sub with ACC feature (Advanced Clock Calibration) - Supports THX TruStudioTM - 960GM-GS3 FX Realtek PCIE x1 Gigabit LAN RTL8111E, speed 10/100/1000 Mb/s - 960GM-S3 FX Realtek PCIEx1 LAN 8105EL, speed 10/100 Mb/s - Supports Untied Overclocking Technology (see CAUTION 2) - 2 x DDR3 DIMM slots - 1.2 Specifications Platform CPU Chipset Memory Expansion Slot...
... - shared memory 512MB (see CAUTION 3) - Supports D-Sub with ACC feature (Advanced Clock Calibration) - Supports THX TruStudioTM - 960GM-GS3 FX Realtek PCIE x1 Gigabit LAN RTL8111E, speed 10/100/1000 Mb/s - 960GM-S3 FX Realtek PCIEx1 LAN 8105EL, speed 10/100 Mb/s - Supports Untied Overclocking Technology (see CAUTION 2) - 2 x DDR3 DIMM slots - 1.2 Specifications Platform CPU Chipset Memory Expansion Slot...

User Manual
Page 46
... reading or writing more data during each transfer. Make sure to set the PIO mode to select the LBA/Large mode for a hard disk > 512 MB under DOS and Windows; LBA/Large Mode Use this item is [Auto]. PIO Mode Use this item to maximize the IDE hard disk data transfer...
... reading or writing more data during each transfer. Make sure to set the PIO mode to select the LBA/Large mode for a hard disk > 512 MB under DOS and Windows; LBA/Large Mode Use this item is [Auto]. PIO Mode Use this item to maximize the IDE hard disk data transfer...

User Manual
Page 48
... options: [Disabled], [3F8 / IRQ4], [2F8 / IRQ3], [3E8 / IRQ4], [2E8 / IRQ3]. Configuration options: [Disabled], [378], and [278]. 48 BIOS SETUP UTILITY Advanced Floppy Configuration Floppy A [1.44 MB 312"] Select the type of your floppy drive. OnBoard Floppy Controller Use this section, you may configure the type of floppy drive connected to the...
... options: [Disabled], [3F8 / IRQ4], [2F8 / IRQ3], [3E8 / IRQ4], [2E8 / IRQ3]. Configuration options: [Disabled], [378], and [278]. 48 BIOS SETUP UTILITY Advanced Floppy Configuration Floppy A [1.44 MB 312"] Select the type of your floppy drive. OnBoard Floppy Controller Use this section, you may configure the type of floppy drive connected to the...
Quick Installation Guide
Page 6
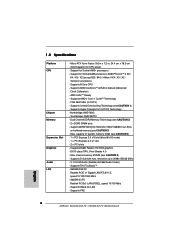
...system memory: 8GB (see CAUTION 3) - Supports AMD's Cool 'n' QuietTM Technology - Max. Supports THX TruStudioTM - 960GM-GS3 FX Realtek PCIE x1 Gigabit LAN RTL8111E, speed 10/100/1000 Mb/s - 960GM-S3 FX Realtek PCIEx1 LAN 8105EL, speed 10/100 Mb/s - 1.2 Specifications Platform CPU Chipset Memory Expansion Slot Graphics Audio LAN - Micro ATX Form Factor: 9.6-in x ...Max. Integrated AMD Radeon HD 3000 graphics - DX10 class iGPU, Pixel Shader 4.0 - Supports D-Sub with ACC feature (Advanced Clock Calibration) - Supports PXE English 6 ASRock 960GM-GS3 FX / 960GM-S3 FX Motherboard
...system memory: 8GB (see CAUTION 3) - Supports AMD's Cool 'n' QuietTM Technology - Max. Supports THX TruStudioTM - 960GM-GS3 FX Realtek PCIE x1 Gigabit LAN RTL8111E, speed 10/100/1000 Mb/s - 960GM-S3 FX Realtek PCIEx1 LAN 8105EL, speed 10/100 Mb/s - 1.2 Specifications Platform CPU Chipset Memory Expansion Slot Graphics Audio LAN - Micro ATX Form Factor: 9.6-in x ...Max. Integrated AMD Radeon HD 3000 graphics - DX10 class iGPU, Pixel Shader 4.0 - Supports D-Sub with ACC feature (Advanced Clock Calibration) - Supports PXE English 6 ASRock 960GM-GS3 FX / 960GM-S3 FX Motherboard

RAID Installation Guide
Page 8
following the detailed instruction of the disk drives to the first logical drive. Enter the desired capacity (MB) for the first logical drive and press . Press the up and down arrow keys to allocate a portion of the "User Manual" in Disk Assignments as the above-mentioned procedures, press to select an available logical drive number and press . 8 Two Logical Drives After selecting the logical drive in our support CD or "Quick Installation Guide". The Define LD Menu displays again. 2. Then please follow the steps below. 1.
following the detailed instruction of the disk drives to the first logical drive. Enter the desired capacity (MB) for the first logical drive and press . Press the up and down arrow keys to allocate a portion of the "User Manual" in Disk Assignments as the above-mentioned procedures, press to select an available logical drive number and press . 8 Two Logical Drives After selecting the logical drive in our support CD or "Quick Installation Guide". The Define LD Menu displays again. 2. Then please follow the steps below. 1.


