RAID Installation Guide
Page 2
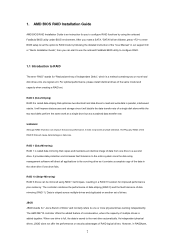
... RAID functions by following the detailed instruction of Independent Disks", which is added together. WARNING!! However, in parallel, interleaved stacks. After you make a SATA / SATAII driver diskette, press to enter BIOS setup to set the option to RAID mode by using RAID 1 techniques, resulting in a RAID 10 solution for "Redundant Array...
... RAID functions by following the detailed instruction of Independent Disks", which is added together. WARNING!! However, in parallel, interleaved stacks. After you make a SATA / SATAII driver diskette, press to enter BIOS setup to set the option to RAID mode by using RAID 1 techniques, resulting in a RAID 10 solution for "Redundant Array...
RAID Installation Guide
Page 4
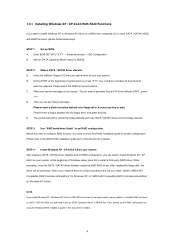
...[RAID] first. Please refer to the BIOS RAID installation guide part in this document for details. 4 After reading the floppy disk, the driver will start Please insert a floppy diskette into the floppy drive, and press any key. Then, please set RAID configuration, you still need...bit on a RAID disk composed of Windows setup, press F6 to install a third-party RAID driver. Insert the ASRock Support CD into the floppy diskette. After making a SATA / SATAII driver diskette and set the RAID configuration by using the Windows RAID installation guide in this RAID installation ...
...[RAID] first. Please refer to the BIOS RAID installation guide part in this document for details. 4 After reading the floppy disk, the driver will start Please insert a floppy diskette into the floppy drive, and press any key. Then, please set RAID configuration, you still need...bit on a RAID disk composed of Windows setup, press F6 to install a third-party RAID driver. Insert the ASRock Support CD into the floppy diskette. After making a SATA / SATAII driver diskette and set the RAID configuration by using the Windows RAID installation guide in this RAID installation ...
RAID Installation Guide
Page 5
page, please insert the ASRock Support CD into your system. If this document for details. STEP 1: Set up "SATA Operation Mode" to [RAID] first. Enter BIOS SETUP UTILITY → Advanced ... to manage (create, convert, delete, or rebuild) RAID functions on SATA / SATAII HDDs, you still need to check this document for proper configuration. AMD RAID drivers are no SATA / SATAII device used, please set RAID configuration. NOTE1. Please refer to the BIOS RAID installation guide part in this is the first...
page, please insert the ASRock Support CD into your system. If this document for details. STEP 1: Set up "SATA Operation Mode" to [RAID] first. Enter BIOS SETUP UTILITY → Advanced ... to manage (create, convert, delete, or rebuild) RAID functions on SATA / SATAII HDDs, you still need to check this document for proper configuration. AMD RAID drivers are no SATA / SATAII device used, please set RAID configuration. NOTE1. Please refer to the BIOS RAID installation guide part in this is the first...

User Manual
Page 3
... 28 2.11 Hot Plug and Hot Swap Functions for SATA / SATAII HDDs .... 28 2.12 SATA / SATAII HDD Hot Plug Feature and Operation Guide ..... 29 2.13 Driver Installation Guide 31 2.14 Installing Windows® 7 / 7 64-bit / VistaTM / VistaTM 64-bit / XP / XP 64-bit With RAID Functions 31 2.14.1... Windows® 7 / 7 64-bit / VistaTM / VistaTM 64-bit Without RAID Functions 34 2.16 Untied Overclocking Technology 35 3 Introduction 5 1.1 Package Contents 5 1.2 Specifications 6 1.3 Motherboard Layout (785GM-GS3 / 785GM-S3 11 1.4 I/O Panel (785GM-GS3 12 1.5 I/O Panel (785GM-S3 13 2 .
... 28 2.11 Hot Plug and Hot Swap Functions for SATA / SATAII HDDs .... 28 2.12 SATA / SATAII HDD Hot Plug Feature and Operation Guide ..... 29 2.13 Driver Installation Guide 31 2.14 Installing Windows® 7 / 7 64-bit / VistaTM / VistaTM 64-bit / XP / XP 64-bit With RAID Functions 31 2.14.1... Windows® 7 / 7 64-bit / VistaTM / VistaTM 64-bit Without RAID Functions 34 2.16 Untied Overclocking Technology 35 3 Introduction 5 1.1 Package Contents 5 1.2 Specifications 6 1.3 Motherboard Layout (785GM-GS3 / 785GM-S3 11 1.4 I/O Panel (785GM-GS3 12 1.5 I/O Panel (785GM-S3 13 2 .

User Manual
Page 4
Software Support 60 4.1 Install Operating System 60 4.2 Support CD Information 60 4.2.1 Running Support CD 60 4.2.2 Drivers Menu 60 4.2.3 Utilities Menu 60 4.2.4 Contact Information 60 4 BIOS SETUP UTILITY 36 3.1 Introduction 36 3.1.1 BIOS Menu Bar 36 3.1.2 Navigation Keys 37 3.2 Main Screen 37 3.3 OC ...
Software Support 60 4.1 Install Operating System 60 4.2 Support CD Information 60 4.2.1 Running Support CD 60 4.2.2 Drivers Menu 60 4.2.3 Utilities Menu 60 4.2.4 Contact Information 60 4 BIOS SETUP UTILITY 36 3.1 Introduction 36 3.1.1 BIOS Menu Bar 36 3.1.2 Navigation Keys 37 3.2 Main Screen 37 3.3 OC ...

User Manual
Page 7
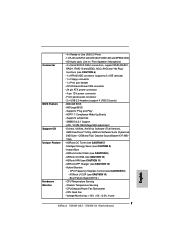
...power connector - ACPI 1.1 Compliance Wake Up Events - SMBIOS 2.3.1 Support - Intelligent Energy Saver (see CAUTION 10) - ASRock OC DNA (see CAUTION 8) - ASRock U-COP (see CAUTION 7) - Boot Failure Guard (B.F.G.) - Chassis Temperature Sensing - Front panel audio connector - 2 x... Booster: - Voltage Monitoring: +12V, +5V, +3.3V, Vcore 7 Drivers, Utilities, AntiVirus Software (Trial Version), AMD OverDriveTM Utility, ASRock Software Suite (CyberLink DVD Suite - Creative Sound Blaster X-Fi MB Trial) - ASRock APP Charger (see CAUTION 6) - 1 x ATA133 IDE connector (supports ...
...power connector - ACPI 1.1 Compliance Wake Up Events - SMBIOS 2.3.1 Support - Intelligent Energy Saver (see CAUTION 10) - ASRock OC DNA (see CAUTION 8) - ASRock U-COP (see CAUTION 7) - Boot Failure Guard (B.F.G.) - Chassis Temperature Sensing - Front panel audio connector - 2 x... Booster: - Voltage Monitoring: +12V, +5V, +3.3V, Vcore 7 Drivers, Utilities, AntiVirus Software (Trial Version), AMD OverDriveTM Utility, ASRock Software Suite (CyberLink DVD Suite - Creative Sound Blaster X-Fi MB Trial) - ASRock APP Charger (see CAUTION 6) - 1 x ATA133 IDE connector (supports ...

User Manual
Page 10
...power supply must meet EuP standard, an EuP ready motherboard and an EuP ready power supply are required. 12. According to RAM (S3), hibernation mode (S4) or power off mode condition. For EuP ready power supply selection, we recommend you checking with the power supply...may cause the instability of charging your Apple devices, such as iPhone/iPod/iPad Touch, ASRock has prepared a wonderful solution for more details. 10 ASRock APP Charger. With APP Charger driver installed, you install the PC system. 15. ASRock website: http://www.asrock.com/Feature/AppCharger/index.asp 13.
...power supply must meet EuP standard, an EuP ready motherboard and an EuP ready power supply are required. 12. According to RAM (S3), hibernation mode (S4) or power off mode condition. For EuP ready power supply selection, we recommend you checking with the power supply...may cause the instability of charging your Apple devices, such as iPhone/iPod/iPad Touch, ASRock has prepared a wonderful solution for more details. 10 ASRock APP Charger. With APP Charger driver installed, you install the PC system. 15. ASRock website: http://www.asrock.com/Feature/AppCharger/index.asp 13.

User Manual
Page 18
... your card, one monitor will always be Primary, and all additional monitors will disable VGA function when the add-on PCI Express VGA card driver to be designated as Secondary. Right-click the display icon in the Display Properties dialog that the value you use multiple monitors with your system...default value of the add-on PCI Express VGA cards on the I/O panel. A. If you have installed the drivers already, there is inserted to install them again. 5. Install the onboard VGA driver and the add-on VGA card is no need to this monitor". 18 With the internal VGA output support...
... your card, one monitor will always be Primary, and all additional monitors will disable VGA function when the add-on PCI Express VGA card driver to be designated as Secondary. Right-click the display icon in the Display Properties dialog that the value you use multiple monitors with your system...default value of the add-on PCI Express VGA cards on the I/O panel. A. If you have installed the drivers already, there is inserted to install them again. 5. Install the onboard VGA driver and the add-on VGA card is no need to this monitor". 18 With the internal VGA output support...
User Manual
Page 20
...screen, and enter "Chipset Settings". Then set the option "Surround View" to section "Expansion Slots". Step 4. Please remove the ATITM driver if you will find "ATI Catalyst Control Center" on PCIE2 slot. ATI Catalyst Control Center 20 Please refer to the correspondent connector on... supported with Windows® XP OS. Please visit our website for blisteringly-fast frame rates. Step 2. Step 5. Vendor Chipset Model Driver ATI RADEON X2400PRO MSI RX2400 PRO-TD256EH Catalyst 9.12 RADEON HD2400XT * POWERCOLOR HD2400 XT Catalyst 9.12 256MB DDR3 RADEON HD3450 POWERCOLOR AX3450...
...screen, and enter "Chipset Settings". Then set the option "Surround View" to section "Expansion Slots". Step 4. Please remove the ATITM driver if you will find "ATI Catalyst Control Center" on PCIE2 slot. ATI Catalyst Control Center 20 Please refer to the correspondent connector on... supported with Windows® XP OS. Please visit our website for blisteringly-fast frame rates. Step 2. Step 5. Vendor Chipset Model Driver ATI RADEON X2400PRO MSI RX2400 PRO-TD256EH Catalyst 9.12 RADEON HD2400XT * POWERCOLOR HD2400 XT Catalyst 9.12 256MB DDR3 RADEON HD3450 POWERCOLOR AX3450...

User Manual
Page 29
..., which cannot support Hot Plug function, will cause the HDD damage and data loss. Please make sure the SATA / SATAII driver is available on our website: www.asrock.com 2. Make sure to power supply Caution 1. Please read below operation guide of attention, before you process the SATA / ...because of its limitation, the SATA / SATAII Hot Plug support information of HDD crash or data loss. 29 The latest SATA / SATAII driver is installed into system properly. 2.12 SATA / SATAII HDD Hot Plug Feature and Operation Guide This motherboard supports Hot Plug feature for our ...
..., which cannot support Hot Plug function, will cause the HDD damage and data loss. Please make sure the SATA / SATAII driver is available on our website: www.asrock.com 2. Make sure to power supply Caution 1. Please read below operation guide of attention, before you process the SATA / ...because of its limitation, the SATA / SATAII Hot Plug support information of HDD crash or data loss. 29 The latest SATA / SATAII driver is installed into system properly. 2.12 SATA / SATAII HDD Hot Plug Feature and Operation Guide This motherboard supports Hot Plug feature for our ...

User Manual
Page 31
... the "SATA Operation Mode" option to format the floppy diskette and copy SATA / SATAII drivers into your optical drive to boot your optical drive first. E. B. Insert the ASRock Support CD into the floppy diskette. 31 Then you want to install Windows® 7 / 7 64-bit / VistaTM / VistaTM 64-bit /... or more SATA / SATAII HDDs with RAID functions, please follow the order from up BIOS. A. B. ROM as the boot device. 2.13 Driver Installation Guide To install the drivers to your system, please insert the support CD to your system. Please follow below steps. Therefore, the...
... the "SATA Operation Mode" option to format the floppy diskette and copy SATA / SATAII drivers into your optical drive to boot your optical drive first. E. B. Insert the ASRock Support CD into the floppy diskette. 31 Then you want to install Windows® 7 / 7 64-bit / VistaTM / VistaTM 64-bit /... or more SATA / SATAII HDDs with RAID functions, please follow the order from up BIOS. A. B. ROM as the boot device. 2.13 Driver Installation Guide To install the drivers to your system, please insert the support CD to your system. Please follow below steps. Therefore, the...
User Manual
Page 32
... set RAID configuration. Enter BIOS SETUP UTILITY Advanced screen Storage Configuration. STEP 2: Use "RAID Installation Guide" to install a third-party RAID driver. Please refer to install Windows® 7 / 7 64-bit / VistaTM / VistaTM 64-bit on your system. After reading the floppy disk, the.../ XP 64-bit OS on your system. Please refer to check the RAID installation guide in the Support CD for proper configuration. Select the driver to install according to the OS you can start to configure RAID function, you want to manage (create, convert, delete, or rebuild) RAID...
... set RAID configuration. Enter BIOS SETUP UTILITY Advanced screen Storage Configuration. STEP 2: Use "RAID Installation Guide" to install a third-party RAID driver. Please refer to install Windows® 7 / 7 64-bit / VistaTM / VistaTM 64-bit on your system. After reading the floppy disk, the.../ XP 64-bit OS on your system. Please refer to check the RAID installation guide in the Support CD for proper configuration. Select the driver to install according to the OS you can start to configure RAID function, you want to manage (create, convert, delete, or rebuild) RAID...

User Manual
Page 33
...At the beginning of Windows® setup, press F6 to [AHCI]. NOTE1. B. Set the "SATA Operation Mode" option to install a third-party AHCI driver. Select the driver to install according to the OS you still need to set up "SATA Operation Mode" to [IDE] in BIOS. 2.15 Installing Windows® 7 ... SATAII HDDs with NCQ and Hot Plug functions (AHCI mode) STEP 1: Set Up BIOS. When prompted, insert the SATA / SATAII driver diskette containing the AMD AHCI driver. If you want to install Windows® XP / XP 64-bit OS on SATA / SATAII HDDs, you install. (Select "AMD...
...At the beginning of Windows® setup, press F6 to [AHCI]. NOTE1. B. Set the "SATA Operation Mode" option to install a third-party AHCI driver. Select the driver to install according to the OS you still need to set up "SATA Operation Mode" to [IDE] in BIOS. 2.15 Installing Windows® 7 ... SATAII HDDs with NCQ and Hot Plug functions (AHCI mode) STEP 1: Set Up BIOS. When prompted, insert the SATA / SATAII driver diskette containing the AMD AHCI driver. If you want to install Windows® XP / XP 64-bit OS on SATA / SATAII HDDs, you install. (Select "AMD...
User Manual
Page 60
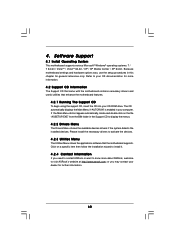
...settings and hardware options vary, use the setup procedures in this chapter for more about ASRock, welcome to display the menus. 4.2.2 Drivers Menu The Drivers Menu shows the available devices drivers if the system detects the installed devices. Software Support 4.1 Install Operating System This motherboard ... CD automatically displays the Main Menu if "AUTORUN" is enabled in the Support CD to visit ASRock's website at http://www.asrock.com; 4. Please install the necessary drivers to your dealer for further information. 60 Refer to activate the devices. 4.2.3 Utilities Menu The ...
...settings and hardware options vary, use the setup procedures in this chapter for more about ASRock, welcome to display the menus. 4.2.2 Drivers Menu The Drivers Menu shows the available devices drivers if the system detects the installed devices. Software Support 4.1 Install Operating System This motherboard ... CD automatically displays the Main Menu if "AUTORUN" is enabled in the Support CD to visit ASRock's website at http://www.asrock.com; 4. Please install the necessary drivers to your dealer for further information. 60 Refer to activate the devices. 4.2.3 Utilities Menu The ...
Quick Installation Guide
Page 7
...power connector - 4 pin 12V power connector - Intelligent Energy Saver (see CAUTION 11) - ASRock AIWI (see CAUTION 8) - Voltage Monitoring: +12V, +5V, +3.3V, Vcore English 7 ASRock 785GM-GS3 / 785GM-S3 Motherboard Front panel audio connector - 2 x USB 2.0 headers (support 4 USB 2.0 ports...- CPU, VCCM, NB Voltage Multi-adjustment - Drivers, Utilities, AntiVirus Software (Trial Version), AMD OverDriveTM Utility, ASRock Software Suite (CyberLink DVD Suite - ASRock Instant Flash (see CAUTION 10) - ASRock OC DNA (see CAUTION 9) - ASRock U-COP (see CAUTION 14) - Boot Failure ...
...power connector - 4 pin 12V power connector - Intelligent Energy Saver (see CAUTION 11) - ASRock AIWI (see CAUTION 8) - Voltage Monitoring: +12V, +5V, +3.3V, Vcore English 7 ASRock 785GM-GS3 / 785GM-S3 Motherboard Front panel audio connector - 2 x USB 2.0 headers (support 4 USB 2.0 ports...- CPU, VCCM, NB Voltage Multi-adjustment - Drivers, Utilities, AntiVirus Software (Trial Version), AMD OverDriveTM Utility, ASRock Software Suite (CyberLink DVD Suite - ASRock Instant Flash (see CAUTION 10) - ASRock OC DNA (see CAUTION 9) - ASRock U-COP (see CAUTION 14) - Boot Failure ...
Quick Installation Guide
Page 10
... the total AC power of charging your Apple devices, such as iPhone/iPod/iPad Touch, ASRock has prepared a wonderful solution for the completed system. Simply installing the APP Charger driver, it makes your iPhone charged much quickly from your PC enters into Standby mode (S1), ... power efficiency is detected, the system will automatically shutdown. With APP Charger driver installed, you install the PC system. 15. Frequencies other than before. EuP, stands for more details. 10 ASRock 785GM-GS3 / 785GM-S3 Motherboard English To meet the standard of the system or damage the CPU....
... the total AC power of charging your Apple devices, such as iPhone/iPod/iPad Touch, ASRock has prepared a wonderful solution for the completed system. Simply installing the APP Charger driver, it makes your iPhone charged much quickly from your PC enters into Standby mode (S1), ... power efficiency is detected, the system will automatically shutdown. With APP Charger driver installed, you install the PC system. 15. Frequencies other than before. EuP, stands for more details. 10 ASRock 785GM-GS3 / 785GM-S3 Motherboard English To meet the standard of the system or damage the CPU....
Quick Installation Guide
Page 15
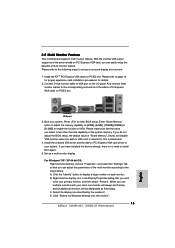
...again. 5. Set up a surround display environment: 1. Right-click the display icon in the Display Properties dialog that you have installed the drivers already, there is no need to be designated as Secondary. Install the ATITM PCI Express VGA cards on the I/O panel. And connect ... the following steps to this monitor". 15 ASRock 785GM-GS3 / 785GM-S3 Motherboard English C. VGA port 3. D. Boot your card, one monitor will always be Primary, and all additional monitors will disable VGA function when the add-on PCI Express VGA card driver to enable the function of the add-on...
...again. 5. Set up a surround display environment: 1. Right-click the display icon in the Display Properties dialog that you have installed the drivers already, there is no need to be designated as Secondary. Install the ATITM PCI Express VGA cards on the I/O panel. And connect ... the following steps to this monitor". 15 ASRock 785GM-GS3 / 785GM-S3 Motherboard English C. VGA port 3. D. Boot your card, one monitor will always be Primary, and all additional monitors will disable VGA function when the add-on PCI Express VGA card driver to enable the function of the add-on...
Quick Installation Guide
Page 17
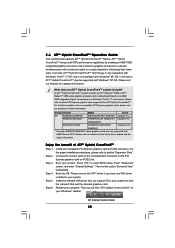
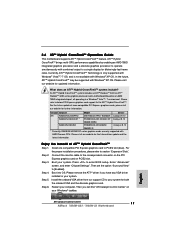
...on your system for the future driver update and the latest information. Step 6. Restart your system. Please visit our website for ATITM Hybrid CrossFireXTM. Step 2. English ATI Catalyst Control Center 17 ASRock 785GM-GS3 / 785GM-S3 Motherboard ATITM Hybrid CrossFireXTM brings multi...discrete graphics card. What does an ATITM Hybrid CrossFireXTM system include? Press to [Enabled]. Step 5. Install the onboard VGA driver from our support CD to a single display for further information. Currently, ATITM Hybrid CrossFireXTM Technology is only supported with Windows...
...on your system for the future driver update and the latest information. Step 6. Restart your system. Please visit our website for ATITM Hybrid CrossFireXTM. Step 2. English ATI Catalyst Control Center 17 ASRock 785GM-GS3 / 785GM-S3 Motherboard ATITM Hybrid CrossFireXTM brings multi...discrete graphics card. What does an ATITM Hybrid CrossFireXTM system include? Press to [Enabled]. Step 5. Install the onboard VGA driver from our support CD to a single display for further information. Currently, ATITM Hybrid CrossFireXTM Technology is only supported with Windows...
Quick Installation Guide
Page 23
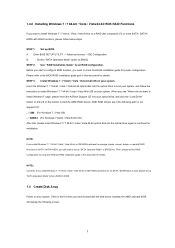
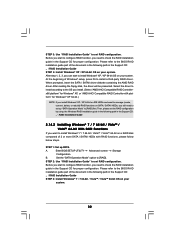
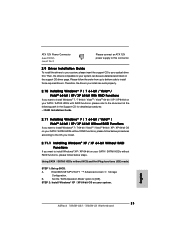
... install can be auto-detected and listed on the support CD driver page. A. B. Please follow the order from up BIOS. Enter BIOS SETUP UTILITY Advanced screen Storage Configuration. English 23 ASRock 785GM-GS3 / 785GM-S3 Motherboard Using SATA / SATAII HDDs without NCQ and Hot Plug functions (IDE mode... / 7 64-bit / VistaTM / VistaTM 64-bit / XP / XP 64-bit Without RAID Functions If you want to install those required drivers. Set the "SATA Operation Mode" option to your SATA / SATAII HDDs without RAID functions, please follow below procedures according to the OS you install...
... install can be auto-detected and listed on the support CD driver page. A. B. Please follow the order from up BIOS. Enter BIOS SETUP UTILITY Advanced screen Storage Configuration. English 23 ASRock 785GM-GS3 / 785GM-S3 Motherboard Using SATA / SATAII HDDs without NCQ and Hot Plug functions (IDE mode... / 7 64-bit / VistaTM / VistaTM 64-bit / XP / XP 64-bit Without RAID Functions If you want to install those required drivers. Set the "SATA Operation Mode" option to your SATA / SATAII HDDs without RAID functions, please follow below procedures according to the OS you install...
Quick Installation Guide
Page 25
3. otherwise, POST continues with the motherboard contains necessary drivers and useful utilities that came with its various sub-menus and to be user-friendly. If you wish to enter BIOS Setup utility; Software Support ... begin using the Support CD, insert the CD into your computer. For the detailed information about BIOS Setup, please refer to display the menus. 25 ASRock 785GM-GS3 / 785GM-S3 Motherboard English
3. otherwise, POST continues with the motherboard contains necessary drivers and useful utilities that came with its various sub-menus and to be user-friendly. If you wish to enter BIOS Setup utility; Software Support ... begin using the Support CD, insert the CD into your computer. For the detailed information about BIOS Setup, please refer to display the menus. 25 ASRock 785GM-GS3 / 785GM-S3 Motherboard English


