
Operating Instructions
Page 7
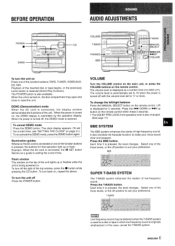
...is overridden by the operation display. Select one c)f the three levels, or the off Press the POWER button VOLUME Turn the VOLUME control on the main unit, or press the VOLUME buttons on the remote control. ENGLISH 6 Tci cancel DEMO mode Press i,he DEMO button. Illumination guides Whenewr ... received (Direct Play Function). Each time it is restored. Press the 1+4 DOWN or FDI up or flash. Press the BBE button. The volume level is pressed, the level changes. Each time it is displayed as a guide to reset the unit. BEFORE OPERATION AUDIO ADJUSTMENTS CD DEMO ...
...is overridden by the operation display. Select one c)f the three levels, or the off Press the POWER button VOLUME Turn the VOLUME control on the main unit, or press the VOLUME buttons on the remote control. ENGLISH 6 Tci cancel DEMO mode Press i,he DEMO button. Illumination guides Whenewr ... received (Direct Play Function). Each time it is restored. Press the 1+4 DOWN or FDI up or flash. Press the BBE button. The volume level is pressed, the level changes. Each time it is displayed as a guide to reset the unit. BEFORE OPERATION AUDIO ADJUSTMENTS CD DEMO ...

Operating Instructions
Page 8
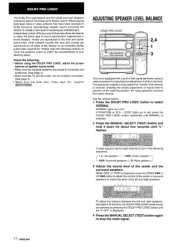
... The DSP (Digital Signal Processor) surround system can also be freely varied without affecting the level of sound presence. Sound adjustment during recording The output volume and tone (except BBE) of the speakers or headphones may be selected or turned off to match the SURROUND modes and can recreate the effect... SYSTEM GEQ f-- ( SURROUND --=====+ a 0"- - The GEQ mode is also changed . - CLASSIC- The SURROUND mode is turned on the remote control within these 2 seconds. To adjust the volume of the GEQ buttons. ac2c2c2 > .-.
... The DSP (Digital Signal Processor) surround system can also be freely varied without affecting the level of sound presence. Sound adjustment during recording The output volume and tone (except BBE) of the speakers or headphones may be selected or turned off to match the SURROUND modes and can recreate the effect... SYSTEM GEQ f-- ( SURROUND --=====+ a 0"- - The GEQ mode is also changed . - CLASSIC- The SURROUND mode is turned on the remote control within these 2 seconds. To adjust the volume of the GEQ buttons. ac2c2c2 > .-.
Operating Instructions
Page 18
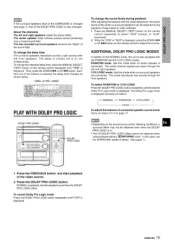
... !? ~-..'- NORMAL lights up in red, press the DOLBY PRO LOGIC button repeatedly until NORMAL is displayed, press the DOWN M or UP M button to adjust the volume of the center or surround speakers to enjoy the same type of audio/visual entertainment. ADJUSTING SPEAKER LEVEL BALANCE DOLBY PRO LOGIC J-:"ft Duo-- The...
... !? ~-..'- NORMAL lights up in red, press the DOLBY PRO LOGIC button repeatedly until NORMAL is displayed, press the DOWN M or UP M button to adjust the volume of the center or surround speakers to enjoy the same type of audio/visual entertainment. ADJUSTING SPEAKER LEVEL BALANCE DOLBY PRO LOGIC J-:"ft Duo-- The...
Operating Instructions
Page 19
If the surround speakers level of the SURROUND is changed . To chi~nge the delay time The surround speakers reproduce sounds a split second after the front speakers, The delay is initially set to select "CEN" (center) or "SLJF?" (surround). 2 While the "CEN" or "SUR is displayed, press the DOWN 11 About the channels The left and right speakers create the stereo effect. Then, press the DOWN K or UP W button. The center speaker helps achieve precise sound positioning over a broad sound field. The rear-mounted surround speakers enhance the "depth" of the DOLBY PRO LOGIC is displayed....
If the surround speakers level of the SURROUND is changed . To chi~nge the delay time The surround speakers reproduce sounds a split second after the front speakers, The delay is initially set to select "CEN" (center) or "SLJF?" (surround). 2 While the "CEN" or "SUR is displayed, press the DOWN 11 About the channels The left and right speakers create the stereo effect. Then, press the DOWN K or UP W button. The center speaker helps achieve precise sound positioning over a broad sound field. The rear-mounted surround speakers enhance the "depth" of the DOLBY PRO LOGIC is displayed....
Operating Instructions
Page 20
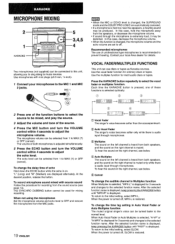
... Auto Multiplex The sound on the left channel is heard from both microphones is adjusted simultaneously. 5 Press the ECHO button and turn the VOLUME control within 4 seconds to select the vocal fader or multiplex function. To change the time lag setting in Multiplex function When Multiplex is ... function for mixing recording. To return to music sources. To record microphone sound mixed with mini plugs (03.5 mm, 1/8inch). 1 Connect your local Aiwa dealer for recording from 1 to the MIC 1 and MIC 2 jacks. q If a microphone is extremely loud, it may be produced. Contact your...
... Auto Multiplex The sound on the left channel is heard from both microphones is adjusted simultaneously. 5 Press the ECHO button and turn the VOLUME control within 4 seconds to select the vocal fader or multiplex function. To change the time lag setting in Multiplex function When Multiplex is ... function for mixing recording. To return to music sources. To record microphone sound mixed with mini plugs (03.5 mm, 1/8inch). 1 Connect your local Aiwa dealer for recording from 1 to the MIC 1 and MIC 2 jacks. q If a microphone is extremely loud, it may be produced. Contact your...
Operating Instructions
Page 23
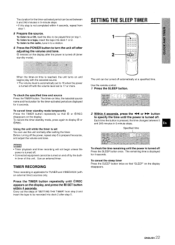
O remains on and begins play with the selected source. * The volume level is automatically set You can use the unit normally after step 5. To... (timer 2 starldby mode), When the timer-on time is reached, the unit turns on the display after adjusting the volume and tone. m Specified time To check the time remaining until the power is pressed, the time changes between 5 ancl... for the timer-activated period are displayed for TUNER and VI DEO/AUX (with the volume level set between 5 and 240 minutes in to a station. 6 Press the POWER button to prepare the source, ...
O remains on and begins play with the selected source. * The volume level is automatically set You can use the unit normally after step 5. To... (timer 2 starldby mode), When the timer-on time is reached, the unit turns on the display after adjusting the volume and tone. m Specified time To check the time remaining until the power is pressed, the time changes between 5 ancl... for the timer-activated period are displayed for TUNER and VI DEO/AUX (with the volume level set between 5 and 240 minutes in to a station. 6 Press the POWER button to prepare the source, ...
Operating Instructions
Page 80
...SURROUND (DISCO, LIVE, HALL 7 SYNC DUB 14 TAPE/DECK l/2 11, 13 T-BASS 6 TIMER 2l TUNER/BAND 8 M, M UP 8, 9, 11 VIDEO/AUX 23 voLuME 6 O-9, +10 8, 9 For assistance and information C~// ~0// fll?e l-80&6ukA/wA Printed in alphabetical order. Las partes se indican en orden alfabetico. The parts ...are indicated on the main unit or remote control are listed in Japan (United States and Puerto Rico) AIWA C0.7LTD. Les parties sent indiquees clans I 'appareil principal ou de la telecommande, se reporter aux pages indiquees. PARTS INDEX...
...SURROUND (DISCO, LIVE, HALL 7 SYNC DUB 14 TAPE/DECK l/2 11, 13 T-BASS 6 TIMER 2l TUNER/BAND 8 M, M UP 8, 9, 11 VIDEO/AUX 23 voLuME 6 O-9, +10 8, 9 For assistance and information C~// ~0// fll?e l-80&6ukA/wA Printed in alphabetical order. Las partes se indican en orden alfabetico. The parts ...are indicated on the main unit or remote control are listed in Japan (United States and Puerto Rico) AIWA C0.7LTD. Les parties sent indiquees clans I 'appareil principal ou de la telecommande, se reporter aux pages indiquees. PARTS INDEX...
