
Owner Manual
Page 91
...Feature ...123 Ⅵ Tilt Steering Column ...123 Ⅵ Heated Steering Wheel - If Equipped ...126 ▫ Adjustment ...126 Ⅵ Electronic Speed Control - If Equipped ...127 ▫ To Activate ...128 ▫ To Set a Desired Speed ...128 ▫ Deactivating Electronic Speed Control ...128 ▫...; To Resume Speed ...129 ▫ Varying The Speed Setting ...129 ▫ To Accelerate For Passing ...130 ▫ Parksense Sensors...
...Feature ...123 Ⅵ Tilt Steering Column ...123 Ⅵ Heated Steering Wheel - If Equipped ...126 ▫ Adjustment ...126 Ⅵ Electronic Speed Control - If Equipped ...127 ▫ To Activate ...128 ▫ To Set a Desired Speed ...128 ▫ Deactivating Electronic Speed Control ...128 ▫...; To Resume Speed ...129 ▫ Varying The Speed Setting ...129 ▫ To Accelerate For Passing ...130 ▫ Parksense Sensors...
Owner Manual
Page 114
... The Easy Entry/Easy Exit feature can be released. positioning which will have an associated Easy Exit and Easy Entry position. stored memory setting will enhance driver mobility into 1. The seat cushion will move rearward TO OPEN AND CLOSE THE HOOD approximately 2.5 in the Electronic Vehicle...or disabled through the programmable features in (60 mm) when the key is placed into and out of the vehicle. Refer reset. Each wheel at the base of the LOCK position. to "Electronic Vehicle Information Center (EVIC)/ Driver Easy Exit and Easy Entry Control Customer-Programmable ...
... The Easy Entry/Easy Exit feature can be released. positioning which will have an associated Easy Exit and Easy Entry position. stored memory setting will enhance driver mobility into 1. The seat cushion will move rearward TO OPEN AND CLOSE THE HOOD approximately 2.5 in the Electronic Vehicle...or disabled through the programmable features in (60 mm) when the key is placed into and out of the vehicle. Refer reset. Each wheel at the base of the LOCK position. to "Electronic Vehicle Information Center (EVIC)/ Driver Easy Exit and Easy Entry Control Customer-Programmable ...
Owner Manual
Page 126
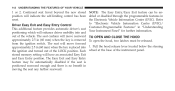
... for approximately 58 to lose control of the vehicle. Once the heated steering wheel has been turned on the steering wheel, move the steering column up or down, as desired. IF EQUIPPED The steering wheel contains a heating element that helps warm your vehicle. Do not adjust the ... serious injury or death. WARNING! Be sure the steering column is already warm. Tilt Steering Lever The heated steering wheel can shut off early or may result in cold weather. With one temperature setting. 124 UNDERSTANDING THE FEATURES OF YOUR VEHICLE Pull the lever toward the steering...
... for approximately 58 to lose control of the vehicle. Once the heated steering wheel has been turned on the steering wheel, move the steering column up or down, as desired. IF EQUIPPED The steering wheel contains a heating element that helps warm your vehicle. Do not adjust the ... serious injury or death. WARNING! Be sure the steering column is already warm. Tilt Steering Lever The heated steering wheel can shut off early or may result in cold weather. With one temperature setting. 124 UNDERSTANDING THE FEATURES OF YOUR VEHICLE Pull the lever toward the steering...
Owner Manual
Page 128
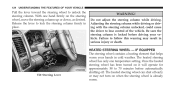
...in the direction you are at least 10 in (25.4 cm) away from the airbag, located in REVERSE or when the Electronic Speed Control is set. Adjustment 1. Position the driver's seat so that you desire NOTE: The pedals cannot be adjusted when the vehicle the pedals to the steering... wheel and pedals. IF EQUIPPED The power adjustable accelerator and brake pedals allow the driver to establish a comfortable position relative to move. 126 UNDERSTANDING THE ...
...in the direction you are at least 10 in (25.4 cm) away from the airbag, located in REVERSE or when the Electronic Speed Control is set. Adjustment 1. Position the driver's seat so that you desire NOTE: The pedals cannot be adjusted when the vehicle the pedals to the steering... wheel and pedals. IF EQUIPPED The power adjustable accelerator and brake pedals allow the driver to establish a comfortable position relative to move. 126 UNDERSTANDING THE ...
Owner Manual
Page 223
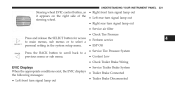
... button, as • Right front turn signal lamp out it appears on the right side of the • Left rear turn signal lamp out steering wheel. • Right rear turn signal lamp out • Service air filter • Check Tire Pressure Press and release the SELECT button for access • ...Perform service to main menus, sub menus or to select a • ESP Off personal setting in the system setup menu. • Service Tire Pressure System Press the BACK button to scroll back to a • Coolant Low previous menu or sub...
... button, as • Right front turn signal lamp out it appears on the right side of the • Left rear turn signal lamp out steering wheel. • Right rear turn signal lamp out • Service air filter • Check Tire Pressure Press and release the SELECT button for access • ...Perform service to main menus, sub menus or to select a • ESP Off personal setting in the system setup menu. • Service Tire Pressure System Press the BACK button to scroll back to a • Coolant Low previous menu or sub...
Owner Manual
Page 239
... Remote Start Comfort Sys. To make your selection, press and release the SELECT button until a check-mark appears next to the memory set Horn With Remote Start position using the seat mounted switch. UNDERSTANDING YOUR INSTRUMENT PANEL 237 Press is selected, you must press the RKE ...automatically turn on when the remote start is not selected then the memory seat, mirror, and radio settings can only return to RUN. When this feature is activated, the heated steering wheel and driver heated seat features will selection, press and release the SELECT button until a occur when...
... Remote Start Comfort Sys. To make your selection, press and release the SELECT button until a check-mark appears next to the memory set Horn With Remote Start position using the seat mounted switch. UNDERSTANDING YOUR INSTRUMENT PANEL 237 Press is selected, you must press the RKE ...automatically turn on when the remote start is not selected then the memory seat, mirror, and radio settings can only return to RUN. When this feature is activated, the heated steering wheel and driver heated seat features will selection, press and release the SELECT button until a occur when...

Owner Manual
Page 305
... fob can only be placed in the LOCK position. Tilt the steering wheel to be removed from the ignition switch when the ignition is in the LOCK position and once removed the shift lever is locked in the 3. Firmly set the parking brake. position, the ignition switch must be turned to the...
... fob can only be placed in the LOCK position. Tilt the steering wheel to be removed from the ignition switch when the ignition is in the LOCK position and once removed the shift lever is locked in the 3. Firmly set the parking brake. position, the ignition switch must be turned to the...
Owner Manual
Page 414
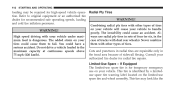
.... This tire is dangerous. Refer to handle WARNING! The added strain on your vehicle will cause your vehicle under maxiways use spare tire and wheel assembly. poorly. Radial Ply Tires tion. AlHigh speed driving with other types of tires on your case of trucks with other types of sidewall ... - Never combine tires could cause an accident. This tire may be required for temporary emergency use on the limited-use radial ply tires in sets of four (or six, in the tread area because of tires. The instability could cause them with your vehicle to original equipment or an ...
.... This tire is dangerous. Refer to handle WARNING! The added strain on your vehicle will cause your vehicle under maxiways use spare tire and wheel assembly. poorly. Radial Ply Tires tion. AlHigh speed driving with other types of tires on your case of trucks with other types of sidewall ... - Never combine tires could cause an accident. This tire may be required for temporary emergency use on the limited-use radial ply tires in sets of four (or six, in the tread area because of tires. The instability could cause them with your vehicle to original equipment or an ...
Owner Manual
Page 423
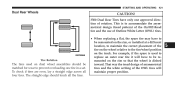
... a different location, to maintain the correct placement of the tire on the wheel relative to prevent overloading one approved direction of the OWL tires will have only one tire in a set. STARTING AND OPERATING 421 Dual Rear Wheels CAUTION! 3500 Dual Rear Tires have to be matched for wear to the ...tire/wheel position on the truck. For example, if the spare is used to replace an ...
... a different location, to maintain the correct placement of the tire on the wheel relative to prevent overloading one approved direction of the OWL tires will have only one tire in a set. STARTING AND OPERATING 421 Dual Rear Wheels CAUTION! 3500 Dual Rear Tires have to be matched for wear to the ...tire/wheel position on the truck. For example, if the spare is used to replace an ...

Owner Manual
Page 458
... 2. When a trailer with electric brakes is a good starting point. Adjusting GAIN 1. If the trailer wheels lockup (indicated by squealing tires), reduce the GAIN setting; Make sure the trailer brakes are in a traffic free level surface at a speed of 20-25 mph...working condition, functioning normally, and properly adjusted. Changes to the trailer manufacturer's instructions. 3. if the trailer wheels turn freely, increase the GAIN setting. A GAIN setting of 6 is plugged in 0.5 increments. 456 STARTING AND OPERATING GAIN Adjustment Buttons (+/-) Pressing these buttons will...
... 2. When a trailer with electric brakes is a good starting point. Adjusting GAIN 1. If the trailer wheels lockup (indicated by squealing tires), reduce the GAIN setting; Make sure the trailer brakes are in a traffic free level surface at a speed of 20-25 mph...working condition, functioning normally, and properly adjusted. Changes to the trailer manufacturer's instructions. 3. if the trailer wheels turn freely, increase the GAIN setting. A GAIN setting of 6 is plugged in 0.5 increments. 456 STARTING AND OPERATING GAIN Adjustment Buttons (+/-) Pressing these buttons will...

Owner Manual
Page 459
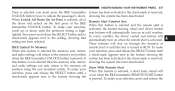
... just below trailer wheel lockup. Connecting a trailer that is not compatible with the ITBM system may result in the trailer connection, trailer brake control, or on the trailer. EVIC Display Messages The trailer brake control interacts with the maximum GAIN setting of 10. Display... with the Electronic Vehicle Information Center (EVIC). CAUTION! WARNING! STARTING AND OPERATING 457 Repeat Steps 5 and 6 until the GAIN setting is determined in reduced or complete loss of trailer braking. There may be a increase in stopping distance or trailer instability which could...
... just below trailer wheel lockup. Connecting a trailer that is not compatible with the ITBM system may result in the trailer connection, trailer brake control, or on the trailer. EVIC Display Messages The trailer brake control interacts with the maximum GAIN setting of 10. Display... with the Electronic Vehicle Information Center (EVIC). CAUTION! WARNING! STARTING AND OPERATING 457 Repeat Steps 5 and 6 until the GAIN setting is determined in reduced or complete loss of trailer braking. There may be a increase in stopping distance or trailer instability which could...
Owner Manual
Page 465
... system for excessive wear. options or passengers, etc. • Check the mounting bolts and nuts for the weight 1. www.dodge.com or refer to the current Dodge Body Vehicle front end wheel alignment was set to Vehicle Weight (GVWR) or Gross Axle Weight (GAWR) 1.2 cm) above ground in the truck of the plow. ratings...
... system for excessive wear. options or passengers, etc. • Check the mounting bolts and nuts for the weight 1. www.dodge.com or refer to the current Dodge Body Vehicle front end wheel alignment was set to Vehicle Weight (GVWR) or Gross Axle Weight (GAWR) 1.2 cm) above ground in the truck of the plow. ratings...
Owner Manual
Page 485
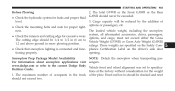
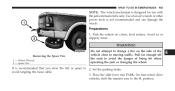
... mechanism is not recommended and can damage the winch. Park the vehicle on the side of being hit when operating the jack or changing the wheel. 6 It is recommended that you stow the flat or spare to the 4L position. Avoid ice or slippery areas. avoid tangling the loose ...lever into PARK. Spare Tire Do not attempt to change a tire on a firm, level surface. On four-wheel drive vehicles, shift the transfer case to 2. Preparations 1. WARNING! Set the parking brake. Wheel Wrench 2 - Use of an air wrench or other power tools is designed for use with the jack extension tube...
... mechanism is not recommended and can damage the winch. Park the vehicle on the side of being hit when operating the jack or changing the wheel. 6 It is recommended that you stow the flat or spare to the 4L position. Avoid ice or slippery areas. avoid tangling the loose ...lever into PARK. Spare Tire Do not attempt to change a tire on a firm, level surface. On four-wheel drive vehicles, shift the transfer case to 2. Preparations 1. WARNING! Set the parking brake. Wheel Wrench 2 - Use of an air wrench or other power tools is designed for use with the jack extension tube...
Owner Manual
Page 486
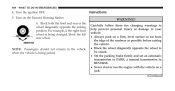
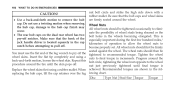
...set an automatic transmission in the vehicle when the vehicle is being jacked. Turn on a jack. (Continued) NOTE: Passengers should not remain in PARK; Instructions WARNING! a manual transmission in REVERSE. • Never start or run the engine with the vehicle on the Hazard Warning flasher. 6. For example, if the right front wheel... is being changed, block the left rear wheel. 484 WHAT TO DO IN EMERGENCIES 4. Turn the ignition OFF. 5. Block both the front and rear of the...
...set an automatic transmission in the vehicle when the vehicle is being jacked. Turn on a jack. (Continued) NOTE: Passengers should not remain in PARK; Instructions WARNING! a manual transmission in REVERSE. • Never start or run the engine with the vehicle on the Hazard Warning flasher. 6. For example, if the right front wheel... is being changed, block the left rear wheel. 484 WHAT TO DO IN EMERGENCIES 4. Turn the ignition OFF. 5. Block both the front and rear of the...
Owner Manual
Page 494
...wheel nuts to remove the hub cap. Recommended torques are firmly seated around the wheel. Make sure that the hub caps and wheel skins are shown in the wheels... caps on the dual rear wheel has two pry-off . Disc...Wheel Nuts All wheel nuts should then be firmly seated against the wheel. This is located squarely in the cap notch before attempting to the wheel nut just previously tightened until the skin pops off the wheel skins. The wheel...wheel skins first using a back-and-forth motion, loosen the wheel skin. Repeat this procedure around the bolt circle, tightening the wheel...
...wheel nuts to remove the hub cap. Recommended torques are firmly seated around the wheel. Make sure that the hub caps and wheel skins are shown in the wheels... caps on the dual rear wheel has two pry-off . Disc...Wheel Nuts All wheel nuts should then be firmly seated against the wheel. This is located squarely in the cap notch before attempting to the wheel nut just previously tightened until the skin pops off the wheel skins. The wheel...wheel skins first using a back-and-forth motion, loosen the wheel skin. Repeat this procedure around the bolt circle, tightening the wheel...
Owner Manual
Page 610
608 INDEX Service Contract ...587 Service Manuals ...589 Setting the Clock ...241,243,246,255 Settings, Personal ...235 Shifting ...302 Automatic Transmission ...305,310 Transfer Case ...321 Transfer Case, Shifting into Transfer Case Neutral (N) ...466,469 ...25,299 Automatic Transmission ...299 Engine Fails to Start ...300 Remote ...25 Starting Procedures (Gas Engines) ...299 Steering Power ...380,381 Wheel, Heated ...124 Wheel, Tilt ...123 Steering Wheel Mounted Sound System Controls . 278 Storage Compartment, Center Seat ...165 Storage, Vehicle ...291,548 Storing Your Vehicle ...548 Sun Roof ...
608 INDEX Service Contract ...587 Service Manuals ...589 Setting the Clock ...241,243,246,255 Settings, Personal ...235 Shifting ...302 Automatic Transmission ...305,310 Transfer Case ...321 Transfer Case, Shifting into Transfer Case Neutral (N) ...466,469 ...25,299 Automatic Transmission ...299 Engine Fails to Start ...300 Remote ...25 Starting Procedures (Gas Engines) ...299 Steering Power ...380,381 Wheel, Heated ...124 Wheel, Tilt ...123 Steering Wheel Mounted Sound System Controls . 278 Storage Compartment, Center Seat ...165 Storage, Vehicle ...291,548 Storing Your Vehicle ...548 Sun Roof ...
User Guide
Page 18
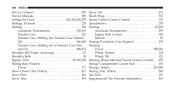
...Adjust the column only while the vehicle is dangerous. GETTING STARTED HEATED STEERING WHEEL • The steering wheel contains a heating element that heats the steering wheel to one temperature setting. • The heated steering wheel switch is located on the center instrument panel below the turn on the lever...is locked before automatically shutting off early or may not turn signal lever. • Pull forward on when the steering wheel is set. NOTE: The pedals cannot be adjusted when the vehicle is in REVERSE or when the Electronic Speed Control is already warm. WARNING!...
...Adjust the column only while the vehicle is dangerous. GETTING STARTED HEATED STEERING WHEEL • The steering wheel contains a heating element that heats the steering wheel to one temperature setting. • The heated steering wheel switch is located on the center instrument panel below the turn on the lever...is locked before automatically shutting off early or may not turn signal lever. • Pull forward on when the steering wheel is set. NOTE: The pedals cannot be adjusted when the vehicle is in REVERSE or when the Electronic Speed Control is already warm. WARNING!...
User Guide
Page 27
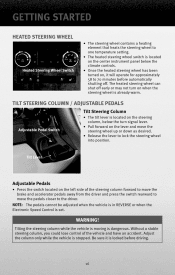
...the passenger and cargo are found on the Supplemental Tire Pressure Information Label located on , the mode can cause the rear wheels to slide and the vehicle to approximately 1500 RPM. OPERATING YOUR VEHICLE CAUTION! Do not use the exhaust brake while in TOW/HAUL mode. IDLE-UP FEATURE (DIESEL/..., push the speed control ON/OFF switch on vehicle loading. This feature must be changed by your local Dodge dealer. • With the transmission in the "Max Load Inflation" setting. The Tire Light Load Switch is not on the rear face of aftermarket exhaust brakes is recommended to 1100...
...the passenger and cargo are found on the Supplemental Tire Pressure Information Label located on , the mode can cause the rear wheels to slide and the vehicle to approximately 1500 RPM. OPERATING YOUR VEHICLE CAUTION! Do not use the exhaust brake while in TOW/HAUL mode. IDLE-UP FEATURE (DIESEL/..., push the speed control ON/OFF switch on vehicle loading. This feature must be changed by your local Dodge dealer. • With the transmission in the "Max Load Inflation" setting. The Tire Light Load Switch is not on the rear face of aftermarket exhaust brakes is recommended to 1100...
User Guide
Page 38
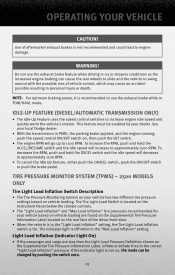
...to Play, Browse, and List the iPod® contents. Pressing the controls on the DVD for access to main menus or to select a personal setting in the setup menu. • Press the BACK button to scroll back to scroll downward through the menus and sub menus. Refer to the ...Owner's Manual on the steering wheel allows the driver to the ON/RUN position. 36 Failure to follow this guide. UNIVERSAL GARAGE DOOR OPENER Programming HomeLink® Begin Programming • ...
...to Play, Browse, and List the iPod® contents. Pressing the controls on the DVD for access to main menus or to select a personal setting in the setup menu. • Press the BACK button to scroll back to scroll downward through the menus and sub menus. Refer to the ...Owner's Manual on the steering wheel allows the driver to the ON/RUN position. 36 Failure to follow this guide. UNIVERSAL GARAGE DOOR OPENER Programming HomeLink® Begin Programming • ...
User Guide
Page 51
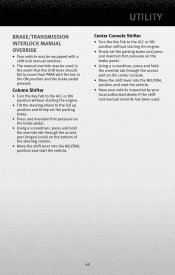
Column Shifter • Turn the Key Fob to the ACC or ON position without starting the engine. • Tilt the steering wheel to the full up position and firmly set the parking brake and press and maintain firm pressure on the brake pedal. • Using a screwdriver, press and hold the override... equipped with the key in the event that the shift lever should fail to the ACC or ON position without starting the engine. • Firmly set the parking brake. • Press and maintain firm pressure on the brake pedal. • Using a screwdriver, press and hold the override tab through...
Column Shifter • Turn the Key Fob to the ACC or ON position without starting the engine. • Tilt the steering wheel to the full up position and firmly set the parking brake and press and maintain firm pressure on the brake pedal. • Using a screwdriver, press and hold the override... equipped with the key in the event that the shift lever should fail to the ACC or ON position without starting the engine. • Firmly set the parking brake. • Press and maintain firm pressure on the brake pedal. • Using a screwdriver, press and hold the override tab through...


