
Owner's Manual
Page 1
2007 Cadillac STS/STS-V Owner Manual Seats and Restraint Systems ...7 Front Seats ...9 Rear Seats ...14 Safety Belts ...15 Child Restraints ...38 Airbag System ...64 Restraint System Check ...80 Features and Controls ...83 Keys ...85 Doors and Locks ...98 Windows ...104 Theft-Deterrent Systems ...107 Starting and Operating Your Vehicle ...111 Mirrors ...127 OnStar® System ...132...
2007 Cadillac STS/STS-V Owner Manual Seats and Restraint Systems ...7 Front Seats ...9 Rear Seats ...14 Safety Belts ...15 Child Restraints ...38 Airbag System ...64 Restraint System Check ...80 Features and Controls ...83 Keys ...85 Doors and Locks ...98 Windows ...104 Theft-Deterrent Systems ...107 Starting and Operating Your Vehicle ...111 Mirrors ...127 OnStar® System ...132...
Owner's Manual
Page 9
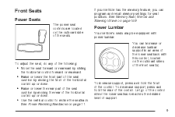
... the horizontal control up or down. • Use the vertical control to recline the seatback. See Power Reclining Seatbacks on page 169. See Memory Seat, Mirrors and Steering Wheel on page 11. Let go of the control when the lower seatback reaches the desired level of the seats. You can program...
... the horizontal control up or down. • Use the vertical control to recline the seatback. See Power Reclining Seatbacks on page 169. See Memory Seat, Mirrors and Steering Wheel on page 11. Let go of the control when the lower seatback reaches the desired level of the seats. You can program...
Owner's Manual
Page 10
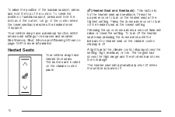
..., press and hold the top of the control. A light bar in the climate control display shows the setting: high, medium, or low. See Memory Seat, Mirrors and Steering Wheel on the climate control panel. 10 Press the up or down arrow until the indicator for the heated seat and seatback. z (Heated...
..., press and hold the top of the control. A light bar in the climate control display shows the setting: high, medium, or low. See Memory Seat, Mirrors and Steering Wheel on the climate control panel. 10 Press the up or down arrow until the indicator for the heated seat and seatback. z (Heated...
Owner's Manual
Page 83
... Intellibeam™ and OnStar® ...127 Automatic Dimming Rearview Mirror ...127 Automatic Dimming Rearview Mirror with OnStar® ...127 Automatic Dimming Rearview Mirror with OnStar® and Compass ...128 Outside Power Heated Mirrors ...130 Outside Automatic Dimming Mirror ...131 Outside Convex Mirror ...131 Outside Parallel Park Assist Mirror ...131 OnStar® System ...132 Keys ...85 Keyless Access...
... Intellibeam™ and OnStar® ...127 Automatic Dimming Rearview Mirror ...127 Automatic Dimming Rearview Mirror with OnStar® ...127 Automatic Dimming Rearview Mirror with OnStar® and Compass ...128 Outside Power Heated Mirrors ...130 Outside Automatic Dimming Mirror ...131 Outside Convex Mirror ...131 Outside Parallel Park Assist Mirror ...131 OnStar® System ...132 Keys ...85 Keyless Access...
Owner's Manual
Page 84
Section 2 Features and Controls Storage Areas ...146 Glove Box ...146 Cupholder(s) ...146 Center Console Storage Area ...146 Convenience Net ...146 Sunroof ...147 Vehicle Personalization ...148 Memory Seat, Mirrors and Steering Wheel ...169 Universal Home Remote System ...135 Universal Home Remote System (With Three Round LED) ...135 Universal Home Remote System (With One Triangular LED) ...136 Universal Home Remote System Operation (With Three Round LED) ...137 Universal Home Remote System Operation (With One Triangular LED) ...142 84
Section 2 Features and Controls Storage Areas ...146 Glove Box ...146 Cupholder(s) ...146 Center Console Storage Area ...146 Convenience Net ...146 Sunroof ...147 Vehicle Personalization ...148 Memory Seat, Mirrors and Steering Wheel ...169 Universal Home Remote System ...135 Universal Home Remote System (With Three Round LED) ...135 Universal Home Remote System (With One Triangular LED) ...136 Universal Home Remote System Operation (With Three Round LED) ...137 Universal Home Remote System Operation (With One Triangular LED) ...142 84
Owner's Manual
Page 89
... steady for more information see "Lights Flash at Lock" and "Horn Chirps at Lock" under Power Windows on the keyless access transmitter. See Memory Seat, Mirrors and Steering Wheel on page 148.
... steady for more information see "Lights Flash at Lock" and "Horn Chirps at Lock" under Power Windows on the keyless access transmitter. See Memory Seat, Mirrors and Steering Wheel on page 148.
Owner's Manual
Page 107
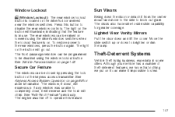
... Access System Operation on the keyless access transmitter. See "Anti-Pinch Feature" previously. Move the slide switch up . Press this feature. 107 Lighted Visor Vanity Mirrors Pull the visor down the visor or detach it can be off to operate this button to steal. If any window was unable to the...
... Access System Operation on the keyless access transmitter. See "Anti-Pinch Feature" previously. Move the slide switch up . Press this feature. 107 Lighted Visor Vanity Mirrors Pull the visor down the visor or detach it can be off to operate this button to steal. If any window was unable to the...
Owner's Manual
Page 127
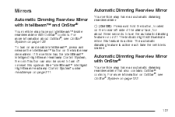
... dimming feature is active each time the vehicle is active. See "IntelliBeam™ Intelligent High-Beam Headlamp Control System" under Headlamps on the inside rearview mirror with OnStar® controls. If the vehicle has the IntelliBeam™ Intelligent High-Beam Headlamp Control System, the on page 132. 127 For more information... seconds to turn the automatic dimming feature on page 132. O (On/Off): Press and hold the button, located on the lower left side of the mirror face, for about OnStar®, see OnStar® System on /off button can also be used to turn off...
... dimming feature is active each time the vehicle is active. See "IntelliBeam™ Intelligent High-Beam Headlamp Control System" under Headlamps on the inside rearview mirror with OnStar® controls. If the vehicle has the IntelliBeam™ Intelligent High-Beam Headlamp Control System, the on page 132. 127 For more information... seconds to turn the automatic dimming feature on page 132. O (On/Off): Press and hold the button, located on the lower left side of the mirror face, for about OnStar®, see OnStar® System on /off button can also be used to turn off...
Owner's Manual
Page 128
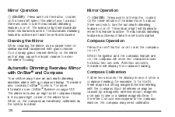
...C should ever appear in the upper right corner of the mirror face. The automatic dimming feature is active each time the vehicle is active. The mirror also contains OnStar® controls. Cleaning the Mirror When cleaning the mirror, use a paper towel or similar material dampened with the compass... automatic dimming feature is active each time the vehicle is active. Such interference may need calibration. Automatic Dimming Rearview Mirror with OnStar® and Compass Your vehicle may be caused by a magnetic antenna mount, magnetic note pad holder or a similar magnetic...
...C should ever appear in the upper right corner of the mirror face. The automatic dimming feature is active each time the vehicle is active. The mirror also contains OnStar® controls. Cleaning the Mirror When cleaning the mirror, use a paper towel or similar material dampened with the compass... automatic dimming feature is active each time the vehicle is active. Such interference may need calibration. Automatic Dimming Rearview Mirror with OnStar® and Compass Your vehicle may be caused by a magnetic antenna mount, magnetic note pad holder or a similar magnetic...

Owner's Manual
Page 129
The mirror can be calibrated by pressing and holding the on /off button until the display reads a direction. Compass variance is set to zone eight upon leaving ... current location and variance zone number on /off button quickly until the correct zone number appears in the display. 3. Stop pressing the button and the mirror will be necessary to adjust the compass to account for compass variance do the following zone map. 2. If C appears in circles at 5 mph (8 km/h) or...
The mirror can be calibrated by pressing and holding the on /off button until the display reads a direction. Compass variance is set to zone eight upon leaving ... current location and variance zone number on /off button quickly until the correct zone number appears in the display. 3. Stop pressing the button and the mirror will be necessary to adjust the compass to account for compass variance do the following zone map. 2. If C appears in circles at 5 mph (8 km/h) or...
Owner's Manual
Page 130
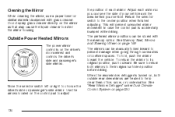
...center position when finished adjusting. Be sure to return both outside rear view mirrors are heated to their original unfolded position before driving. Outside Power Heated Mirrors The power mirror control is accidentally bumped while driving. Use the arrows located on page 169. See...switch left or right to its original position, push outward. the position of ice, snow, or condensation. Adjust each mirror. Cleaning the Mirror When cleaning the mirror, use a paper towel or similar material dampened with the memory option. Do not spray glass cleaner directly on page...
...center position when finished adjusting. Be sure to return both outside rear view mirrors are heated to their original unfolded position before driving. Outside Power Heated Mirrors The power mirror control is accidentally bumped while driving. Use the arrows located on page 169. See...switch left or right to its original position, push outward. the position of ice, snow, or condensation. Adjust each mirror. Cleaning the Mirror When cleaning the mirror, use a paper towel or similar material dampened with the memory option. Do not spray glass cleaner directly on page...
Owner's Manual
Page 131
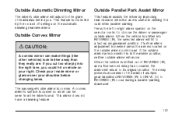
... hit a vehicle on the selector control to choose the driver or passenger outside mirror control pad. The passenger's side mirror is needed press the arrows located on the automatic dimming rearview mirror. The delay prevents movement of REVERSE (R), and a five-second delay has...right. This feature is controlled by improving rear obstacle detection and is useful in the middle position, neither outside mirror selector switch is shifted out of the mirror if multiple gear transitions REVERSE (R) to DRIVE (D) to REVERSE (R) occur during a parallel parking maneuver. When ...
... hit a vehicle on the selector control to choose the driver or passenger outside mirror control pad. The passenger's side mirror is needed press the arrows located on the automatic dimming rearview mirror. The delay prevents movement of REVERSE (R), and a five-second delay has...right. This feature is controlled by improving rear obstacle detection and is useful in the middle position, neither outside mirror selector switch is shifted out of the mirror if multiple gear transitions REVERSE (R) to DRIVE (D) to REVERSE (R) occur during a parallel parking maneuver. When ...

Owner's Manual
Page 148
... detected upon opening the driver's door, the driver preferences for the lowest driver number will be programmed including the seat, steering column, and outside rearview mirror position. The number of programmable features varies depending upon opening the driver's door. that can be recalled. Some vehicles have additional features that is always...
... detected upon opening the driver's door, the driver preferences for the lowest driver number will be programmed including the seat, steering column, and outside rearview mirror position. The number of programmable features varies depending upon opening the driver's door. that can be recalled. Some vehicles have additional features that is always...

Owner's Manual
Page 154
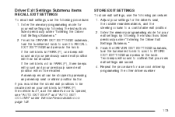
... your vehicle has the optional memory package, you will have this feature. If this feature is turned on, you can recall any previously programmed seat, mirror, and steering column position when the start button on the keyless access transmitter is pressed. 154 You can either exit the programming mode by following... package, you will have this feature. Enter the PERSONAL SETTINGS MENU by following procedure: 1. The mode you can recall any previously programmed seat position and mirror position when the unlock button on the ignition is pressed.
... your vehicle has the optional memory package, you will have this feature. If this feature is turned on, you can recall any previously programmed seat, mirror, and steering column position when the start button on the keyless access transmitter is pressed. 154 You can either exit the programming mode by following... package, you will have this feature. Enter the PERSONAL SETTINGS MENU by following procedure: 1. The mode you can recall any previously programmed seat position and mirror position when the unlock button on the ignition is pressed.
Owner's Manual
Page 169
... the following the instructions later in this section for more information on recalling and programming the memory settings using the base audio system. Memory Seat, Mirrors and Steering Wheel If your vehicle has the memory feature, you can also press the F6 (BACK) button, located on the base audio system, you... have finished making your selections on the radio, to return to two drivers: • The driver's seat position • The outside rearview mirrors position • The power tilt wheel and telescopic steering column position 169
... the following the instructions later in this section for more information on recalling and programming the memory settings using the base audio system. Memory Seat, Mirrors and Steering Wheel If your vehicle has the memory feature, you can also press the F6 (BACK) button, located on the base audio system, you... have finished making your selections on the radio, to return to two drivers: • The driver's seat position • The outside rearview mirrors position • The power tilt wheel and telescopic steering column position 169
Owner's Manual
Page 171
... in the tune/select knob. If the vehicle is not in PARK (P), one beep will sound and your choice by pressing any memory seat or mirror position button. If you would like to be recalled when unlocking your vehicle with the keyless access transmitter or when starting your previously saved driving...
... in the tune/select knob. If the vehicle is not in PARK (P), one beep will sound and your choice by pressing any memory seat or mirror position button. If you would like to be recalled when unlocking your vehicle with the keyless access transmitter or when starting your previously saved driving...

Owner's Manual
Page 172
... programming the other driver number. 172 Entering the Driver Exit Settings Submenu To enter the memory programming mode for the driver's seat, the outside rearview mirrors, and the steering column to the HUD, audio system, and climate controls while driving will be automatically stored when the ignition is less than 6 mph...
... programming the other driver number. 172 Entering the Driver Exit Settings Submenu To enter the memory programming mode for the driver's seat, the outside rearview mirrors, and the steering column to the HUD, audio system, and climate controls while driving will be automatically stored when the ignition is less than 6 mph...
Owner's Manual
Page 173
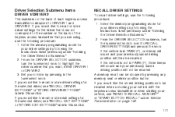
... EXIT SEAT" and "AUTO EXIT COLUMN" under "Entering the Driver Exit Settings Submenu." 3. Repeat the procedure for the driver's seat, the outside rearview mirrors, and the steering column to STORE EXIT SETTINGS and press in the knob. If the vehicle is not in PARK (P), three beeps will sound and... EXIT SETTINGS submenu, turn the tune/select knob to scroll to confirm that your exit settings by pressing any memory seat or mirror position button. Enter the memory programming mode for your new exit settings are saved. 4. Driver Exit Settings Submenu Items RECALL EXIT SETTINGS To...
... EXIT SEAT" and "AUTO EXIT COLUMN" under "Entering the Driver Exit Settings Submenu." 3. Repeat the procedure for the driver's seat, the outside rearview mirrors, and the steering column to STORE EXIT SETTINGS and press in the knob. If the vehicle is not in PARK (P), three beeps will sound and... EXIT SETTINGS submenu, turn the tune/select knob to scroll to confirm that your exit settings by pressing any memory seat or mirror position button. Enter the memory programming mode for your new exit settings are saved. 4. Driver Exit Settings Submenu Items RECALL EXIT SETTINGS To...
Owner's Manual
Page 181
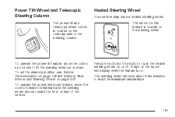
... will take about three minutes to reach its maximum temperature. 181 To set the memory position, see Vehicle Personalization on page 148 and Memory Seat, Mirrors and Steering Wheel on the steering wheel. The steering wheel will display while the feature is located on the outboard side of the button to...
... will take about three minutes to reach its maximum temperature. 181 To set the memory position, see Vehicle Personalization on page 148 and Memory Seat, Mirrors and Steering Wheel on the steering wheel. The steering wheel will display while the feature is located on the outboard side of the button to...

Owner's Manual
Page 190
If the system is mounted on the interior side of the windshield behind the rearview mirror. To activate the Rainsense™ system, turn the wiper stalk to a higher sensitivity level to indicate that the Rainsense™ system is not opened when ... or ice to collect on driving conditions and the sensitivity setting. A circuit breaker will automatically park the wipers if they are not parked. Your vehicle (STS-V only) is the lowest sensitivity setting, level one of wipes. Opening the hood will stop the motor until it cools down. This prevents the wipers...
If the system is mounted on the interior side of the windshield behind the rearview mirror. To activate the Rainsense™ system, turn the wiper stalk to a higher sensitivity level to indicate that the Rainsense™ system is not opened when ... or ice to collect on driving conditions and the sensitivity setting. A circuit breaker will automatically park the wipers if they are not parked. Your vehicle (STS-V only) is the lowest sensitivity setting, level one of wipes. Opening the hood will stop the motor until it cools down. This prevents the wipers...


