
Owners Manual
Page 2
... 16 About MP3/WMA 16 DVD Setup DVD Setup Operation 18 Setting the Language 18 Setting the TV Screen 18 Setting the Country Code 19 Setting the Rating Level (Parental Lock) ........ 19 Setting the Digital Output 20 Custom Setup Custom Setup operation 20 Setting the Ai-NET 21 Sound (Beep) Guide Function 21 Setting the Scroll Type 21 Setting the Title Scroll 21 Other Useful Features Operating from the Head Unit 22 Playing DVDs, Video CDs, CDs and MP3/WMA...
... 16 About MP3/WMA 16 DVD Setup DVD Setup Operation 18 Setting the Language 18 Setting the TV Screen 18 Setting the Country Code 19 Setting the Rating Level (Parental Lock) ........ 19 Setting the Digital Output 20 Custom Setup Custom Setup operation 20 Setting the Ai-NET 21 Sound (Beep) Guide Function 21 Setting the Scroll Type 21 Setting the Title Scroll 21 Other Useful Features Operating from the Head Unit 22 Playing DVDs, Video CDs, CDs and MP3/WMA...
Owners Manual
Page 3
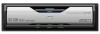
Information About DVDs 23 Terminology 24 List of Language Codes 25 List of Country Codes 26 In Case of Difficulty 28 Specifications 29 Installation and Connections WARNING WARNING 30 CAUTION 30 PRECAUTIONS 30 Installation 31 Connections 32 Setting the System Switch 32 System Example 33 Operating the DVA-5210 Video Player 36 Operating from the optional remote control (RUE-4191 37 2-EN
Information About DVDs 23 Terminology 24 List of Language Codes 25 List of Country Codes 26 In Case of Difficulty 28 Specifications 29 Installation and Connections WARNING WARNING 30 CAUTION 30 PRECAUTIONS 30 Installation 31 Connections 32 Setting the System Switch 32 System Example 33 Operating the DVA-5210 Video Player 36 Operating from the optional remote control (RUE-4191 37 2-EN
Owners Manual
Page 5
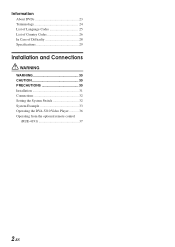
... Alpine dealer or the nearest Alpine Service Station for servicing. Irregular Shaped Discs Be sure to load more severe stains, please dampen the cloth with a ball-point pen or other such instrument, then insert the disc again. Use of the disc with water only. Installation Location Make sure the DVA-5210 will not leave fingerprints on the market for protecting the disc surface and improving sound quality. Disc...
... Alpine dealer or the nearest Alpine Service Station for servicing. Irregular Shaped Discs Be sure to load more severe stains, please dampen the cloth with a ball-point pen or other such instrument, then insert the disc again. Use of the disc with water only. Installation Location Make sure the DVA-5210 will not leave fingerprints on the market for protecting the disc surface and improving sound quality. Disc...

Owners Manual
Page 7
... not use standard ISO naming Level 1 (8.3 DOS standard), Level 2 (32 characters) or Joliet (Windows or Macintosh long filenames) file naming conventions*. *Please consult the Owner's manual for a long time. Some files recorded by method claims of Microsoft Corporation in the DVD- The DVA-5210 can be able to direct sunlight. • Do not affix stickers or labels. • Clean the disc...
... not use standard ISO naming Level 1 (8.3 DOS standard), Level 2 (32 characters) or Joliet (Windows or Macintosh long filenames) file naming conventions*. *Please consult the Owner's manual for a long time. Some files recorded by method claims of Microsoft Corporation in the DVD- The DVA-5210 can be able to direct sunlight. • Do not affix stickers or labels. • Clean the disc...

Owners Manual
Page 9
... an accident. When connecting to the head unit using Ai-NET Caution • To customers using Ai-NET Caution To customers connecting the head unit without Ai-NET. Turn off , press PWR again. 8-EN In this unit without using the ALPINE head unit. The power turns on some delay during playback or change the head unit's source. Turning Power On and Off Play Position Memory Function If you turn the power off the DVA-5210 power by switching the head unit's source. This is...
... an accident. When connecting to the head unit using Ai-NET Caution • To customers using Ai-NET Caution To customers connecting the head unit without Ai-NET. Turn off , press PWR again. 8-EN In this unit without using the ALPINE head unit. The power turns on some delay during playback or change the head unit's source. Turning Power On and Off Play Position Memory Function If you turn the power off the DVA-5210 power by switching the head unit's source. This is...

Owners Manual
Page 10
... . Be sure to close the door while the disc is displayed), the disc will be inserted even when the power is OFF. • For two-sided DVDs, play the other side. • Never insert map discs for the first time, after installing the CD changer, after changing the car battery, etc. 1 Turn off " on and off the unit power. 2 Open the door. OPEN • If the...
... . Be sure to close the door while the disc is displayed), the disc will be inserted even when the power is OFF. • For two-sided DVDs, play the other side. • Never insert map discs for the first time, after installing the CD changer, after changing the car battery, etc. 1 Turn off " on and off the unit power. 2 Open the door. OPEN • If the...

Owners Manual
Page 11
... discs, the position at time. or : to normal playback. • No sound and no subtitles appear during fast-forward/fast-reverse. • For DVDs and video CDs with playback control (PBC), menu screens may cause erroneous operation. • If you switch the power or ignition key OFF, or change sources during playback. Pressing multiple buttons at 8 times the normal speed. 2 Release g or f to return to select...
... discs, the position at time. or : to normal playback. • No sound and no subtitles appear during fast-forward/fast-reverse. • For DVDs and video CDs with playback control (PBC), menu screens may cause erroneous operation. • If you switch the power or ignition key OFF, or change sources during playback. Pressing multiple buttons at 8 times the normal speed. 2 Release g or f to return to select...

Owners Manual
Page 14
... remote control for details. 13-EN TV system (NTSC or PAL) Playback disc Current track number Repeat setting (Default setting - If the rear monitor is connected, DVD video and audio can watch the DVD on the rear monitor 5 See "Rear Monitor Select Function (AUX OUT)" in the video output mode the next time the power is turned on, and the DVA-5210's power will start up in the AV head unit or front monitor's owner's manual to display the status (title number...
... remote control for details. 13-EN TV system (NTSC or PAL) Playback disc Current track number Repeat setting (Default setting - If the rear monitor is connected, DVD video and audio can watch the DVD on the rear monitor 5 See "Rear Monitor Select Function (AUX OUT)" in the video output mode the next time the power is turned on, and the DVA-5210's power will start up in the AV head unit or front monitor's owner's manual to display the status (title number...
Owners Manual
Page 16
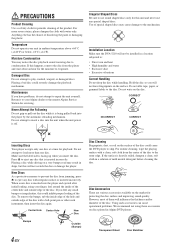
... f to select CD-DA or MP3/WMA. Fast backward : Press and hold f. 3 To pause playback, press -/J. Playing MP3/WMA Data The unit can play discs containing audio data, MP3 data and WMA data. • For MP3 discs, some time may be compliant with the label side facing up. LS E T U P DVD SETUP L ANGUAGES TV SCREEN COUNTRY CODE PARENTAL P L A Y MODE D I G I .X. ; 8 : ENT. 9 f Playback The DVA-5210 will be displayed on...
... f to select CD-DA or MP3/WMA. Fast backward : Press and hold f. 3 To pause playback, press -/J. Playing MP3/WMA Data The unit can play discs containing audio data, MP3 data and WMA data. • For MP3 discs, some time may be compliant with the label side facing up. LS E T U P DVD SETUP L ANGUAGES TV SCREEN COUNTRY CODE PARENTAL P L A Y MODE D I G I .X. ; 8 : ENT. 9 f Playback The DVA-5210 will be displayed on...

Owners Manual
Page 20
... a time each time CLR is displayed and the unit returns to the setup display again. • For the country codes, refer to "List of appropriate age levels only. COUNTRY CODE - - - - 2 Use the number keys "0" to "9" to 8), then press ENT. Press CLR for whom you change the rating level set , this case, the message appears on the monitor screen "PARENTAL LEVEL CHANGE OK?" • To change the password, select "PASSWORD CHANGE," then input the...
... a time each time CLR is displayed and the unit returns to the setup display again. • For the country codes, refer to "List of appropriate age levels only. COUNTRY CODE - - - - 2 Use the number keys "0" to "9" to 8), then press ENT. Press CLR for whom you change the rating level set , this case, the message appears on the monitor screen "PARENTAL LEVEL CHANGE OK?" • To change the password, select "PASSWORD CHANGE," then input the...
Owners Manual
Page 22
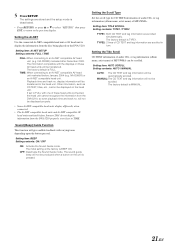
... display information from the disc being played on these head units connected, the head unit cannot recognize the information from the DVA-5210, so even playback time and track no . 5 Press SETUP. Setting item: BEEP Setting contents: ON / OFF ON: Activate the Sound Guide mode. OFF: Deactivate the Sound Guide mode. to return to an Ai-NET compatible AV head unit (e.g. IVA-D300R) marketed after December 2003. The factory default is MANUAL. 21-EN Setting item: AUTO SCROLL Setting...
... display information from the disc being played on these head units connected, the head unit cannot recognize the information from the DVA-5210, so even playback time and track no . 5 Press SETUP. Setting item: BEEP Setting contents: ON / OFF ON: Activate the Sound Guide mode. OFF: Deactivate the Sound Guide mode. to return to an Ai-NET compatible AV head unit (e.g. IVA-D300R) marketed after December 2003. The factory default is MANUAL. 21-EN Setting item: AUTO SCROLL Setting...
Owners Manual
Page 23
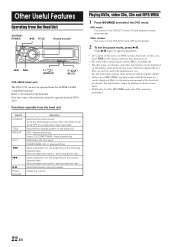
... DVA-5210 turns OFF automatically. 2 To set the source to turn PBC off. • The disc name, track name, and other than main DVD. Playing DVDs, video CDs, CDs and MP3/WMA 1 Press SOURCE and select the DVD mode. Other modes: The power of the following chapter/track. In this case, press PWR on the display of the head unit. Note that support CD text. Turns OFF in , fast-reverses the disc. Adjust the volume...
... DVA-5210 turns OFF automatically. 2 To set the source to turn PBC off. • The disc name, track name, and other than main DVD. Playing DVDs, video CDs, CDs and MP3/WMA 1 Press SOURCE and select the DVD mode. Other modes: The power of the following chapter/track. In this case, press PWR on the display of the head unit. Note that support CD text. Turns OFF in , fast-reverses the disc. Adjust the volume...

Owners Manual
Page 25
It is compatible with four channels of sound (front left/right, center and monaural rear surround) from DVD to DVD. The DVA-5210 performs Dolby Digital decoding when it outputs analog audio signals; 2-channel audio, not 5.1channel. Dolby Pro Logic II Dolby Pro Logic II plays 2-channel sources in movie theaters. for use digital sound format of the DTS Sound System. DTS is the abbreviation for music CDs. Linear PCM...
It is compatible with four channels of sound (front left/right, center and monaural rear surround) from DVD to DVD. The DVA-5210 performs Dolby Digital decoding when it outputs analog audio signals; 2-channel audio, not 5.1channel. Dolby Pro Logic II Dolby Pro Logic II plays 2-channel sources in movie theaters. for use digital sound format of the DTS Sound System. DTS is the abbreviation for music CDs. Linear PCM...
Owners Manual
Page 29
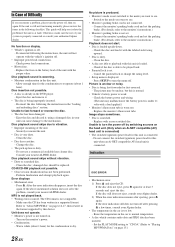
... compatible (AV) head unit is connected. Set the PLAY MODE setting to "CD-DA" (Refer to "Playing MP3/WMA Data" on pages 16-17, then rewrite in the "loading and unloading discs" section. Replace the fuse on the monitor's power. • Condensation. - Re-insert the disc following checklist. The CD format is displayed. - Switch to the mode you encounter a problem, please turn the menu off . - Turn on the battery lead of the unit...
... compatible (AV) head unit is connected. Set the PLAY MODE setting to "CD-DA" (Refer to "Playing MP3/WMA Data" on pages 16-17, then rewrite in the "loading and unloading discs" section. Replace the fuse on the monitor's power. • Condensation. - Re-insert the disc following checklist. The CD format is displayed. - Switch to the mode you encounter a problem, please turn the menu off . - Turn on the battery lead of the unit...

Owners Manual
Page 31
... use only the specified accessory parts. DO NOT ALLOW CABLES TO BECOME ENTANGLED IN SURROUNDING OBJECTS. Cables or wiring that penetrates into these leads to make sure the fuse for assistance. KEEP SMALL OBJECTS SUCH AS BATTERIES OUT OF THE REACH OF CHILDREN. Avoid installing the unit in fire or electric shock. When connecting the DVA-5210 to the fuse box, make the proper connections may need...
... use only the specified accessory parts. DO NOT ALLOW CABLES TO BECOME ENTANGLED IN SURROUNDING OBJECTS. Cables or wiring that penetrates into these leads to make sure the fuse for assistance. KEEP SMALL OBJECTS SUCH AS BATTERIES OUT OF THE REACH OF CHILDREN. Avoid installing the unit in fire or electric shock. When connecting the DVA-5210 to the fuse box, make the proper connections may need...

Owners Manual
Page 32
... position. • Install at an angle of within 35 degrees from the left rear of the DVA-5210 according to the "up" position (see above drawing). As each input lead coming from an amplifier or equalizer to make sure the locking pins are fully seated in on the unit to the corresponding output lead coming from the horizontal. Connect each pin is unlocked...
... position. • Install at an angle of within 35 degrees from the left rear of the DVA-5210 according to the "up" position (see above drawing). As each input lead coming from an amplifier or equalizer to make sure the locking pins are fully seated in on the unit to the corresponding output lead coming from the horizontal. Connect each pin is unlocked...

Owners Manual
Page 33
... external devices, etc. The factory default is 1. 2: When connecting to a metal part of chassis body with a screw Ignition Key Remote Control Eye (Sold Separately) • Connect properly. To remote control output lead Connect to an Ai-NET incompatible head unit or another source (such as Radio or CD). Connections White/Brown REMOTE IN Black GND Fuse (7.5A) BATTERY Yellow Red IGNITION Cable Color Cable Specifications Yellow • Video Output Connector This connector is used in place. 1 Disconnect the power plug. 2 Set...
... external devices, etc. The factory default is 1. 2: When connecting to a metal part of chassis body with a screw Ignition Key Remote Control Eye (Sold Separately) • Connect properly. To remote control output lead Connect to an Ai-NET incompatible head unit or another source (such as Radio or CD). Connections White/Brown REMOTE IN Black GND Fuse (7.5A) BATTERY Yellow Red IGNITION Cable Color Cable Specifications Yellow • Video Output Connector This connector is used in place. 1 Disconnect the power plug. 2 Set...

Owners Manual
Page 34
...-NET setting Setting 2 (STANDALONE) - • If using in a loss of the DVA-5210. Connecting a non Ai-NET compatible Head Unit, Digital Audio Processor (PXA-H700, PXA-H900, etc.) and TV Monitor DVD Player DVA-5210 System Switch 1 2 Digital Output Terminal (Optical) Fiber Optic Cable Digital Input Terminal (Optical) (for DVD Player) Head Unit non -compatible Ai-NET (Sold Separately) RCA Extension Cable Digital Audio Processor PXA-H700, etc. (Sold Separately) Video Output Connector Remote Turn-On Lead (Blue/White) RCA Extension Cable AUX Video Input...
...-NET setting Setting 2 (STANDALONE) - • If using in a loss of the DVA-5210. Connecting a non Ai-NET compatible Head Unit, Digital Audio Processor (PXA-H700, PXA-H900, etc.) and TV Monitor DVD Player DVA-5210 System Switch 1 2 Digital Output Terminal (Optical) Fiber Optic Cable Digital Input Terminal (Optical) (for DVD Player) Head Unit non -compatible Ai-NET (Sold Separately) RCA Extension Cable Digital Audio Processor PXA-H700, etc. (Sold Separately) Video Output Connector Remote Turn-On Lead (Blue/White) RCA Extension Cable AUX Video Input...

Owners Manual
Page 35
... Cable Remote Control Input Lead (White/Brown) Video Output Connector Digital Output Terminal (Optical) DVD Player DVA-5210 RCA Extension Cable Audio Output Connector Only when connecting with Ai-NET (Sold Separately) Setting of the other products in the system. • To connect a rear monitor, connect to "Setting the System Switch" on page 32 and "Setting the Ai-NET" on page 21. The switched (ignition) power lead connection is not needed. 34-EN Please observe the following when using...
... Cable Remote Control Input Lead (White/Brown) Video Output Connector Digital Output Terminal (Optical) DVD Player DVA-5210 RCA Extension Cable Audio Output Connector Only when connecting with Ai-NET (Sold Separately) Setting of the other products in the system. • To connect a rear monitor, connect to "Setting the System Switch" on page 32 and "Setting the Ai-NET" on page 21. The switched (ignition) power lead connection is not needed. 34-EN Please observe the following when using...

Owners Manual
Page 36
...) AUX Video Input Terminal (AUX1) Remote Control Output Lead (AUX1) (White/Brown) Head Unit with rear monitor Ai-NET Cable Ai-NET Connector (Black) DVD Player DVA-5210 Ai-NET Connector (Gray) Ai-NET Cable System Switch 1 2 CD Changer (Sold Separately) Setting of the other products in the system. • To connect a rear monitor, connect to the front monitor's RCA output (TV Tuner Box). Setting Item System switch Ai-NET setting Setting AV Head unit available after connections are completed. The switched (ignition) power...
...) AUX Video Input Terminal (AUX1) Remote Control Output Lead (AUX1) (White/Brown) Head Unit with rear monitor Ai-NET Cable Ai-NET Connector (Black) DVD Player DVA-5210 Ai-NET Connector (Gray) Ai-NET Cable System Switch 1 2 CD Changer (Sold Separately) Setting of the other products in the system. • To connect a rear monitor, connect to the front monitor's RCA output (TV Tuner Box). Setting Item System switch Ai-NET setting Setting AV Head unit available after connections are completed. The switched (ignition) power...

