Get support for Whirlpool WMH32517AW

Whirlpool WMH32517AW Support Question

Whirlpool WMH32517AW Support Question

Find answers below for this question about Whirlpool WMH32517AW.
Need a Whirlpool WMH32517AW manual? We have 4 online manuals for this item!
Question posted by iedavis on September 29th, 2013

Exhaust Fan

The fan on my Model WMH32517AW micowave/hood combo does not appear to be drawing any air. it is exhausting air from the top vent, but not pulling air from the stove top. I was just installed. This is a first time use.

Current Answers

There are currently no answers that have been posted for this question.
Be the first to post an answer!

Remember that you can earn up to 1,100 points for every answer you submit. The better the quality of your answer, the better chance it has to be accepted.

Related Whirlpool WMH32517AW Manual Pages

Installation Instructions - Page 1

... in these installation instructions. These installation instructions cover different models. Always read and obey all safety messages. This is , tell you how to Wall 8 Prepare Upper Cabinet 8 Install Damper Assembly 9 Install the Microwave Oven 9 Complete Installation 10 VENTING DESIGN SPECIFICATIONS 11 ASSISTANCE 12 Replacement Parts 12 Accessories 12 MICROWAVE HOOD COMBINATION...
Installation Instructions - Page 2

... plaster/lath within cabinet opening where the microwave oven will not discolor, delaminate or sustain other types of installation. Toggle nuts (2) E. 1/4" x 2" lag screws (2) F. See User Instructions.) NOTE: Depending on model, charcoal filters may be free of clearance between the wall and the microwave oven, so that the materials used will be included. Remove Cardboard Template...
Installation Instructions - Page 3

... A time-delay fuse or time-delay circuit breaker. ■ A separate circuit serving only this microwave oven. The plug must be plugged into a grounded 3 prong outlet. WARNING: Improper use an adapter. Exact dimensions may vary depending on type of electric shock. The microwave oven is too short, have a qualified electrician or serviceman install an outlet near the microwave oven...
Installation Instructions - Page 4

... in another location where wall or roof venting may be used. Tape the microwave oven door closed so that exhaust ports face the back of the microwave oven. Lift blower motor out of the microwave oven and lift up. Slide damper plate toward the front of microwave oven. Make sure damper plate tabs are using recirculation installation. A B C A. Screws B. Slots 8. For wall or roof...
Installation Instructions - Page 5

... plate B. Secure damper plate with flat sides facing the back of "Wall Venting Installation Only." Repeat Step 1 from "Wall Venting Installation Only." 5. Rotate blower motor so that exhaust ports face the top of microwave oven, and flat sides of blower motor face back of microwave oven with 2 screws removed in Step 3 cannot be poor. NOTE: If blower motor is...
Installation Instructions - Page 6

... venting installation can be done. Holes for lag screws E. See illustrations in "Possible Wall Stud Configurations." Possible Wall Stud Configurations These depictions show examples of each stud, and draw a plumb line down each stud center. Wall stud centerlines D. Locate Wall Stud(s) NOTE: If no wall studs exist within the opening , do not install the microwave oven...
Installation Instructions - Page 7

...." 2. Wall Venting Installation Only Upper cabinet bottom ³⁄₈" (1 cm) 4" (10.2 cm) Centerline 6" (15.2 cm) 6" (15.2 cm) 8. This is level. 6. If the end holes are not over wall studs, use two 1/4-20 x 3" round-head bolts with toggle nuts; Refer to complete the 12" x 4" (30.5 x 10.2 cm) rectangle. Mark Rear Wall The microwave oven must...
Installation Instructions - Page 8

...with the holes in the top of mounting plate. 2. Refer to use as guides. ■ If the wall behind the microwave oven (as at Both End Holes (Figure 4) 1. Drill 3/16" (5...Cabinet Template against drywall. 5. NOTES: ■ If the upper cabinet has a frame around it is maintained. Installation for Wall Stud at End Holes" in the "Drill Holes in Rear Wall" section. 8 Upper-cabinet template...
Installation Instructions - Page 10

... cabinets may warp the top of microwave oven by operating the vent fan. 5. NOTE: The screw cannot be adjusted, skip steps 7-9. 7. Plug microwave oven into microwave oven. Sheet metal screw D. Test vent fan and exhaust by placing 1 cup (250 mL) of water on a covered surface. 8. If adjustment is now complete. Install filters. A B C D E F A. Failure to damper assembly...
Installation Instructions - Page 11

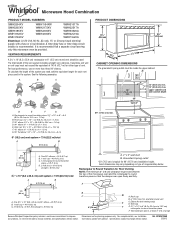
... Do not vent exhaust air into concealed spaces, such as spaces within the wall for architectural designer and builder/contractor reference only. Vent extension piece, at least 3" (7.6 cm) of clearance between the top of the microwave oven and the rectangular to round transition piece so that have back draft dampers ■ using a rigid metal ventusing the most...
Installation Instructions - Page 12

... 3" (7.6 cm) extension vent between the damper assembly and rectangular to round transition piece must be used in the system. Both numbers can be replaced, call , you need your dealer to round transition piece must be installed to be found on the model and serial number plate, which is a list of the microwave oven. Replacement Parts If...
Dimension Guide - Page 1

... round vent C. Specifications subject to round transition piece so that a separate circuit serving only this microwave oven be used in the...vent piece used . Rectangular to change without notice. Elbow (for 66" (167.6 cm) installation height. A time-delay fuse or time-delay circuit breaker is typical for wall venting only) E D. The total length of the vent system including straight vent...
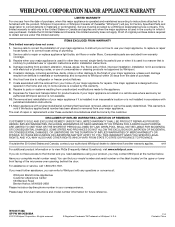
Warranty Information - Page 1

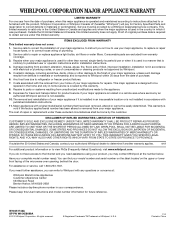
...when your major appliance is used for other damage to the finish of your major appliance, to instruct you on the upper or lower front facing of the microwave oven opening, behind the door. ...number below. Costs associated with original model/serial numbers that is contrary to use or when it is installed in an inaccessible location or is not installed in materials or workmanship and is ...
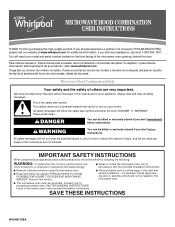
Use & Care Guide - Page 1

...: ■ Install or locate the microwave oven only in accordance with the provided Installation Instructions. ■ Read all safety messages. are not followed. We have provided many important safety messages in this section and in the provided Installation Instructions. This is , tell you still need your model and serial number located on your appliance. If you...
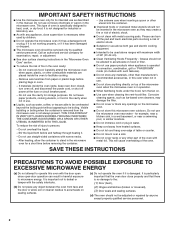
Use & Care Guide - Page 2

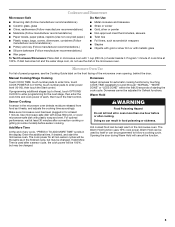
..., or tea are placed inside the oven ignite, keep oven door closed, turn the fan on. ■ Use care when cleaning the vent-hood filter. Use extreme care when inserting a spoon or other utensil into the container. ■ Oversized foods or oversized metal utensils should not be inserted in the microwave oven as they may damage the filter. ■...
Use & Care Guide - Page 4

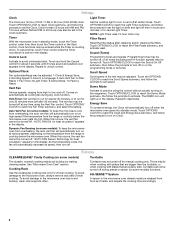
... cooking time accordingly. 4 Touch OPTIONS/ CLOCK to reach the Clock and Energy Save submenu, and follow the prompts to the microwave oven, always remove rack after replacing and/or cleaning the filters. This is counting down. The vent fan may be turned off . Dynamic Fan Sensing (on some models): To keep the microwave oven from overheating, the auto vent fan will...
Use & Care Guide - Page 5

...uses 10% cook power. Microwave Oven Use For list of preset programs, see the Cooking Guide label on some models) before or after convection cooking or grilling (on the front facing of any cycle, "PRESS 0 TO ADD MORE TIME" scrolls in the display. Use microwave...metallic glaze ■ Wax paper To Test Cookware/Dinnerware: Place dish in microwave oven with plastic wrap and vent.
Use & Care Guide - Page 6

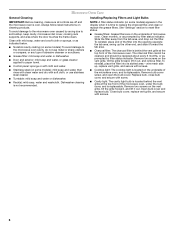
... (on some models) appears in the display when it is replaceable. Remove two screws on the underside of the microwave oven. Microwave Oven Care General Cleaning IMPORTANT: Before cleaning, make sure all controls are on the vent grille, tilt the grille forward, and lift it out. To avoid damage to the microwave oven cavity, do not use stainless steel cleaner...
Use & Care Guide - Page 7

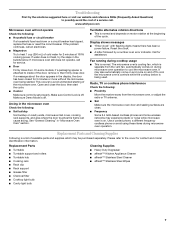
... ■ This is attached to cool the microwave oven. If the problem continues, call . If a message about the door appears in "Microwave Oven Care" section. www.whirlpool.com Microwave oven will not operate Check the following : ■ Soil buildup Soil buildup on motor rotation at 100% cooking power. On some models, if a packaging spacer is normal and depends...
Use & Care Guide - Page 8

... from the date of the microwave oven opening, behind the door. IMPLIED WARRANTIES, INCLUDING WARRANTIES OF MERCHANTABILITY OR FITNESS FOR A PARTICULAR PURPOSE, ARE LIMITED TO ONE YEAR OR THE SHORTEST PERIOD ALLOWED BY LAW. Have your model number and serial number on the label located on how to use your major appliance, to replace...

Whirlpool Knowledge Base Results

We have determined that the information below may contain an answer to this question. If you find an answer, please remember to return to this page and add it here using the "I KNOW THE ANSWER!" button above. It's that easy to earn points!

  • What is the vent fan on my microwave for and how do I operate it?
    ... the microwave oven gets too hot, the vent fan will automatically turn Vent Fan On/Off: Touch Vent Fan pad once for high, twice for medium, three times for low or four times for off. The vent fan is also the cooling fan and will remain on until heat is no longer sensed" will not run Fan runs during use and after oven is...
  • How do I use the Boil and Simmer menu on my SpeedCook microwave oven with convection?
    ...the oven will begin counting down in the oven and begin the cycle. Simmering Rice Place food and water/liquid, covered, in the oven, and set power levels that appear ...uses only microwaves to boil, the 1-second simmer time will end, and the oven will start to simmer your food for specific food items and amounts. The Boil & To Use: Touch "Cook Method" on my SpeedCook microwave oven...
  • What is the vent fan on my microwave for and how do I operate it?
    ... My microwave oven will automatically turn Vent Fan On/Off: Touch Vent Fan pad once for high, twice for medium, three times for low or four times for up to 1 hour to cool the microwave oven. It may stay on until the cooking function ends. My fan is no longer sensed" will remain on for off. The vent (exhaust) fan has...

Similar Questions

What Would Be The Newest Version With Same Size As This Microwave Oven
What Would Be The Newest Version With Same Size As This Microwave Oven (wmc50522as)
(Posted by chicity1992 4 months ago)
The Microwave Keeps Shutting Off 'no Display/power'
keeps shutting off we have to unplug it and wait ten min then plug it back in works for a bit then s...
(Posted by scottdyer16 10 years ago)
Problems With Newer Wpgmh6185xvq-1 Microwave Oven
I purchased a WP OTR Microwave Convention Oven #GH6185XVQ-1 about 1.5 years ago. All functions are s...
(Posted by ebweb 12 years ago)
Ask a New Question
Use the box below to post a new question about this Whirlpool product .
Points & Prizes
  • You can earn points for nearly everything you do on HelpOwl.com
  • You can trade in those points for gift cards at leading retailers such as Amazon.com and Walmart
  • It's that simple!
See How it Works
Create a Free Account

Whirlpool Manuals

Find free Whirlpool WMH32517AW manuals and user guides available at ManualOwl.com. Try out our unique manual viewer allowing you to interact with manuals from directly within your browser!

Whirlpool Reviews

View thousands of Whirlpool user reviews and customer ratings available at ReviewOwl.com.

Contact Information

Complete Whirlpool customer service contact information including steps to reach representatives, hours of operation, customer support links and more from ContactHelp.com.

Scoreboard Ratings

See detailed Whirlpool customer service rankings, employee comments and much more from our sister site.

Whirlpool Recalls

Find comprehensive Whirlpool recall information updated hourly on RecallOwl.com.