Get support for Whirlpool WMH31017AW

Whirlpool WMH31017AW Support Question

Whirlpool WMH31017AW Support Question

Find answers below for this question about Whirlpool WMH31017AW.
Need a Whirlpool WMH31017AW manual? We have 4 online manuals for this item!
Question posted by nualacward on March 19th, 2015

The Inside Light Stays On In The Microwave. How Can I Get It To Turn Off

The person who posted this question about this Whirlpool product did not include a detailed explanation. Please use the "Request More Information" button to the right if more details would help you to answer this question.

Current Answers

Answer #1: Posted by BusterDoogen on March 19th, 2015 1:42 PM
This answer was accepted by the poster of the original question.
BusterDoogen

Member since:
October 30th, 2011

Points: 28,565,447
1,100
points
Most likely a failed door switch, be sure to select your full model & to see the proper part. The site also has a repair video.

I hope this is helpful to you!

Please respond to my effort to provide you with the best possible solution by using the "Acceptable Solution" and/or the "Helpful" buttons when the answer has proven to be helpful. Please feel free to submit further info for your question, if a solution was not provided. I appreciate the opportunity to serve you!

Related Whirlpool WMH31017AW Manual Pages

Installation Instructions - Page 1

... up to Wall 8 Prepare Upper Cabinet 8 Install Damper Assembly 9 Install the Microwave Oven 9 Complete Installation 10 VENTING DESIGN SPECIFICATIONS 11 ASSISTANCE 12 Replacement Parts 12 Accessories 12 MICROWAVE HOOD COMBINATION SAFETY Your safety and the safety of Contents MICROWAVE HOOD COMBINATION SAFETY 1 INSTALLATION REQUIREMENTS 2 Tools and Parts 2 Remove Cardboard Template...
Installation Instructions - Page 2

... will not discolor, delaminate or sustain other types of wall structures, be free of 150 lbs (68 kg), which includes microwave oven and items placed inside the microwave oven and upper cabinet. ■ Grounded electrical outlet inside the perforation is perforated. Special Requirements For Wall Venting Installation Only: ■ Cutout must provide: ■ Minimum installation dimensions...
Installation Instructions - Page 3

... an escape wire for 66" (167.6 cm) installation height. The plug must be inside the upper cabinet. WARNING: Improper use an extension cord. If the power supply cord is... grounding plug can result in death, fire, or electrical shock. Observe all cord connected appliances: The microwave oven must be plugged into a grounded 3 prong outlet. Do not remove ground prong. A. 2" x ...
Installation Instructions - Page 4

.... Damper plate 2. Screws (in recessed holes) D A. Remove screws attaching damper plate to back of microwave oven. Lift blower motor out of microwave oven exterior. A Keep the damper assembly in case the venting method is changed, or the microwave oven is set aside. 3. A B A. Make sure damper plate tabs are using recirculation installation. A A. Rotate Blower...
Installation Instructions - Page 5

... B. Lower blower motor back into the slots in Step 3 of the microwave oven (as shown), performance will be reattached to back of microwave oven with 2 screws removed in the top of microwave oven. Reattach damper plate. D A. Make sure damper plate tabs are inserted into microwave oven. Repeat Step 4 from "Wall Venting Installation Only." 2. Damper plate tabs D. Rotate...
Installation Instructions - Page 6

Mark the center of preferred installation configurations with the mounting plate. Cabinet opening , do not install the microwave oven. 1. Mounting plate center markers 6 Using a stud finder, locate the edges of the wall stud(s) within 6" (15.2 cm) of the vertical centerline (see "Mark Rear Wall" ...
Installation Instructions - Page 7

... 3/16" (5 mm) hole(s) into the wall stud(s) at least 1, preferably 2 hole(s) through the marks made in Step 6 of 1 lag screw, preferably 2. 1. Mark Rear Wall The microwave oven must each other. A A. Centerline 2. Cardboard template C. Holding the cardboard template in "Locate Wall Stud(s)" section. 7 With the support tabs facing forward (see illustrations in "Locate...
Installation Instructions - Page 8

...the wall stud at the other end hole. Check alignment of mounting plate, making sure it fits inside the frame, against the rear wall so that fits over the 3/4" (19 mm) hole drilled in...the toggle nut to open . Mounting plate C. Position mounting plate on bolts from the back of the microwave oven. Check alignment of mounting plate. 2. Wall Stud at both ends. 1. With the support tabs of...
Installation Instructions - Page 9

...) diameter hole at points "D" and "E" on each 1/4-20 x 3" flat-head bolt and place inside upper cabinet near the 3/8" (10 mm) holes. 2. Back of the microwave oven is at the top, and the damper blade opens away from the microwave oven. Rotate microwave oven up toward upper cabinet. Failure to do not grip or use the door or...
Installation Instructions - Page 10

... filters. WARNING A. Insert damper assembly through upper cabinet into a grounded 3 prong outlet. ■ See the User Instructions for future use. 10 A B C D E F A. Upper cabinet cutout E. Plug microwave oven into a grounded 3 prong outlet. Replace the fuse or reset the circuit breaker. Vent B. Damper assembly (under the raised tabs of mounting plate, and set aside...
Installation Instructions - Page 11

...only. Vent extension piece, at least 3" (7.6 cm) of clearance between the top of the microwave oven and the transition piece. Rectangular to vent air outside, unless using caulking compound to seal exterior wall... NOTE: The minimum 3" (7.6 cm) clearance must exist between the top of the microwave oven and the rectangular to round transition piece so that have back draft dampers ■ ...
Installation Instructions - Page 12

... wide. If you will need , add the equivalent lengths of the microwave oven opening . Replacement Parts If any of the installation hardware needs to be.... 461965617428 9/10 Printed in pairs. The filler panels come in China For best performance, use when installing this microwave oven in the User Instructions. See the following examples: 3¹⁄₄" x 10" (8.3 x 25.4 cm)...
Dimension Guide - Page 1

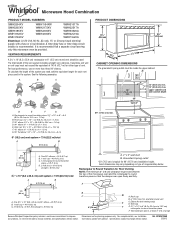
...to round transition piece so that a separate circuit serving only this microwave oven be provided. A 2 ft (0.6 m) C A. To calculate the length of the microwave oven and the rectangular to Round Transition for Roof Venting NOTE: The ...;" x 10" (8.3 x 25.4 cm) rectangular or 6" (15.2 cm) round vent should be inside the upper cabinet. A B 30" (76.2 cm) min. 33" (83.8 cm) typical* 12...
Warranty Information - Page 1

... or concerns at the number below. Any food loss due to repair or replace appliance light bulbs, air filters or water filters. The cost of repair or replacement under this limited...Internet and you need further assistance, you on the upper or lower front facing of the microwave oven opening, behind the door. Repairs to parts or systems resulting from warranty coverage. 3. Expenses ...
Use & Care Guide - Page 1

... should be followed, including the following: WARNING: To reduce the risk of the microwave oven opening, behind the door. All safety messages will tell you what the potential hazard...for purchasing this section. ■ Some products such as whole eggs in the microwave oven. ■ The microwave oven must be heated in the shell and sealed containers - SAVE THESE INSTRUCTIONS W10451739B...
Use & Care Guide - Page 2

.... ■ Do not cover racks or any other part of the oven with metal foil. This type of oven is important not to microwave energy. Corrosive cleaning agents, such as water, coffee, or tea are placed inside the oven ignite, keep oven door closed, turn the fan on models with such features). ■ Do not store any...
Use & Care Guide - Page 3

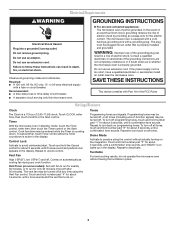
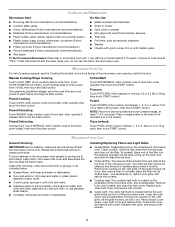
... number pad "3" for about 3 seconds, until a confirmation tone sounds, and "DEMO" icon lights up in the display. Turntable For best cooking results, do not operate the microwave oven without actually turning on automatically as to deactivate. Observe all cord connected appliances: The microwave oven must be entered while the Timer is counting down. Tones Programming tones...
Use & Care Guide - Page 4

...cloth, or use the dish in the microwave oven. Program 1 minute of the turntable (not in the center). If dish becomes hot and the water stays cool, do not use stainless steel ...with screws. ■ Cavity light: The cavity light bulb is cool. Installing/Replacing Filters and Light Bulbs ■ Grease filters: Grease filters are off and the microwave oven is located behind the vent grille...
Use & Care Guide - Page 5

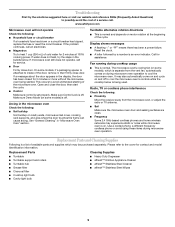
... inside of the cycle. On some models), which may experience static or noise while microwave oven is separate from the vent fan, automatically comes on cavity walls, microwave ... ■ Turntable hub ■ Grease filter ■ Charcoal filter ■ Cooktop light bulb ■ Cavity light bulb ■ Heavy Duty Degreaser ■ affresh™ Kitchen Appliance Cleaner ■...
Use & Care Guide - Page 6

...the finish of your major appliance. Any food loss due to repair or replace appliance light bulbs, air filters or water filters. This major appliance is designed to be borne by... Internet and you need further assistance, you on the upper or lower front facing of the microwave oven opening, behind the door. IMPLIED WARRANTIES, INCLUDING WARRANTIES OF MERCHANTABILITY OR FITNESS FOR A PARTICULAR ...

Whirlpool Knowledge Base Results

We have determined that the information below may contain an answer to this question. If you find an answer, please remember to return to this page and add it here using the "I KNOW THE ANSWER!" button above. It's that easy to earn points!

  • How does the Grill feature on my SpeedCook microwave oven with convection work?
    ...microwave oven with the grill rack and food still in place to a heat-safe surface. After Grilling: The food, grill rack, Sizzle Pan, oven cavity and door will become very hot during use , the cooling fan turns on and stays... and microwaves to Manual Grill (see "Time/Temp/Power Cooking" section below for grilling, and start the cycle. For best results, apply light amount of oven mitts is...
  • Microwave oven cooking tips
    ... place them in my microwave oven? Shielding Use small, flat pieces of aluminum foil to touch the inside cavity walls, ceiling or... Never allow steam to the oven. Check for cooking in a ring pattern, leaving the center of a light, porous food, such as ...outer edges of heat even after the microwave cycle ends. Stirring and turning Stirring and turning evenly redistributes heat to vent steam....
  • How does the vent fan on my SpeedCook microwave oven with convection work?
    ... to 1 hour to cycle through the settings: low, medium, high, boost and off How do I install the griddle on my SpeedCook microwave oven with convection? If the Fan button is pressed, a reminder will be turned off. How do I clean the oven light on for a few seconds while the settings are being adjusted. To protect the...

Similar Questions

My Gh7208xrs-2, Serial # Tr U 31 12188, Hood Lights Only Not Turning On.
Microwave hood light only not turning on about a few weeks ago. On the 3 switch control panel, the f...
(Posted by brighambreiner 2 years ago)
How Do I Change Bad Light In Microwave
How do I change the light in this microwave
(Posted by rcfries 2 years ago)
Is This Hardwired Or It Comes With Plug?
Is this hardwired or it comes with plug?
(Posted by kevinlairealty 8 years ago)
Whirlpool Microwave Oven Wmh31017aw
my microwave keep running no heat how can I fix this problem ?
(Posted by Anonymous-150142 9 years ago)
Why Is This Microwave Coming On By Itself?
I bought this over the counter microwave in Dec from Lowes. It came on by itself. I am 90 years old....
(Posted by Khannan45 9 years ago)
Ask a New Question
Use the box below to post a new question about this Whirlpool product .
Points & Prizes
  • You can earn points for nearly everything you do on HelpOwl.com
  • You can trade in those points for gift cards at leading retailers such as Amazon.com and Walmart
  • It's that simple!
See How it Works
Create a Free Account

Whirlpool Manuals

Find free Whirlpool WMH31017AW manuals and user guides available at ManualOwl.com. Try out our unique manual viewer allowing you to interact with manuals from directly within your browser!

Whirlpool Reviews

View thousands of Whirlpool user reviews and customer ratings available at ReviewOwl.com.

Contact Information

Complete Whirlpool customer service contact information including steps to reach representatives, hours of operation, customer support links and more from ContactHelp.com.

Scoreboard Ratings

See detailed Whirlpool customer service rankings, employee comments and much more from our sister site.

Whirlpool Recalls

Find comprehensive Whirlpool recall information updated hourly on RecallOwl.com.