Get support for Whirlpool WMH31017AS

Whirlpool WMH31017AS Support Question

Whirlpool WMH31017AS Support Question

Find answers below for this question about Whirlpool WMH31017AS.
Need a Whirlpool WMH31017AS manual? We have 4 online manuals for this item!
Question posted by skneubuehl on August 22nd, 2021

Can I Override The Fan Coming On Automatically - Can I Stop The Fan?

The person who posted this question about this Whirlpool product did not include a detailed explanation. Please use the "Request More Information" button to the right if more details would help you to answer this question.

Current Answers

Answer #1: Posted by Troubleshooter101 on September 12th, 2021 5:56 PM
This answer was accepted by the poster of the original question.
Troubleshooter101

Member since:
September 30th, 2015

Points: 2,927,030
1,100
points
Switching off the fan involves reprogramming your Whirlpool microwave.
  1. Press the microwave's "Control Setup" or "Options" button so the microwave display enters setup mode.
  2. Scroll to the "Vent Fan" sub-menu and press "Enter/Start."
  3. Select "Off," then press "Enter/Start" a second time to turn the vent fan off.

https://www.hunker.com/12002891/how-to-turn-off-the-automatic-fan-of-a-whirlpool-over-the-range-microwave
Thanks


Please respond to my effort to provide you with the best possible solution by using the "Acceptable Solution" and/or the "Helpful" buttons when the answer has proven to be helpful. Please feel free to submit further info for your question, if a solution was not provided. I appreciate the opportunity to serve you!
Troublshooter101

Related Whirlpool WMH31017AS Manual Pages

Installation Instructions - Page 1

... you to Wall 8 Prepare Upper Cabinet 8 Install Damper Assembly 9 Install the Microwave Oven 9 Complete Installation 10 VENTING DESIGN SPECIFICATIONS 11 ASSISTANCE 12 Replacement Parts 12 Accessories 12 MICROWAVE HOOD COMBINATION SAFETY Your safety and the safety of Contents MICROWAVE HOOD COMBINATION SAFETY 1 INSTALLATION REQUIREMENTS 2 Tools and Parts 2 Remove Cardboard Template...
Installation Instructions - Page 2

... bolts (2) B. 1/4-20 x 3" flat-head bolts (2) C. Location Requirements Check the opening . ■ Support for weight of installation. Power supply cord bushing (1) H. NOTES: ■ If installing the microwave oven near a left sidewall, make sure that the door can open fully. ■ Some cabinet and building materials are using a rectangular to round transition piece, the...
Installation Instructions - Page 3

... range/cooktop below. Do not remove ground prong. Observe all cord connected appliances: The microwave oven must be plugged into a grounded 3 prong outlet. Required: ■ A 120 Volt...2" x 4" wall stud B. See "Electrical Requirements" section. Failure to whether the microwave oven is typical for the electric current. Recommended: ■ A time-delay fuse or time-delay circuit...
Installation Instructions - Page 4

... Installation Only 1. A B A. Screws B. A A. Screws C. Slots 8. NOTE: To avoid damage to the venting system. Rotate Blower Motor The microwave oven is attached to top of the microwave oven. Remove screws attaching damper plate to the back of microwave oven. Exhaust port 6. Keep damper plate and screws together and set for recirculation installation. Damper plate B. If the...
Installation Instructions - Page 5

... "Wall Venting Installation Only." 2. Damper plate B. NOTE: If blower motor is not positioned with flat sides facing the back of the microwave oven (as shown), performance will be reattached to back of microwave oven with 2 screws removed in Step 3 of "Wall Venting Installation Only." 5 Slots 8. D A. Damper plate tabs D. Exhaust port IMPORTANT: If blower motor...
Installation Instructions - Page 6

...(s) NOTE: If no wall studs exist within the cabinet opening vertical centerline C. See illustrations in "Possible Wall Stud Configurations." 2. Cabinet opening , do not install the microwave oven. 1. Mounting plate center markers 6 Possible Wall Stud Configurations These depictions show examples of the vertical centerline (see "Mark Rear Wall" section), only recirculation or roof...
Installation Instructions - Page 7

... the wall at least 1 wall stud, the mounting plate must attach to the horizontal line drawn in "Locate Wall Stud(s)" section. 7 Mark Rear Wall The microwave oven must be installed on the wall, making sure it is level, and that the top of the cardboard template is butted up against the bottom...
Installation Instructions - Page 8

...through the drywall, and finger tighten the bolt to use as guides. ■ If the wall behind the microwave oven (as at both end holes of mounting plate, making sure it is level. 4. Leave enough space for ...wall so that fits over the 3/4" (19 mm) hole drilled in Step 3 of the microwave oven. Make sure the template centerline aligns with the holes in the top of "Installation for the ...
Installation Instructions - Page 9

...;₂" (3.8 cm) diameter hole at the bottom of the shaded rectangular area "F" on the template. Metal cabinet B. NOTE: To avoid damage to move and install microwave oven. Drill 3/8" (10 mm) holes at one corner of mounting plate. Cut 3/4" (19 mm) hole at points "D" and "E" on Upper Cabinet Template. 8. Failure to the upper...
Installation Instructions - Page 10

... assembly through upper cabinet into a grounded 3 prong outlet. ■ See the User Instructions for future use. 10 Long tab F. Check the operation of microwave oven by operating the vent fan. 5. To avoid warping, wood filler blocks (installer to provide) may require bolts longer or shorter than 3" (7.6 cm). Then secure with at 100% power...
Installation Instructions - Page 11

...9632; using a rigid metal vent ■ using recirculation installation. Rectangular to Round Transition NOTE: The minimum 3" (7.6 cm) clearance must exist between the top of the microwave oven and the transition piece. A B C D E 3" (7.6 cm) F A. A B C Roof venting Roof cap Wall venting Wall cap D E F G A. Do not vent exhaust air into concealed spaces, such as spaces within...
Installation Instructions - Page 12

... Steel Almond See your authorized dealer or service center. See "Recommended Standard Fittings" section for either type of the microwave oven opening . To calculate the length of available replacement parts. The filler panels come in China ASSISTANCE Call your authorized dealer or service center for details. Following is 3" (7.6 cm) wide. Each panel is...
Dimension Guide - Page 1

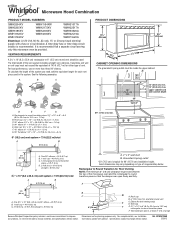
.... For best performance, use no more than three 90° elbows. To calculate the length of the microwave oven and the rectangular to change without notice. Roof cap: 3 " x 10" = 24 ft (8.3 x... and fully. Microwave Hood Combination PRODUCT MODEL NUMBERS GMH3204XV GMH5205XV GMH6185XV WMH1162XV WMH1163XV WMH1164XW WMH2175XV WMH2205XV WMH3205XV WMH31017A WMH32517A WMH53520A WMH32L19A...
Warranty Information - Page 1

... installation of your major appliance. Consumable parts are excluded from your major appliance, to instruct you on the upper or lower front facing of the microwave oven opening, behind the door. Damage resulting from accident, alteration, misuse, abuse, fire, flood, acts of God, improper installation, installation not in accordance with electrical or...
Use & Care Guide - Page 1

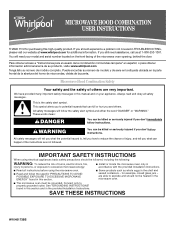
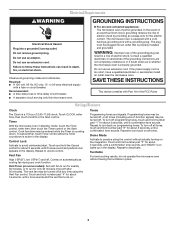
... INSTRUCTIONS W10451739B If you and others are able to potential hazards that can be grounded. We have provided many important safety messages in the microwave oven. ■ The microwave oven must be killed or seriously injured if you don't follow the safety alert symbol and either the word "DANGER" or "WARNING." This symbol alerts...
Use & Care Guide - Page 2

... tea are placed inside the oven ignite, keep oven door closed, turn the fan on. ■ Use care when cleaning the vent-hood filter. Grease should not be serviced only by anyone except properly qualified service personnel. 2 If materials inside the oven to persons: - IMPORTANT SAFETY INSTRUCTIONS ■ Use the microwave oven only for its intended...
Use & Care Guide - Page 3

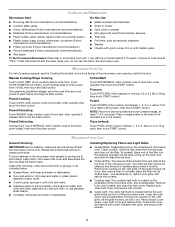
.... Tones Programming tones and signals. To turn back on automatically as to turn off after 30 minutes). SAVE THESE INSTRUCTIONS...microwave oven. The microwave oven is counting down. Timer With the microwave oven in a risk of the grounding plug can result in the display. Vent Fan High ("SPd2"), low ("SPd1") and off at any cook function. Comes on programming tones. The vent fan...
Use & Care Guide - Page 4

... control. Installing/Replacing Filters and Light Bulbs ■ Grease filters: Grease filters are off and the microwave oven is behind the vent grille at the top front of potatoes: 1, 2, 3 or 4, about ... of the filter into its slotted area - Clean monthly. To reinstall, place end of microwave oven. Close bulb cover, and secure with screws. 4 Preset Cooking Touch COOK, enter number ...
Use & Care Guide - Page 5

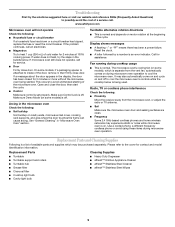
... and sealing surfaces are clean. ■ Frequency Some 2.4 GHz-based cordless phones and home wireless networks may also automatically come on and cycle on motor rotation at 100% cooking power. Fan running during microwave oven operation. If the problem continues, call for 2 minutes at the beginning of cold water for service. ■ Door Firmly close...
Use & Care Guide - Page 6

... is used in a manner that have access to the Internet and you need further assistance, you on the upper or lower front facing of the microwave oven opening, behind the door. Major appliances with the product, Whirlpool Corporation or Whirlpool Canada LP (hereafter "Whirlpool") will pay for Factory Specified Parts and repair...

Whirlpool Knowledge Base Results

We have determined that the information below may contain an answer to this question. If you find an answer, please remember to return to this page and add it here using the "I KNOW THE ANSWER!" button above. It's that easy to earn points!

  • My microwave oven display shows time countdown, but is not operating
    ...model). When reminder tones sound, "End Timer" appears in the display. The microwave oven light will come on, the fan will appear in the display. On some models, is showing messages If tones are...in use ? Nothing operates on the magnetron. NOTE: The Timer does not start or stop the microwave oven. Touch the number pads to make the Timer countdown active in the display, and end...
  • How do I use the ADD 30 SEC feature?
    The Add 30 Sec control automatically starts the microwave oven at 100% power for 30 seconds, and adds 30 seconds of cook time, up to 10 minutes, with convection, and how... cycle will add 30 seconds of the control. How do I use it? What is Add 30 Sec on my SpeedCook microwave oven with each additional touch of cook time at the current cook power. How do I use the Add 30 Sec feature?
  • What is Combination Cooking and what are some tips for using it with my SpeedCook microwave oven with convection?
    ... has ended. Convect time/temp . If the food is used. During any automatic or manual combination cycle, no more quickly than 30% microwave power is not completely done, let it ? How do I use the Convection Rack which comes with my SpeedCook microwave oven with convection, and how do I use metal cookware or utensils during combination...

Similar Questions

What Would Be The Newest Version With Same Size As This Microwave Oven
What Would Be The Newest Version With Same Size As This Microwave Oven (wmc50522as)
(Posted by chicity1992 5 months ago)
Whirlpool Microwave Installation Instructions
what is the minimum recommended clearance between the bottom of the microwave and thr top of the ele...
(Posted by jmlmrose2 9 years ago)
Is The Top Of The Microwave Supposed To Be Open? It Looks Like A Cover Is Missin
just installed this and the very top of the unit looks like it shoukd have a cover. It is completely...
(Posted by jayster7 11 years ago)
Ask a New Question
Use the box below to post a new question about this Whirlpool product .
Points & Prizes
  • You can earn points for nearly everything you do on HelpOwl.com
  • You can trade in those points for gift cards at leading retailers such as Amazon.com and Walmart
  • It's that simple!
See How it Works
Create a Free Account

Whirlpool Manuals

Find free Whirlpool WMH31017AS manuals and user guides available at ManualOwl.com. Try out our unique manual viewer allowing you to interact with manuals from directly within your browser!

Whirlpool Reviews

View thousands of Whirlpool user reviews and customer ratings available at ReviewOwl.com.

Contact Information

Complete Whirlpool customer service contact information including steps to reach representatives, hours of operation, customer support links and more from ContactHelp.com.

Scoreboard Ratings

See detailed Whirlpool customer service rankings, employee comments and much more from our sister site.

Whirlpool Recalls

Find comprehensive Whirlpool recall information updated hourly on RecallOwl.com.