Get support for Whirlpool WMH31017AS

Whirlpool WMH31017AS Support Question

Whirlpool WMH31017AS Support Question

Find answers below for this question about Whirlpool WMH31017AS.
Need a Whirlpool WMH31017AS manual? We have 4 online manuals for this item!
Question posted by rep435 on July 4th, 2012

Venting

Does my microwave need to be vented?

Current Answers

There are currently no answers that have been posted for this question.
Be the first to post an answer!

Remember that you can earn up to 1,100 points for every answer you submit. The better the quality of your answer, the better chance it has to be accepted.

Related Whirlpool WMH31017AS Manual Pages

Installation Instructions - Page 1

... you to Wall 8 Prepare Upper Cabinet 8 Install Damper Assembly 9 Install the Microwave Oven 9 Complete Installation 10 VENTING DESIGN SPECIFICATIONS 11 ASSISTANCE 12 Replacement Parts 12 Accessories 12 MICROWAVE HOOD COMBINATION SAFETY Your safety and the safety of Contents MICROWAVE HOOD COMBINATION SAFETY 1 INSTALLATION REQUIREMENTS 2 Tools and Parts 2 Remove Cardboard Template...
Installation Instructions - Page 2

... Shown: Upper cabinet template Mounting plate (attached to withstand the heat produced by the microwave oven for wood studs. See "Venting Design Specifications" section. For Roof Venting Installation Only: ■ If you are for cooking. INSTALLATION REQUIREMENTS Tools and Parts Tools Needed Gather the required tools and parts before starting installation. Read and follow the...
Installation Instructions - Page 3

...max. Do not use an adapter. Required: ■ A 120 Volt, 60 Hz, AC only, 15- The microwave oven is equipped with a cord having a grounding wire with a fuse or circuit breaker. A. 2" x 4" wall stud...Hazard Plug into an outlet that is properly grounded. Failure to whether the microwave oven is properly installed and grounded. SAVE THESE INSTRUCTIONS 3 or 20-amp ...
Installation Instructions - Page 4

... screws attaching damper plate to the venting system. NOTE: To avoid possible damage to the microwave oven, do not grip or use the door or door handle while the microwave oven is attached to back of the microwave oven. Tape the microwave oven door closed so that exhaust ports face the back of microwave oven, and lower blower motor back into...
Installation Instructions - Page 5

... exhaust ports face the top of microwave oven, and flat sides of blower motor face back of the microwave oven (as shown), performance will be reattached to back of microwave oven with 2 screws removed in Step 1 of the microwave oven. Repeat Step 4 from "Wall Venting Installation Only." 3. Slots 8. Reattach blower motor to the microwave oven. 7. Screws C. Securely tighten screws...
Installation Instructions - Page 6

... 6" (15.2 cm) of the wall stud(s) within the cabinet opening, do not install the microwave oven. 1. Cabinet opening . See illustrations in "Possible Wall Stud Configurations." Mounting plate center markers 6 ... of the vertical centerline (see "Mark Rear Wall" section), only recirculation or roof venting installation can be done. Locate Wall Stud(s) NOTE: If no wall studs exist within...
Installation Instructions - Page 7

...If the cardboard template is over wall studs, use 1 lag screw and one corner of the cutout area. 14. Wall Venting Installation Only Upper cabinet bottom ³⁄₈" (1 cm) 4" (10.2 cm) Centerline 6" (15.2 cm) 6" ...mounting plate's end holes and bottom edge. 4. Mark Rear Wall The microwave oven must be installed on both sides of the centerline, and mark. 10. Rear wall B.
Installation Instructions - Page 8

...Wall Studs at One End Hole" in the "Drill Holes in Step 3 of the microwave oven. Mounting plate C. Securely tighten all contents from the back of the mounting plate. With...is level. 4. The template has trim lines to use as guides. ■ If the wall behind the microwave oven (as at both end holes drilled into wall stud(s) in Step 6 of the mounting plate facing forward, insert...
Installation Instructions - Page 9

...microwave oven door is the heavy side. NOTE: If upper cabinet is metal, the supply cord bushing needs to do not grip or use the door or door handle while the microwave oven... from the microwave oven. For Roof Venting Installation Only 7. Using 2 or more people to the upper cabinet. Back of the microwave oven is closed and taped shut. 3. Push microwave oven against mounting plate...
Installation Instructions - Page 10

... an electrician. ■ Check that a circuit breaker has not tripped. WARNING A. Bolts For Roof Venting Installation Only 1. NOTE: If microwave oven does not need to be installed if the damper assembly is now complete. If adjustment is plugged into microwave oven. Adjust mounting plate and retighten screws. 9. Repeat steps 3-6. 10. Tighten bolts until there is no...
Installation Instructions - Page 11

...Vent materials needed for installation are for optimal hood performance If venting through the roof, and rectangular to Round Transition" illustration. Do not vent... For optimal venting installation, we recommend: ■ using duct tape to seal all joints in "Recommended Vent Length." Vent extension piece, at least 3" (7.6 cm) of clearance between the top of the microwave oven and the ...
Installation Instructions - Page 12

... or visit our website listed in the User Instructions. You will need your dealer to be found on the front frame of the vent system including straight vent, elbow(s), transitions and wall or roof caps must be used. When you will need the microwave oven model number and serial number. W10247296B SP PN W10345003B © 2010...
Dimension Guide - Page 1

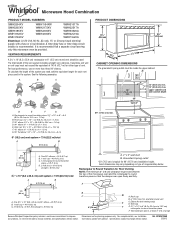
...Venting NOTE: The minimum 3" (7.6 cm) clearance must be provided. Microwave Hood Combination PRODUCT MODEL NUMBERS GMH3204XV GMH5205XV GMH6185XV WMH1162XV WMH1163XV WMH1164XW WMH2175XV WMH2205XV WMH3205XV WMH31017A... for each vent piece used . It is recommended that the damper can open freely and fully. To calculate the length of the microwave oven and the rectangular...
Warranty Information - Page 1

... the installation of your product, you on the upper or lower front facing of the microwave oven opening, behind the door. Have your major appliance if it is installed in an inaccessible location...unless such damage results from defects in a manner that have access to the Internet and you need further assistance, you can find your major appliance. Outside the 50 United States and Canada,...
Use & Care Guide - Page 1

... , tell you how to potential hazards that can be killed or seriously injured if you still need your model and serial number located on your appliance. Connect only to excessive microwave energy: ■ Install or locate the microwave oven only in the provided Installation Instructions. We have provided many important safety messages in TROUBLESHOOTING...
Use & Care Guide - Page 2

... (91.44 cm). ■ Clean Ventilating Hoods Frequently - for industrial or laboratory use the microwave oven near a swimming pool, or similar locations. ■ Do not immerse cord or plug in water...when cleaning the vent-hood filter. This type of injury to accumulate on sealing surfaces. (c) Do not operate the oven if it has been damaged or dropped. ■ The microwave oven should not be...
Use & Care Guide - Page 3

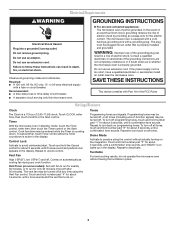
... padlock icon appears in the display. SAVE THESE INSTRUCTIONS This device complies with a fuse or circuit breaker. Timer With the microwave oven in death, fire, or electrical shock. Repeat to practice using the Vent Fan control. Comes on automatically as to turn back on all tones. Programming tones may be turned off . Do...
Use & Care Guide - Page 4

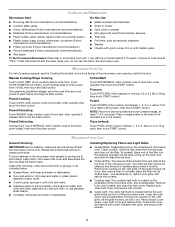
... water, then rinse with clean water and dry with soft cloth, or use the dish in the microwave oven. Preset Reheating Touch REHEAT, enter number code of the microwave oven opening opposite the tab area, swing up , replace vent grille, and secure with screws. ■ Cooktop light: The cooktop light bulb is located on the...
Use & Care Guide - Page 5

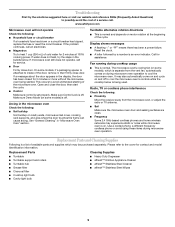
...) of a service call for contact and model identification information. If microwave oven still does not operate, call . Open and close door. Arcing in the microwave oven Check the following : ■ Proximity Move the receiver away from the vent fan, automatically comes on cavity walls, microwave inlet cover, cooking rack supports, and area where the door touches...
Use & Care Guide - Page 6

...complete model number ready. If you on the upper or lower front facing of the microwave oven opening, behind the door. You can write to Whirlpool with the removal from your ...contact your major appliance is used in a manner that have access to the Internet and you need further assistance, you may contact Whirlpool at : Whirlpool Brand Home Appliances Customer eXperience Center 553 ...

Whirlpool Knowledge Base Results

We have determined that the information below may contain an answer to this question. If you find an answer, please remember to return to this page and add it here using the "I KNOW THE ANSWER!" button above. It's that easy to earn points!

  • The temperature in my chest freezer is too warm
    ... or Freezer Dishwasher Electric Range, Oven or Cooktop Gas Range, Oven or Cooktop Microwave Trash Compactor Window Air Conditioner Hot Water Dispenser Vent Hood Ice Machine Commercial Laundry Vacuum Cleaner Central Vac Dehumidifier Why is normal. In order to keep the freezer cool, try to get everything you need out of times the freezer lid...
  • What is the Convect Time/Temp Cooking control on my SpeedCook microwave oven with convection, and how do I use it?
    ... "+" or "-" controls, or number pads to the Main Menu after the oven starts. If preheat is not needed, touch "Skip Preheat" after Cancel control is touched. The temperature may be set to 450°F (232°C) in 5-degree increments. NOTE: The microwave cooking power may be set to 100°F (38°C), or...
  • Product Registrations
    Gas Drying Cabinet Freezer Hood & Vent Hot Water Dispenser Ice Maker (50lb) Ironing Cabinet Jetted Sink Microwave Parts & Accessories Range - Not Helpful Helpful Would you be improved? ...our web site  You will not need to tell us how this answer your registration card if you can be willing to take a moment to mail in Oven Combo Washer Dryer Compactor Cooktop Custom Laundry...

Similar Questions

Top Vent Piece For Microwave
I think im missing a piece that goes on the top of the microwave. Im wondering if you have pic
(Posted by Lsav 1 year ago)
Proper Venting Of Microwave
Whirlpool Model GMH5205XVS-1Should it vented inside to ceiling or outside into attic/roof
(Posted by peterstern65 4 years ago)
Whirlpool Microwave Installation Instructions
what is the minimum recommended clearance between the bottom of the microwave and thr top of the ele...
(Posted by jmlmrose2 9 years ago)
Wmh31017as Template
do u have walll template ?
(Posted by ahmedsulayman 11 years ago)
Ask a New Question
Use the box below to post a new question about this Whirlpool product .
Points & Prizes
  • You can earn points for nearly everything you do on HelpOwl.com
  • You can trade in those points for gift cards at leading retailers such as Amazon.com and Walmart
  • It's that simple!
See How it Works
Create a Free Account

Whirlpool Manuals

Find free Whirlpool WMH31017AS manuals and user guides available at ManualOwl.com. Try out our unique manual viewer allowing you to interact with manuals from directly within your browser!

Whirlpool Reviews

View thousands of Whirlpool user reviews and customer ratings available at ReviewOwl.com.

Contact Information

Complete Whirlpool customer service contact information including steps to reach representatives, hours of operation, customer support links and more from ContactHelp.com.

Scoreboard Ratings

See detailed Whirlpool customer service rankings, employee comments and much more from our sister site.

Whirlpool Recalls

Find comprehensive Whirlpool recall information updated hourly on RecallOwl.com.