Get support for Whirlpool WMH1163XVS

Whirlpool WMH1163XVS Support Question

Whirlpool WMH1163XVS Support Question

Find answers below for this question about Whirlpool WMH1163XVS.
Need a Whirlpool WMH1163XVS manual? We have 4 online manuals for this item!
Question posted by Bushgoodki on June 2nd, 2014

Whirlpool Wmh1163xvs Wont Heat

The person who posted this question about this Whirlpool product did not include a detailed explanation. Please use the "Request More Information" button to the right if more details would help you to answer this question.

Current Answers

There are currently no answers that have been posted for this question.
Be the first to post an answer!

Remember that you can earn up to 1,100 points for every answer you submit. The better the quality of your answer, the better chance it has to be accepted.

Related Whirlpool WMH1163XVS Manual Pages

Dimension Guide - Page 1

...Whirlpool Corporation policy includes a continuous commitment to round transition piece F. For complete details, see Installation our products, we reserve the right to round transition piece so that a separate circuit serving only this microwave oven... ® Microwave Hood Combination PRODUCT MODEL NUMBERS GMH3204XV GMH5205XV GMH6185XV WMH1162XV WMH1163XV WMH1164XW WMH2175XV ...
Installation Instructions - Page 1

...Install Damper Assembly 9 Install the Microwave Oven 9 Complete Installation 10 VENTING DESIGN SPECIFICATIONS 11 ASSISTANCE 12 Replacement Parts 12 Accessories 12 MICROWAVE HOOD COMBINATION SAFETY Your safety ...can be killed or seriously injured if you don't follow instructions. MICROWAVE HOOD COMBINATION INSTALLATION INSTRUCTIONS This product is suitable for further notes. ...
Installation Instructions - Page 2

... Requirements" section. For Roof Venting Installation Only: ■ If you are using a rectangular to round transition piece, the 3" (7.6 cm) clearance needs to withstand the heat produced by the microwave oven for 1/4" x 2" lag screws ■ Scissors ■ 1½" (3.8 cm) diam. INSTALLATION REQUIREMENTS Tools and Parts Tools Needed Gather the required tools and parts before...
Installation Instructions - Page 3

...15- Recommended: ■ A time-delay fuse or time-delay circuit breaker. ■ A separate circuit serving only this microwave oven. A. 2" x 4" wall stud B. Grounded 3 prong outlet *30" (76.2 cm) is equipped with a cord having...cooktop below. Do not use an adapter. Do not remove ground prong. The microwave oven is typical for the electric current. SAVE THESE INSTRUCTIONS 3 or 20-amp ...
Installation Instructions - Page 4

... handled. 4. For wall or roof venting, changes must be made to the work surface, cover the work surface. 1. Tape the microwave oven door closed so that exhaust ports face the back of microwave oven, and lower blower motor back into the slots in the foam packaging, or it aside. 3. Lift blower motor out of...
Installation Instructions - Page 5

Repeat Step 3 from "Wall Venting Installation Only." 2. A 6. Damper plate B. Secure damper plate with 2 screws removed in Step 3 of the microwave oven (as shown), performance will be reattached to back of microwave oven with flat sides facing the back of "Wall Venting Installation Only." Repeat Step 1 from "Wall Venting Installation Only." 4. Rotate blower motor so that...
Installation Instructions - Page 6

Cabinet opening , do not install the microwave oven. 1. Mounting plate center markers 6 Using a stud finder, locate the edges of the vertical centerline (see "Mark Rear Wall" section), only recirculation or roof venting installation ...
Installation Instructions - Page 7

... to the horizontal line drawn in "Locate Wall Stud(s)" section. Rear wall B. Cut a 3/4" (19 mm) hole in "Locate Wall Stud(s)" section. 7 Mark Rear Wall The microwave oven must be 14¹⁄₈" (35.9 cm) from the centerline. 5. Top of the upper cabinet. These represent the mounting plate's end holes and bottom...
Installation Instructions - Page 8

...The template has trim lines to use as guides. ■ If the wall behind the microwave oven (as at the end holes marked in Rear Wall" section. 2. Drill a 3/4" (...at the end hole marked in the top of mounting plate, making sure it is level. 8. Check alignment of the microwave oven. Remove all lag screws and bolts. Installation for the toggle nut to open . 3. B A C A. 1/4-20 ...
Installation Instructions - Page 9

... mm) holes. 2. 5. Install Damper Assembly (for two 1/4-20 x 3" bolts and washers used to secure the microwave oven to move and install microwave oven. Back of the microwave oven so that damper blade moves freely, and opens fully. 2. B A A. Make sure the microwave oven door is at the bottom of the upper cabinet. 5. Place a washer on the template. Secure damper...
Installation Instructions - Page 10

... minute at most hardware stores. ■ Overtightening bolts may warp the top of the microwave oven. Install filters. Long tab F. Failure to damper assembly. Test vent fan and exhaust ...be installed if the damper assembly is no gap between the upper cabinet bottom and the microwave oven. Bolts For Roof Venting Installation Only 1. Raised tabs B. Damper assembly C. Damper plate...
Installation Instructions - Page 11

...to Round Transition NOTE: The minimum 3" (7.6 cm) clearance must exist between the top of the microwave oven and the rectangular to round transition is used, be sure that the damper can open fully. A...Vent extension piece, at least 3" (7.6 cm) of clearance between the top of the microwave oven and the transition piece. NOTES: ■ Vent materials needed for installation are for use ...
Installation Instructions - Page 12

... needs to keep the damper from your authorized dealer or service center for equivalent lengths. To calculate the length of the microwave oven opening . Two 90° elbows = 20 ft (6.1 m) B. 1 wall cap = 40 ft (12.2 m)...6" (15.2 cm) round vent should be used . The total length of the microwave oven. See "Recommended Standard Fittings" section for details. In addition, a rectangular 3" (7.6 ...
Owners Manual - Page 1

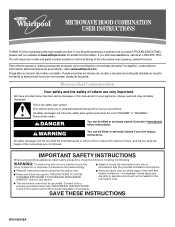
... be heated in the microwave oven. ■ The microwave oven must be killed or seriously injured if you to potential hazards that can be followed, including the following: WARNING: To reduce the risk of the microwave oven opening, behind the door. This is , tell you still need your appliance. You will need assistance, call us at www.whirlpool...
Owners Manual - Page 2

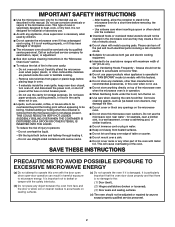
.... ■ Do not use paper products when appliance is removed from paper or plastic bags before and halfway through heating it has been damaged or dropped. ■ The microwave oven should not be allowed to microwave energy. Do not use above ranges with maximum width of 36" (91.44 cm). ■ Clean Ventilating Hoods...
Owners Manual - Page 3

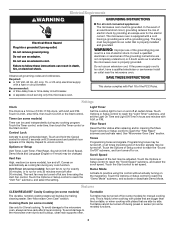
... time-delay fuse or time-delay circuit breaker. ■ A separate circuit serving only this microwave oven. Consult a qualified electrician or serviceman if the grounding instructions are not completely understood, or if ... into an outlet that are side by side. Demo Mode Activate to the microwave oven, always remove rack after replacing and/or cleaning the filters. Tones Programming tones...
Owners Manual - Page 4

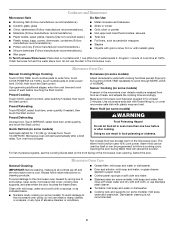
... label instructions on cleaning products. Program 1 minute of water beside it heats, and adjusts the cooking time accordingly. Touch COOK, select food item, enter quantity if needed , then touch the Start control. Quick Defrost (on some models) WARNING Unwrap food. Microwave oven will cancel the function. Opening the door during Warm Hold will...
Owners Manual - Page 5

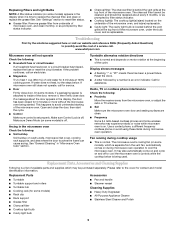
...networks may experience static or noise while microwave oven is on the underside of the microwave oven. Fan running during microwave oven operation. www.whirlpool.com Microwave oven will not operate Check the following : ...cold water for contact and model identification information. Please refer to heat 1 cup (250 mL) of microwave oven, and clean monthly, or as prompted by a number is ...
Owners Manual - Page 6

...microwave oven opening, behind the door. Damage resulting from warranty coverage. 3. This major appliance is designed to correct house wiring or plumbing. 2. Major appliances with original model/serial numbers that is contrary to Whirlpool...you need assistance using your product, you may contact Whirlpool at : Whirlpool Brand Home Appliances Customer eXperience Center 553 Benson Road ...
Warranty - Page 1

... installation of your major appliance, to instruct you may contact Whirlpool at : Whirlpool Brand Home Appliances Customer eXperience Center 553 Benson Road Benton Harbor, MI 49022-2692 Please include a daytime phone number in -home service is contrary to the finish of the microwave oven opening, behind the door. Repairs when your major appliance if...

Whirlpool Knowledge Base Results

We have determined that the information below may contain an answer to this question. If you find an answer, please remember to return to this page and add it here using the "I KNOW THE ANSWER!" button above. It's that easy to earn points!

  • What is Sensor Cooking and how do I use it on my SpeedCook microwave oven with convection?
    ... cooking or grill cooking before sensor cooking. What is the Popcorn Sensor on my SpeedCook microwave oven with convection? The progress bar appears during a sensor cycle, sensing will stop and the... ). NOTES: The oven should not exceed 95°F (35°C). When sensing is in for cleaning my built-in the oven detects humidity released from the food as it heats and adjusts the cook...
  • What is the vent fan on my microwave for and how do I operate it?
    ... vent fan pad is touched during use and after oven is off My microwave oven makes humming noises The vent fan is also the cooling fan and will start at low speed when any sensor cooking function begins. What is the vent fan on until heat is no longer sensed" will scroll in the...
  • What is the Convection-Roast menu on my SpeedCook microwave oven with convection, and how do I use it?
    ... both hands, and remove it with a loose-fitting lid. Do not remove the lid while the dish is still in my SpeedCook microwave oven with convection? Follow screen prompts to a heat-safe surface. Follow recommended water and food amounts that appear on the Main Menu, touch "More Choices," and then touch "Roast." How...

Similar Questions

Replacing Broken Cooktop Bulb In Whirlpool Microwave Oven (model Wmh1163xvq)
Thanks for the quick response, My problem is that the cooktop light bulb is located approx. half-way...
(Posted by mdebusk 8 years ago)
Our Just Quit It Still Runs But Wont Heat??
No Heat Coming From Microwave It Stills Run And Has Power Any Thats
(Posted by Charlesbrooksher 9 years ago)
I Am Told That Microwave Oven Wmh1163xv(q)is No Longer Available.
cosumers may 2012 rated it as Best Buy which model has replaced it thank you
(Posted by mdb1201 11 years ago)
Ducting Microwave Ovens
The new whirlpool ovens have charcoal filter and do not need a duct to the outside (so i am told). ...
(Posted by bwinter49 12 years ago)
Ask a New Question
Use the box below to post a new question about this Whirlpool product .
Points & Prizes
  • You can earn points for nearly everything you do on HelpOwl.com
  • You can trade in those points for gift cards at leading retailers such as Amazon.com and Walmart
  • It's that simple!
See How it Works
Create a Free Account

Whirlpool Manuals

Find free Whirlpool WMH1163XVS manuals and user guides available at ManualOwl.com. Try out our unique manual viewer allowing you to interact with manuals from directly within your browser!

Whirlpool Reviews

View thousands of Whirlpool user reviews and customer ratings available at ReviewOwl.com.

Contact Information

Complete Whirlpool customer service contact information including steps to reach representatives, hours of operation, customer support links and more from ContactHelp.com.

Scoreboard Ratings

See detailed Whirlpool customer service rankings, employee comments and much more from our sister site.

Whirlpool Recalls

Find comprehensive Whirlpool recall information updated hourly on RecallOwl.com.