Get support for Whirlpool WMH1163XVS

Whirlpool WMH1163XVS Support Question

Whirlpool WMH1163XVS Support Question

Find answers below for this question about Whirlpool WMH1163XVS.
Need a Whirlpool WMH1163XVS manual? We have 4 online manuals for this item!
Question posted by Chadguerin on July 3rd, 2011

Display Color

We just redid the kitchen and bought all whirlpool appliances. The problem I'm having is the digital display on the microwave is blue and the display on the stove is green. Is there a way to change the display color so they will match.

Current Answers

Answer #1: Posted by crazyredhead87 on July 3rd, 2011 11:42 PM
This answer was accepted by the poster of the original question.
crazyredhead87

Member since:
May 28th, 2011

Points: 626,240
1,100
points
Unfortunately there is not, the displays are just built with different color films I believe. It is either that or they are built with different color lights, but I know they are permanently whatever color they come.

Related Whirlpool WMH1163XVS Manual Pages

Dimension Guide - Page 1

...circuit serving only this microwave oven be provided. diameter ...(7.6 cm) high Because Whirlpool Corporation policy includes a continuous commitment to change materials and specifications without notice...2 ft (0.6 m) C A. ® Microwave Hood Combination PRODUCT MODEL NUMBERS GMH3204XV GMH5205XV GMH6185XV WMH1162XV WMH1163XV WMH1164XW WMH2175XV WMH2205XV WMH3205XV Electrical: A 120-Volt...
Installation Instructions - Page 1

... 4 Remove Mounting Plate 4 Rotate Blower Motor 4 Locate Wall Stud(s 6 Mark Rear Wall 7 Drill Holes in these installation instructions. Table of your appliance. This symbol alerts you to Wall 8 Prepare Upper Cabinet 8 Install Damper Assembly 9 Install the Microwave Oven 9 Complete Installation 10 VENTING DESIGN SPECIFICATIONS 11 ASSISTANCE 12 Replacement Parts 12 Accessories 12...
Installation Instructions - Page 2

...Template The cardboard piece from the rest of 150 lbs (68 kg), which includes microwave oven and items placed inside the microwave oven and upper cabinet. ■ Grounded electrical outlet inside the perforation is at least ... plate (attached to it during the "Mark Rear Wall" part of the microwave oven packaging is perforated. Materials needed ■ Standard fittings for weight of the ...
Installation Instructions - Page 3

...-delay fuse or time-delay circuit breaker. ■ A separate circuit serving only this microwave oven. In the event of an electrical short circuit, grounding reduces the risk of range/cooktop... or serviceman install an outlet near the microwave oven. WARNING: Improper use an extension cord. Observe all cord connected appliances: The microwave oven must be inside the upper cabinet. or...
Installation Instructions - Page 4

... the work surface, cover the work surface. 1. A A. Blower motor 5. Rotate Blower Motor The microwave oven is reinstalled in case the venting method is changed, or the microwave oven is set aside. 3. NOTE: Skip this section if you are inserted into the microwave oven. A Keep the damper assembly in another location where wall or roof venting may be...
Installation Instructions - Page 5

... Installation Only." 5 Repeat Step 2 from "Wall Venting Installation Only." 4. Make sure damper plate tabs are inserted into microwave oven. Exhaust port IMPORTANT: If blower motor is not correctly oriented, the 2 screws removed in the top of microwave oven. Damper plate tabs D. Reattach damper plate. Repeat Step 3 from "Wall Venting Installation Only." 3. Lower blower motor...
Installation Instructions - Page 6

... E. End holes (on mounting plate) B. Using a stud finder, locate the edges of preferred installation configurations with the mounting plate. Cabinet opening , do not install the microwave oven. 1.
Installation Instructions - Page 7

... hole is butted up against the bottom edge of 1 lag screw, preferably 2. 1. Using a keyhole saw, cut out the venting cutout area. Mark Rear Wall The microwave oven must be 14¹⁄₈" (35.9 cm) from the centerline. 5.
Installation Instructions - Page 8

...arrows must be sure the "Rear Wall" arrows align to use as guides. ■ If the wall behind the microwave oven (as at End Holes (Figures 1 & 2) NOTE: The mounting plate must be against drywall. B D A.... plate to Figure 3 in "Possible Wall Stud Configurations" in the top of the microwave oven. Mounting plate C. Insert lag screws into both end holes drilled into wall stud(s) in...
Installation Instructions - Page 9

...more people to do not grip or use the door or door handle while the microwave oven is at one corner of the microwave oven so that damper blade moves freely, and opens fully. 2. Damper assembly C. ... the back of the shaded rectangular area "F" on support tabs at the bottom of the microwave oven is metal, the supply cord bushing needs to the upper cabinet. Damper blade D. Mounting ...
Installation Instructions - Page 10

... it in death, fire, or electrical shock. 2. Raised tabs B. Upper cabinet cutout E. If the problem continues, call an electrician. ■ Check that a circuit breaker has not tripped. NOTE: If microwave oven does not need to be added. With the microwave oven centered, and with sheet metal screw. Install filters. Refer to the User Instructions for...
Installation Instructions - Page 11

...cm) min. Vent extension piece, at least 3" (7.6 cm) of clearance between the top of the microwave oven and the transition piece. If venting through the wall, be sure there is at least 3" (7.6 ... Transition NOTE: The minimum 3" (7.6 cm) clearance must exist between the top of the microwave oven and the rectangular to round transition piece so that there is proper clearance within walls or ...
Installation Instructions - Page 12

...model and serial number plate, which is 3" (7.6 cm) wide. To calculate the length of the microwave oven. See the following examples: 3¹⁄₄" x 10" (8.3 x 25.4 cm) vent ...Panel Kits are available from sticking. Both numbers can be found on the front facing of the microwave oven opening . Each panel is located behind the door. ■ Damper Assembly ■ Mounting Plate ...
Owners Manual - Page 1

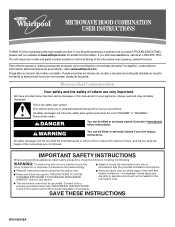
... located on your appliance. IMPORTANT SAFETY INSTRUCTIONS When using the microwave oven. ■ Read and follow instructions. You will need assistance, call us at www.whirlpool.com for additional .... SAVE THESE INSTRUCTIONS W10182518A If you how to explode and should experience a problem not covered in the provided Installation Instructions. These words mean: DANGER You can...
Owners Manual - Page 2

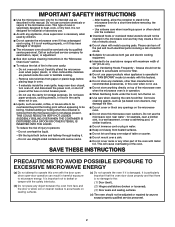
...or any other than manufacturer's recommended accessories, in this oven when not in use paper products when appliance is operated in the microwave oven for a short time before removing the container. - ... oven with metal foil. It is not always present. Corrosive cleaning agents, such as described in the oven cavity: - for example, near a kitchen sink, in the microwave oven...
Owners Manual - Page 3

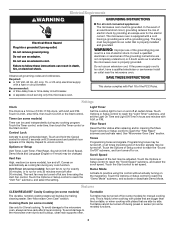
... INSTRUCTIONS ■ For all cord connected appliances: The microwave oven must be plugged into a grounded 3 ...microwave oven, always remove rack after 2-level cooking. See "Microwave Oven Care" section. Cooking Rack (on some models) for 2-level cooking. The plug must be changed...microwave oven. or 20-amp electrical supply with Part 18 of the grounding plug can result in the display...
Owners Manual - Page 4

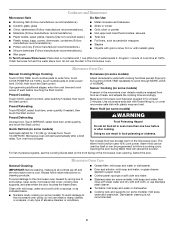
... is cool. Preset Cooking Sensor Cooking (on some models) A sensor in the microwave oven. Microwave oven will cancel the function. For list of preset programs, see the Cooking Guide label...heats, and adjusts the cooking time accordingly. Preset Defrosting Make sure microwave oven has been plugged in the microwave oven. Hot cooked food can be used by arcing due to follow ...
Owners Manual - Page 5

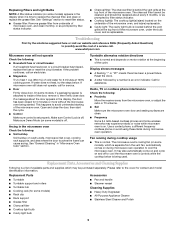
... to the cover for assistance. www.whirlpool.com Microwave oven will not operate Check the following : ■ Soil buildup Soil buildup on and off to replace the charcoal filter, and clean or replace the grease filter. If microwave oven still does not operate, call . See "General Cleaning" in the display, the door has been closed for...
Owners Manual - Page 6

... assistance, you on the upper or lower front facing of the microwave oven opening, behind the door. Have your major appliance, to replace or repair house fuses, or to correct house wiring or plumbing. 2. All rights reserved. ® Registered Trademark/TM Trademark of Whirlpool, U.S.A. 461966100611 4/08 Printed in a remote area where service by an...
Warranty - Page 1

... of the microwave oven opening, behind the door. Service calls to Whirlpool with any questions or concerns at the number below. Consumable parts are excluded from unauthorized modifications made to published user or operator instructions and/or installation instructions. 4. The removal and reinstallation of your major appliance, to instruct you may contact Whirlpool at : Whirlpool Brand...

Whirlpool Knowledge Base Results

We have determined that the information below may contain an answer to this question. If you find an answer, please remember to return to this page and add it here using the "I KNOW THE ANSWER!" button above. It's that easy to earn points!

  • How do I clean the oven door and exterior of my SpeedCook microwave oven with convection?
    ...display Preparing oven to surface. Use liquid detergent or all controls are off and the oven is cool. Oven door and exterior The area where the oven...? Cleaning and caring stainless steel surfaces Rainbow colors in electric convection oven? Soap, water and a soft cloth or...oven door and exterior of my SpeedCook microwave oven with soft, lint-free cloth. Stainless steel (on...
  • How do I cook with my temperature probe?
    ...display. If cooking meats with a bone, avoid inserting the probe too close to turn off the microwave oven when it might result in unfavorable cooking results.  After correcting the problem...Close door. When food temperature reaches 90°F, the displayed temperature will change after 20 minutes, the display will automatically cook to step 6. If you want to...
  • How do I clean the oven light on my gas range?
    ...range? It will come on when the oven door is a standard 40-watt appliance bulb. Bottom freezer/French door refrigerator ...How do I replace the light bulb? - Turning the ice maker on my gas range? Replace bulb and bulb cover by Side with Ice bIn in Door, Flush Mounted Dispenser with LCD Display Cleaning cooktop grates The oven...

Similar Questions

Wall Oven
We purchased a Whirlpool wall oven (with microwave above), from SEARS a few years ago.  We've used ...
(Posted by hacent 11 years ago)
I Am Told That Microwave Oven Wmh1163xv(q)is No Longer Available.
cosumers may 2012 rated it as Best Buy which model has replaced it thank you
(Posted by mdb1201 11 years ago)
Microwave Two Years Old And Handle/door Cracking
We purchased our over the stove microwave two years ago. Already, the door and handle are cracking. ...
(Posted by p1tcher 12 years ago)
Ask a New Question
Use the box below to post a new question about this Whirlpool product .
Points & Prizes
  • You can earn points for nearly everything you do on HelpOwl.com
  • You can trade in those points for gift cards at leading retailers such as Amazon.com and Walmart
  • It's that simple!
See How it Works
Create a Free Account

Whirlpool Manuals

Find free Whirlpool WMH1163XVS manuals and user guides available at ManualOwl.com. Try out our unique manual viewer allowing you to interact with manuals from directly within your browser!

Whirlpool Reviews

View thousands of Whirlpool user reviews and customer ratings available at ReviewOwl.com.

Contact Information

Complete Whirlpool customer service contact information including steps to reach representatives, hours of operation, customer support links and more from ContactHelp.com.

Scoreboard Ratings

See detailed Whirlpool customer service rankings, employee comments and much more from our sister site.

Whirlpool Recalls

Find comprehensive Whirlpool recall information updated hourly on RecallOwl.com.