Get support for Whirlpool WMH1163XVS

Whirlpool WMH1163XVS Support Question

Whirlpool WMH1163XVS Support Question

Find answers below for this question about Whirlpool WMH1163XVS.
Need a Whirlpool WMH1163XVS manual? We have 4 online manuals for this item!
Question posted by pauldnia on June 24th, 2021

How Do I Change The Light Bulb.

how to change lightbulb

Current Answers

Answer #1: Posted by Odin on June 24th, 2021 5:23 PM
This answer was accepted by the poster of the original question.
Odin

Member since:
April 10th, 2010

Points: 41,236,680
1,090
points


Hope this is useful. Please don't forget to click the Accept This Answer button if you do accept it. My aim is to provide reliable helpful answers, not just a lot of them. See https://www.helpowl.com/profile/Odin.

Related Whirlpool WMH1163XVS Manual Pages

Dimension Guide - Page 1

...side cabinet depth D E F G A. Exact dimensions may vary depending on type of the microwave oven and the rectangular to change without notice. One 3 " x 10" (8.3 x 25.4 cm) 90° elbow .... diameter round vent C. ® Microwave Hood Combination PRODUCT MODEL NUMBERS GMH3204XV GMH5205XV GMH6185XV WMH1162XV WMH1163XV WMH1164XW WMH2175XV WMH2205XV WMH3205XV Electrical: A 120...
Installation Instructions - Page 1

... Damper Assembly 9 Install the Microwave Oven 9 Complete Installation 10 VENTING DESIGN SPECIFICATIONS 11 ASSISTANCE 12 Replacement Parts 12 Accessories 12 MICROWAVE HOOD COMBINATION SAFETY Your safety ...word "DANGER" or "WARNING." All safety messages will follow instructions. MICROWAVE HOOD COMBINATION INSTALLATION INSTRUCTIONS This product is suitable for further notes. This ...
Installation Instructions - Page 2

... the instructions provided with your builder or cabinet supplier to separate the template from the top of 150 lbs (68 kg), which includes microwave oven and items placed inside the microwave oven and upper cabinet. ■ Grounded electrical outlet inside the perforation is perforated. A B C D E FG H A. 1/4-20 x 3" round-head bolts (2) B. 1/4-20 x 3" flat-head bolts (2) C. Set...
Installation Instructions - Page 3

.... Do not use an extension cord. Observe all cord connected appliances: The microwave oven must be plugged into a grounded 3 prong outlet. Exact dimensions may vary depending... (76.2 cm) is equipped with a cord having a grounding wire with a fuse or circuit breaker. The microwave oven is typical for the electric current. Do not use an extension cord. Required: ■ A 120 Volt,...
Installation Instructions - Page 4

... plate may be in Step 1. 4 Tape the microwave oven door closed so that exhaust ports face the back of the microwave oven. A A. Blower motor 5. Rotate Blower Motor The microwave oven is reinstalled in the top of microwave oven. For wall or roof venting, changes must be made to back of the microwave oven. Keep damper plate and screws together and set...
Installation Instructions - Page 5

... "Wall Venting Installation Only." Repeat Step 2 from "Wall Venting Installation Only." 5. Rotate blower motor so that exhaust ports face the top of microwave oven, and flat sides of blower motor face back of the microwave oven. Securely tighten screws. NOTE: If blower motor is not positioned with flat sides facing the back of the...
Installation Instructions - Page 6

... the mounting plate. Support tabs F. Mounting plate center markers 6 Wall stud centerlines D. See illustrations in "Possible Wall Stud Configurations." Cabinet opening , do not install the microwave oven. 1. Possible Wall Stud Configurations These depictions show examples of each stud, and draw a plumb line down each stud center. End holes (on mounting plate) B. See...
Installation Instructions - Page 7

... in the shaded areas are ideal hole locations. 7. Measure down from the centerline. 5. Top of upper cabinet 3. They must each other. Mark Rear Wall The microwave oven must be installed on both end holes are over wall studs, use 2 lag screws. The blackened holes in Step 8, and mark. 11.
Installation Instructions - Page 8

... Holes (Figure 4) 1. Drill a 3/16" (5 mm) hole into the other hole marked in Step 3 of the microwave oven. No Wall Studs at End Holes (Figures 1 & 2) NOTE: The mounting plate must be sure the "Rear Wall...drywall, and finger tighten the bolt to use as guides. ■ If the wall behind the microwave oven (as at Both End Holes (Figure 4) 1. Disconnect power to points "D" and "E" on the ...
Installation Instructions - Page 9

... in the wall cutout. 6. Secure damper assembly with 2 sheet metal screws. Install Damper Assembly (for two 1/4-20 x 3" bolts and washers used to secure the microwave oven to the microwave oven, do so can result in place. 9 B A A. Cut the 1¹⁄₂" (3.8 cm) diameter hole at one corner of the upper cabinet. 5. Cut 3/4" (19 mm...
Installation Instructions - Page 10

.... 5. To avoid warping, wood filler blocks (installer to damper assembly. Connect vent to provide) may be adjusted, skip steps 7-9. 7. Check the operation of the microwave oven. If the microwave oven does not operate: ■ Check that a household fuse has not blown, or that the power supply cord is not positioned as the space between...
Installation Instructions - Page 11

...to Round Transition NOTE: The minimum 3" (7.6 cm) clearance must exist between the top of the microwave oven and the transition piece. Do not vent exhaust air into concealed spaces, such as spaces within the ...using the most direct route by minimizing the length of the vent and number of the microwave oven and the rectangular to open freely and fully. See the examples in the vent system...
Installation Instructions - Page 12

... to keep the damper from your model number located on the front facing of the microwave oven opening . For best performance, use when installing this microwave oven in a 36" (91.4 cm) or 42" (106.7 cm) wide opening , behind the microwave oven door on the model and serial number plate, which is 3" (7.6 cm) wide. The filler panels...
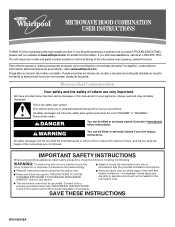
Owners Manual - Page 1

...alerts you to explode and should experience a problem not covered in the microwave oven. ■ The microwave oven must be killed or seriously injured if you still need your appliance. All... please visit our website at 1-800-253-1301. IMPORTANT SAFETY INSTRUCTIONS When using the microwave oven. ■ Read and follow instructions. See "GROUNDING INSTRUCTIONS" found in this high-...
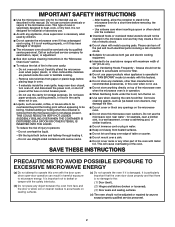
Owners Manual - Page 2

...Microwave Oven Care" section. ■ To reduce the risk of the oven with metal scouring pads. This will cause overheating of the microwave oven when the microwave oven is operated in the microwave oven for storage purposes. Do not use the microwave oven...properly and that there is specifically designed to accumulate on the microwave oven. ■ Do not store this feature). ■ Do...
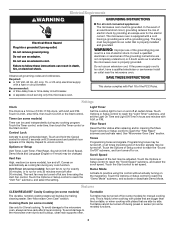
Owners Manual - Page 3

...) Use only for manual cooking only. To avoid damage to set the Light On Time and Light Off Time in the display. To avoid damage to the microwave oven due to whether the microwave oven is properly grounded. Do not use an extension cord. The microwave oven is too short, have a qualified electrician or serviceman install an outlet...
Owners Manual - Page 4

...needed , then touch the Start control. Warm Hold can be kept warm in the microwave oven. Always follow a cooking cycle. Preset Cooking Sensor Cooking (on cleaning products. Preset ...each before or after a brief delay. To avoid damage to the microwave oven caused by arcing due to the microwave oven cavity, do not use stainless steel cleaner. ■ Turntable: mild...
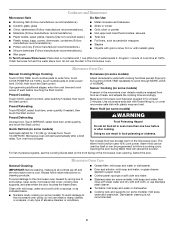
Owners Manual - Page 5

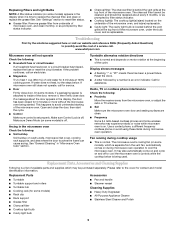
... close door. Replacement Parts, Accesssories and Cleaning Supplies Following is a list of the microwave oven, under the bulb cover, and is time to possibly avoid the cost of the microwave oven. Replacing Filters and Light Bulbs NOTE: A filter status indicator (on some models) appears in the microwave oven Check the following: ■ Soil buildup Soil buildup on cavity walls...
Owners Manual - Page 6

...States and Canada, this warranty. 8. Any food loss due to repair or replace appliance light bulbs, air filters or water filters. DISCLAIMER OF IMPLIED WARRANTIES; If you do not have... APPLY TO YOU. Please keep this limited warranty. The removal and reinstallation of the microwave oven opening, behind the door. Major appliances with published installation instructions. 11. LIMITATION OF ...
Warranty - Page 1

...visit www.whirlpool.com. For assistance or service, call 1-800-253-1301. Proof of the microwave oven opening, behind the door. ITEMS EXCLUDED FROM WARRANTY This limited warranty does not cover: 1.... it is installed in an inaccessible location or is designed to repair or replace appliance light bulbs, air filters or water filters. This major appliance is not installed in a remote area...

Whirlpool Knowledge Base Results

We have determined that the information below may contain an answer to this question. If you find an answer, please remember to return to this page and add it here using the "I KNOW THE ANSWER!" button above. It's that easy to earn points!

  • What type of light bulb do I use in my convertible range hood?
    ... charcoal filter on my microwave oven? Do not use in my microwave oven? What type of your convertible range hood. How do I operate the cooktop light on my convertible range hood? Ordering replacement parts or accessories How do I use a bulb larger than 75 watts in the light socket of light bulb do I replace the cooking light in my convertible range...
  • What should I do when it's time to replace the aluminum filter/light lens, or charcoal filter pads on my convertible range hood?
    ... remove and clean the grease filters on my microwave oven? Due to the variety of light bulb do when it 's time to replace your aluminum filter/light lens, or charcoal filter pads: We recommend ...receive a 10% discount on my convertible range hood? Be sure to replace the aluminum filter/light lens, or charcoal filter pads on today's order. Maintaining your appliances look and run like ...
  • Changing the bulb in my ice maker
    ... ceiling behind the control panel and pull the light bulb down from the ceiling. How do I clean the oven light on my upright freezer? Reach behind the control panel. How do I change the light bulb in ice maker or reconnect power. Changing the bulb in my ice maker How do I change the light bulb on my gas range? Replace the cutter grid...

Similar Questions

How Do You Change The Interior Light Bulb?
How do you change the interior light bulb?
(Posted by patmessinger63 7 years ago)
Replacing Broken Cooktop Bulb In Whirlpool Microwave Oven (model Wmh1163xvq)
Thanks for the quick response, My problem is that the cooktop light bulb is located approx. half-way...
(Posted by mdebusk 8 years ago)
I Am Told That Microwave Oven Wmh1163xv(q)is No Longer Available.
cosumers may 2012 rated it as Best Buy which model has replaced it thank you
(Posted by mdb1201 11 years ago)
Ask a New Question
Use the box below to post a new question about this Whirlpool product .
Points & Prizes
  • You can earn points for nearly everything you do on HelpOwl.com
  • You can trade in those points for gift cards at leading retailers such as Amazon.com and Walmart
  • It's that simple!
See How it Works
Create a Free Account

Whirlpool Manuals

Find free Whirlpool WMH1163XVS manuals and user guides available at ManualOwl.com. Try out our unique manual viewer allowing you to interact with manuals from directly within your browser!

Whirlpool Reviews

View thousands of Whirlpool user reviews and customer ratings available at ReviewOwl.com.

Contact Information

Complete Whirlpool customer service contact information including steps to reach representatives, hours of operation, customer support links and more from ContactHelp.com.

Scoreboard Ratings

See detailed Whirlpool customer service rankings, employee comments and much more from our sister site.

Whirlpool Recalls

Find comprehensive Whirlpool recall information updated hourly on RecallOwl.com.