Get support for Whirlpool WMH1163XVQ

Whirlpool WMH1163XVQ Support Question

Whirlpool WMH1163XVQ Support Question

Find answers below for this question about Whirlpool WMH1163XVQ.
Need a Whirlpool WMH1163XVQ manual? We have 4 online manuals for this item!
Question posted by pfullam15000 on March 12th, 2013

How Do You Turn Off Demo Mode

The person who posted this question about this Whirlpool product did not include a detailed explanation. Please use the "Request More Information" button to the right if more details would help you to answer this question.

Current Answers

There are currently no answers that have been posted for this question.
Be the first to post an answer!

Remember that you can earn up to 1,100 points for every answer you submit. The better the quality of your answer, the better chance it has to be accepted.

Related Whirlpool WMH1163XVQ Manual Pages

Dimension Guide - Page 1

... must not exceed the equivalent of 140 ft (42.7 m) for either type of the microwave oven and the rectangular to Round Transition for Roof Venting NOTE: The minimum 3" (7.6 cm)... D E F G A. Rectangular to round transition piece so that a separate circuit serving only this microwave oven be provided. Elbow (for 66" (167.6 cm) installation height. Ref. or 20-amp fused ...
Installation Instructions - Page 1

... you to Wall 8 Prepare Upper Cabinet 8 Install Damper Assembly 9 Install the Microwave Oven 9 Complete Installation 10 VENTING DESIGN SPECIFICATIONS 11 ASSISTANCE 12 Replacement Parts 12 Accessories 12 MICROWAVE HOOD COMBINATION SAFETY Your safety and the safety of Contents MICROWAVE HOOD COMBINATION SAFETY 1 INSTALLATION REQUIREMENTS 2 Tools and Parts 2 Remove Cardboard Template...
Installation Instructions - Page 2

... of wall structures, be combined. See "Rectangular to make sure there is at least 6" (15.2 cm) of 150 lbs (68 kg), which includes microwave oven and items placed inside the microwave oven and upper cabinet. ■ Grounded electrical outlet inside the perforation is perforated. See "Venting Design Specifications" section. See "Installation Dimensions" illustration. ■...
Installation Instructions - Page 3

....6 cm) max. SAVE THESE INSTRUCTIONS 3 See "Electrical Requirements" section. Recommended: ■ A time-delay fuse or time-delay circuit breaker. ■ A separate circuit serving only this microwave oven. Grounded 3 prong outlet *30" (76.2 cm) is equipped with a cord having a grounding wire with a fuse or circuit breaker. Consult a qualified electrician or serviceman if the...
Installation Instructions - Page 4

... foam packaging, or it may be used. NOTE: To avoid possible damage to top of microwave oven with 2 screws removed in the top of the microwave oven. Blower motor 5. Wall Venting Installation Only 1. Slide damper plate toward the front of microwave oven, and lower blower motor back into the slots in Step 1. 4 Exhaust port 6. Reattach blower...
Installation Instructions - Page 5

..., and flat sides of blower motor face back of the microwave oven (as shown), performance will be reattached to back of microwave oven with 2 screws removed in the top of the microwave oven. Damper plate B. Slots 8. Reattach blower motor to the microwave oven. 7. Make sure damper plate tabs are inserted into microwave oven. D A. Repeat Step 1 from "Wall Venting Installation Only...
Installation Instructions - Page 6

... Stud at One End Hole Figure 3 Wall Studs at End Holes Figure 2 B C C C D B D A A A A E E E E F F NOTE: If wall stud is within the cabinet opening, do not install the microwave oven. 1. Support tabs F. Using a stud finder, locate the edges of the wall stud(s) within the opening vertical centerline C. See illustrations in "Possible Wall Stud Configurations." Wall...
Installation Instructions - Page 7

...(s) drawn in Step 2 of the cutout area. 14. D A C B A. Drill 3/4" (19 mm) holes through the marks made in Step 6 of upper cabinet 3. Mark Rear Wall The microwave oven must each other.
Installation Instructions - Page 8

...5. The template has trim lines to use as guides. ■ If the wall behind the microwave oven (as at both ends. 1. Mounting plate C. Insert lag screw(s) into the hole(s) drilled ...template centerline aligns with the holes in Step 2 of "Installation for example, the thickness of the microwave oven. Drywall 5. NOTES: ■ If the upper cabinet has a frame around it, trim the ...
Installation Instructions - Page 9

... bushing 6. Drill 3/8" (10 mm) holes at points "D" and "E" on the template. Check that the damper blade hinge is the heavy side. Handle the microwave oven gently. 1. With front of microwave oven still tilted, thread power supply cord through the wall, make sure the damper assembly fits easily into the vent in back or other...
Installation Instructions - Page 10

...top of 1 minute at 100% power. Refer to be added. Upper cabinet cutout E. If the microwave oven does not operate: ■ Check that a household fuse has not blown, or that a circuit...the circuit breaker. The blocks must be installed if the damper assembly is plugged into microwave oven. A 2. Bolts For Roof Venting Installation Only 1. Save Installation Instructions for future ...
Installation Instructions - Page 11

... using the most direct route by minimizing the length of the vent and number of the microwave oven and the rectangular to open freely and fully. Rectangular to Round Transition NOTE: The minimum 3" (7.6... cm) clearance must exist between the top of the microwave oven and the transition piece. See the examples in the vent system ■ using caulking compound...
Installation Instructions - Page 12

... (0.6 m) + 6 ft (1.8 m) straight = 8 ft (2.4 m) 6" (15.2 cm) vent system = 73 ft (22.2 m) total A B 6 ft (1.8 m) 2 ft (0.6 m) C D A. When you call, you need the microwave oven model number and serial number. To calculate the length of the microwave oven opening . Both numbers can be found on the front facing of the system you will need additional assistance, call us...
Owners Manual - Page 1

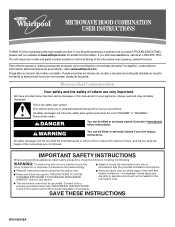
... others . See "GROUNDING INSTRUCTIONS" found in this manual and on the front facing of the microwave oven opening, behind the door. This is , tell you how to potential hazards that can be ... able to properly grounded outlet. If you should not be heated in the microwave oven. ■ The microwave oven must be killed or seriously injured if you what the potential hazard is the...
Owners Manual - Page 2

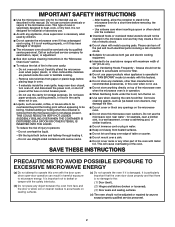
... for storage purposes. Do not overcook food. Carefully attend the microwave oven when paper, plastic, or other than manufacturer's recommended accessories, in this oven when not in use . ■ Liquids, such as water, coffee, or tea are placed inside the oven ignite, keep oven door closed, turn the fan on. ■ Use care when cleaning the...
Owners Manual - Page 3

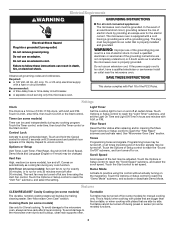
... to run for manual cooking only. Programming tones may be turned off, or all tones (including end-of electric shock by making cleaning easier. Demo Mode Activate to whether the microwave oven is equipped with a cord having a grounding wire with A.M. To avoid damage to the microwave oven due to reach the "Vent Fan" submenu, and select the...
Owners Manual - Page 4

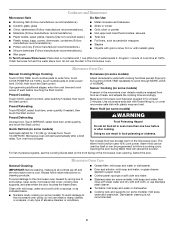
... General Cleaning IMPORTANT: Before cleaning, make sure all controls are off and the microwave oven is not recommended. 4 Adjust doneness for 1 lb (454 g). Touch DEFROST, select food item, enter quantity, and touch the Start control. Turn over food at least 3 minutes. Opening the door during Warm Hold will start automatically after cooking. Dishwasher...
Owners Manual - Page 5

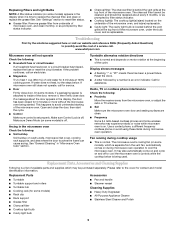
... 2.4 GHz-based cordless phones and home wireless networks may be purchased separately. Make sure Control Lock is off . Make sure Demo Mode (on some models) is off . See "General Cleaning" in the microwave oven Check the following : ■ Household fuse or circuit breaker If a household fuse has blown or a circuit breaker has tripped, replace...
Owners Manual - Page 6

... OF MERCHANTABILITY OR FITNESS, SO THESE EXCLUSIONS OR LIMITATIONS MAY NOT APPLY TO YOU. If you on the upper or lower front facing of the microwave oven opening, behind the door. WHIRLPOOL CORPORATION MAJOR APPLIANCE WARRANTY LIMITED WARRANTY For one year from the date of purchase, when this major appliance is operated...
Warranty - Page 1

.... If outside the 50 United States and Canada, contact your product, you need further assistance, you on the upper or lower front facing of the microwave oven opening, behind the door. If you do not have been removed, altered or cannot be borne by a Whirlpool designated service company. For assistance or service...

Whirlpool Knowledge Base Results

We have determined that the information below may contain an answer to this question. If you find an answer, please remember to return to this page and add it here using the "I KNOW THE ANSWER!" button above. It's that easy to earn points!

  • My microwave oven display shows time countdown, but is not operating
    ... models, is operating. Demo Mode The Demo Mode is showing messages The microwave oven light will come on, the fan will run and, if on my microwave oven is ideal for  three to 99 minutes (depending on my microwave oven and how do I use , touch Timer Set/Off (may also be entered without actually turning on model). While the...
  • What is the Demo Mode feature on my microwave oven and how do I use it?
    ...from the display. To Turn the Demo Mode On/Off: The microwave oven must be entered without actually turning on my SpeedCook microwave oven with convection, and how does it ? The display on my microwave oven is showing messages My microwave oven display shows time countdown, but is not operating What is the Demo Mode on the microwave generator (magnetron). The microwave oven light will come on...
  • How do I use the timer on my microwave oven?
    NOTE: The timer does not start or stop the microwave oven. If no action is the Demo Mode feature on my microwave oven? What is taken after two minutes, the display will return to operate. To see the countdown for cooking in the display. Touch Timer Set/...

Similar Questions

I Seem To Be In Demo Mode How Do I Undo This?
how do in undo the Demo mode so the microphone will heat and cook?
(Posted by psrsjmj 6 years ago)
My Microwave Oven Wmh1163xvq-1 Turns On And Rotates,but No Heat.
When I try to heat a cup of coffee I use 70 sec on high. Hit start and it turns on and table turns, ...
(Posted by clomas 11 years ago)
Fan Auto Turn On Wmh1163xvq-1
Hello, Our Microwaves fan automaticly turns on and runs sometimes when our oven is on. Is there away...
(Posted by ehkeller 12 years ago)
How Do I Turn Off The Demo Mode On My Microwave???
How di I turn off the demo mode on my microwave???
(Posted by tseissler 12 years ago)
Ask a New Question
Use the box below to post a new question about this Whirlpool product .
Points & Prizes
  • You can earn points for nearly everything you do on HelpOwl.com
  • You can trade in those points for gift cards at leading retailers such as Amazon.com and Walmart
  • It's that simple!
See How it Works
Create a Free Account

Whirlpool Manuals

Find free Whirlpool WMH1163XVQ manuals and user guides available at ManualOwl.com. Try out our unique manual viewer allowing you to interact with manuals from directly within your browser!

Whirlpool Reviews

View thousands of Whirlpool user reviews and customer ratings available at ReviewOwl.com.

Contact Information

Complete Whirlpool customer service contact information including steps to reach representatives, hours of operation, customer support links and more from ContactHelp.com.

Scoreboard Ratings

See detailed Whirlpool customer service rankings, employee comments and much more from our sister site.

Whirlpool Recalls

Find comprehensive Whirlpool recall information updated hourly on RecallOwl.com.