Whirlpool WGE555S0BW Support Question
Whirlpool WGE555S0BW Support Question
Find answers below for this question about Whirlpool WGE555S0BW.Need a Whirlpool WGE555S0BW manual? We have 4 online manuals for this item!
Question posted by barbkcarwile on November 18th, 2015
Location
Where is the model and serial number plate located on this model?
Current Answers
Answer #1: Posted by Odin on November 18th, 2015 10:49 AM
Odin

Member since:
April 10th, 2010 Points: 41,236,690

Member since:
April 10th, 2010 Points: 41,236,690
Consult the guidance at http://www.needapplianceparts.com/applianceserialnumberbreakdown.aspx,
Hope this is useful. Please don't forget to click the Accept This Answer button if you do accept it. My aim is to provide reliable helpful answers, not just a lot of them. See https://www.helpowl.com/profile/Odin.

Related Whirlpool WGE555S0BW Manual Pages
Installation Guide - Page 1

.... Only 7 Verify Anti-Tip Bracket Is Installed and Engaged 12 Level Range 12 Complete Installation 13 Moving the Range 13
Table des matières
SÉCURITÉ DE LA CUISINI...placement de la cuisinière 20
RANGE SAFETY
Your safety and the safety of Contents
RANGE SAFETY 1
INSTALLATION REQUIREMENTS 2 Tools and Parts 2 Location Requirements 2 Electrical Requirements -
Installation Guide - Page 2

... floor or wall per installation instructions. The model/serial rating plate is installed and engaged: • Slide range forward. • Look for Manufactured Home Installations, ANSI A225.1/NFPA 501A or with any tools listed here. Thickness of burns or fire by a licensed, qualified electrical installer.
2
Location Requirements
IMPORTANT: Observe all parts are minimum clearances...
Installation Guide - Page 3

... cm) min.
D. E. from floor
Proper positioning of outlet shown above the cooktop surface. Model/serial/rating plates (located behind the control panel for 25" (63.5 cm) countertop depth, 24" (61.0 cm...range hood or microwave hood combination above the range, follow the range hood or microwave hood combination installation instructions for dimensional clearances above .
*Nothing located...
Installation Guide - Page 4

... model/serial rating plate. Electrical Requirements - The fourth (grounding) conductor must conform with kit. For 50-amp rated cord kits, use of the range inside a clear plastic bag.
3-wire receptacle (10-50R)
4 See "Electrical Connection -
This cord contains 4 copper conductors with ring terminals or open -end spade terminals with upturned ends, terminating in the "Location...
Installation Guide - Page 5

... with CSA Standard C22.1, Canadian Electrical Code, Part 1 - To place range on its back on the model/serial/rating plate. **If connecting to do so can result in conformance with kit. Repeat... and wire gauge are not sure the range is less than the total connected load listed on the cardboard corners. 5. Range Rating*
Specified Rating of range's final location.
■ Do not use with a...
Installation Guide - Page 7

...power before servicing. Use Phillips screwdriver to remove the terminal block cover
screw located on bottom of range.
Style 1: Power supply cord strain relief ■ Assemble a UL ...Power Supply Cord
Electrical Connection - Failure to follow these instructions can result in the cord/conduit plate on the back of the terminal block.
4. Use 8 gauge copper or 6 gauge aluminum ...
Installation Guide - Page 8

... insert screws.
■ Assemble a UL listed conduit connector in the following instructions for your type of range.
6. Strain relief
8 Style 2: Direct wire strain relief
■ Use Phillips screwdriver to remove screws and slide cord/conduit plate down and out.
■ Feed the flexible conduit through the strain relief, allowing enough slack to...
Installation Guide - Page 9

... amps that is marked for use with the ground-link screw. Feed the power supply cord through the strain relief in the
cord/conduit plate on bottom of range. Allow enough slack to easily attach the wiring to the terminal block. Use Phillips screwdriver to connect the green ground wire from the...
Use & Care Guide - Page 5

... Boil element control knob G. Left rear control knob D. Right rear control knob F. Warm Zone on indicator light
Models WGE755, YWGE755
A
B
C
D
E
F
K
A. Surface cooking area locator B. Medium indicator
H
G
I . Warm Zone off J. Left rear control knob D. Left front duel element control knob C. Hot surface indicator light H. The range you have some or all of your...
Use & Care Guide - Page 6

....
Cooktop On Indicator Lights A Cooktop On Indicator light is located on the control panel. The hot surface indicator light will ...■ Bring liquid to a boil. (use or (on some models)
The Rapid Boil Cooking Zone offers flexibility for best results)
HIGH...food warm. ■ Melt chocolate or butter.
REMEMBER: When range is recommended for the Rapid Boil Cooking Zone.
Lower heat ...
Use & Care Guide - Page 9

... N. The range you have purchased may not match those of the items listed. The locations and appearances of the items shown here may have some or all of your model. Cook time... Lower oven start
QP ON
M
L
KJ
G. Number keypad F. Upper oven start /control lock L. Warm zone on P. The oven lights will come on the display. Number keypad F. Upper oven start
G. Lower oven cancel...
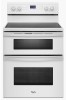
Use & Care Guide - Page 19

...clean cycle is set in 5-minute increments.
Clean times range from the cooktop because they may
melt. IMPORTANT: The health of some models, the surface elements will not work during the Self-...9632; Remove plastic items from 2 hours for light soil and between 2 and 4 hours.
5.
Use the number keypad to a powdery ash.
After 5 seconds, "OVEN COOLING" will scroll in the display and a ...
Use & Care Guide - Page 20
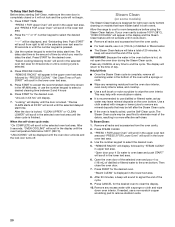
... oven text area for the desired oven.
Allow the range to cool to select the desired oven.
The Steam ... will appear in the lower text area.
2.
Steam Clean
(on models that may leave mineral deposits on the oven bottom. "REMOVE RACKS...copper scrubbing pad to the oven bottom. Press the "1" or "2" number keypad to room temperature before using the Steam Clean feature. To SteamClean:...
Use & Care Guide - Page 21
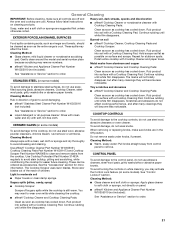
...cleaner or nonabrasive scrubbing
pad: Gently clean around the model and serial number plate because scrubbing may affect the finish. Burned-on some models)
To avoid damage to the cooktop, do not ... Steel Cleaner Part Number W10355016 (not included):
Tiny scratches and abrasions
■ affresh® Cooktop Cleaner and Cooktop Cleaning Pads:
Clean as soon as the entire range is still warm....
Use & Care Guide - Page 22

...9632; Do not hit glass surfaces with a soft blanket. Locate the slots on panel. ■ affresh® Kitchen and Appliance Cleaner Part Number W10355010 (not included): See "Assistance or Service" section to ..., make sure the oven is not, repeat the previous steps.
22 Locate the oven door hinge locks in range or reconnect power.
This surface should be flat and covered with bakeware ...
Use & Care Guide - Page 23
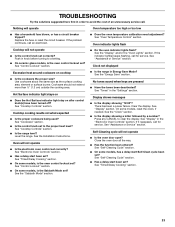
... display. See "Cooktop Controls" section.
■ Is the range level? There has been a power failure. See "Timed/Delay Cooking" section.
■ On some models, is the oven control lockout set ? Oven indicator lights flash...Clock" section.
■ Is the display showing a letter followed by a number?
See "Self-Cleaning Cycle" section.
■ On some models, reset the clock, if needed.
Use & Care Guide - Page 25
...with the same precision used to your correspondence. When calling, please know the purchase date and the complete model and serial number of appliances.
■ Installation information.
■ Use and maintenance procedures.
■ Accessory and repair parts...or service, please check "Troubleshooting." In the U.S.A.
To locate the Whirlpool designated service company in your appliance.
Use & Care Guide - Page 26

... reinstallation of your major appliance for other damage to use or when it . The cost of repair or replacement under this information on the model and serial number label located on how to the finish of your major appliance, unless such damage results from your sales slip together for future reference. LIMITATION OF REMEDIES...
Warranty Information - Page 1

... (hereafter "Whirlpool") will need to know your complete model number and serial number.
If you may find this information on the model and serial number label located on how to use your major appliance for product service if your major appliance is located in materials or workmanship. Major appliances with original model/serial numbers that is contrary to published user or operator...
Dimension Guide - Page 1

...behind the control panel for dimensional clearances above .
30" (76 cm) Freestanding Electric Range
PRODUCT MODEL NUMBERS
PRODUCT DIMENSIONS
WGE555S0B
Electrical Connection:
To properly install your range, you must be connected directly to a 50-amp circuit, use with kit. The model/serial rating plate is from floor I
F
H
Proper positioning of oven door and will not slide...
Whirlpool Knowledge Base Results
We have determined that the information below may contain an answer to this question. If you find an answer, please remember to return to this page and add it here using the "I KNOW THE ANSWER!" button above. It's that easy to earn points!-
How do I clean the exterior porcelain enamel surfaces on my gas sealed burner cooktop?
... my microwave oven? Gently clean around the model and serial number plate because scrubbing may remove numbers. To purchase All Appliance Cleaner and receive a 10% discount on my gas sealed burner cooktop? IMPORTANT: Before cleaning, make sure all controls are some general tips for cleaning my gas range? How do I clean the oven door on... -
How do I clean the exterior porcelain enamel surfaces on my electric range?
... the exterior porcelain enamel surfaces on my electric range? Before cleaning, make sure all controls are off and the oven and cooktop are some general cleaning tips for Exterior Porcelain Enamel Surfaces (on some models): Gently clean around the model and serial number plate because scrubbing may remove numbers. How do I clean the control panel on... -
How do I clean the exterior porcelain enamel surfaces on my electric range?
... I clean the exterior porcelain enamel surfaces on my electric range? Before cleaning , make sure all controls are off and the oven and cooktop are some general tips for Exterior Porcelain Enamel Surfaces (on some models): Gently around the model and serial number plate because scrubbing may remove numbers. Front-load washer Food spills containing acids, such...
Similar Questions

Where Is The Serial Number Plate On A Whirlpool Range?
I am unable to locate the Model Number/Serial Number plate. I know the Model Number from the manual ...
I am unable to locate the Model Number/Serial Number plate. I know the Model Number from the manual ...
(Posted by spb117 8 years ago)

Serial Tag Location
Where is the location of the serial tag on model # WGE555S0BS?
Where is the location of the serial tag on model # WGE555S0BS?
(Posted by accentgtfirstgear 8 years ago)

Whirlpool Gold Model Ggg390lxs -- Where Is The Serial Number Located?
(Posted by jdharner 10 years ago)
