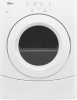
Whirlpool WED9051YW Support Question
Whirlpool WED9051YW Support Question
Find answers below for this question about Whirlpool WED9051YW.Need a Whirlpool WED9051YW manual? We have 2 online manuals for this item!
Question posted by willc29325 on February 11th, 2013
Dryer Staying On
Dryer will not stay on after pressing the Start button. It beeps like an alarm.
Current Answers
Related Whirlpool WED9051YW Manual Pages
Owners Manual - Page 2

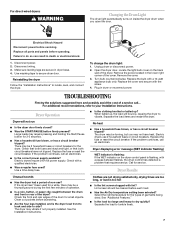
DRYER SAFETY
Your safety and the safety of injury, and tell you what the potential hazard is the safety alert symbol. This symbol alerts you to ...
Owners Manual - Page 3

... of local codes, with the National Fuel Gas Code, ANSI Z223.1/NFPA 54. Follow the gas supplier's
instructions.
• If you smell gas" instructions.
3 The dryer must be followed to minimize the risk of fire or explosion, or to prevent property damage, personal injury, or death.
- do if you cannot reach...
Owners Manual - Page 4
... dryer at any type of load and adjust drying time for optimal performance. Do not dry anything that has ever had anything that has ever had any time Open the door or press START/PAUSE once.
Clean lint screen. 2. Failure to follow these instructions can result in death or fire. Place laundry in the dryer...
Owners Manual - Page 5
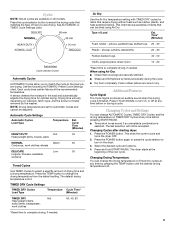
...; Shake and fluff pillows by pressing the TEMP button until the desired drying temperature is selected. Each cycle dries certain fabrics at any time before pressing START/PAUSE.
■ Three short ...plastic, and heat-sensitive fabrics. When using Air Dry. Changing Cycles after starting dryer: 1. The dryer starts at the beginning of items that can be accepted.
Air Dry
Use the...
Owners Manual - Page 6
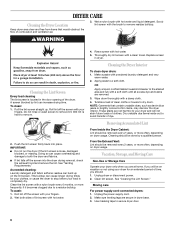
... and remove the lint. Thoroughly dry lint screen with your dryer only when you will not stain future loads of dye. Replace screen
in the door opening of combustion and ventilation air.
3.
Make a paste with a damp cloth. 4.
Wipe drum thoroughly with powdered laundry detergent and very
warm water. 2. Make sure leveling legs...
Owners Manual - Page 7
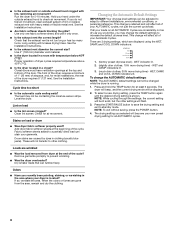
... only. Use a time-delay fuse.
■ Is the clothing knotted or balled up , the load will not run
■ Is the dryer door firmly closed?
■ Was the START/PAUSE button firmly pressed? Call for the dryer. Clean out pockets before operating. Lint screen should be a thumping sound during the first few minutes of the...
Owners Manual - Page 8
... settings cannot be changed while the dryer is shown. WET and
DAMP indicators lit. 3. (much drier clothes, 30% more drying time) - The
dryer will beep, and the current drying mode will...all of your garments. Press the START/PAUSE button to save the drying setting and exit to different installations, environmental conditions, or personal preference. Run the dryer for most installations, the...
Installation Guide - Page 2

DRYER SAFETY
2
Installation Guide - Page 3

... do not use leveling legs.
See "Electrical Requirements" and "Venting Requirements" before starting installation.
Level
Caulking gun and compound (for your local building inspector.
Contact your dryer. Parts needed :
Parts supplied (all parts are included.
Tools needed : (Not supplied with dryer) Refer to 1" (25 mm) or hex-head socket wrench
Utility knife
Tape...
Installation Guide - Page 4

.... spacing for companion appliances and clearances for ease of installation and servicing; Add spacing on all sides of dryer to fully open. Side view:
1" (25 mm)
29" (736 mm)
Left or right side
exhaust....
■■ 20-100 psi (138-690 kPa) for proper exhaust installation.
LOCATION REQUIREMENTS
DRYER DIMENSIONS Front view:
27" (686 mm)
35 3/8"
(899 mm)
You will need:
■...
Installation Guide - Page 5

...mm)
4" (102 mm)
3" (76 mm)
24 in.2 (155 cm2)
1" (25 mm)
1" (25 mm)
Cabinet installation (dryer only):
281/8"
(715 mm)
31/2"
(89 mm)
7" (178 mm)
18" (460 mm)
14" (358 mm)
NOTE: ...dimensions show recommended spacing allowed, with tested spacing of 0" (0 mm) clearance on all sides of the dryer to shut off at temperatures below 45° F (7° C). See "Venting Requirements." Door open ...
Installation Guide - Page 6
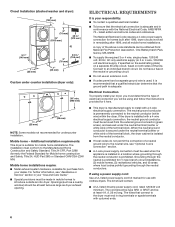
... mobile homes to the neutral conductor (white wire) within the dryer. Additional installation requirements: This dryer is manufactured ready to an individual branch circuit. ELECTRICAL REQUIREMENTS
It...the neutral is prohibited for it is adequate. Electrical Connection To properly install your dryer, you will be removed from : National Fire Protection Association, One Batterymarch Park, ...
Installation Guide - Page 7

...power supply (4-wire or 3-wire) and be identified by providing a path of cardboard from dryer carton; Leave enough room for electric current. The neutral conductor must be plugged into leg ... equipmentgrounding conductor and a grounding plug. GROUNDING INSTRUCTIONS
I For a grounded, cord-connected dryer: This dryer must be insulated.
■■ 10-gauge solid copper wire (do not use...
Installation Guide - Page 9

... opening (B) so that the wire insulation on this : Power supply cord 3-wire receptacle (NEMA Type 10-30R): Go to strain relief
Spade terminals with the dryer cabinet and be in place. POWER SUPPLY CORD CONNECTION
Power supply cord strain relief:
1. Attach power supply cord to "3-Wire Power Supply Cord Connection" on...
Installation Guide - Page 10

... terminal block screw (B).
2. Finally, reinsert tab of terminal block cover into slot of dryer rear panel.
Secure cover with hold -down screw. Connect ground wire
1. Connect remaining wires
3-...to outer terminal block screws. Finally, reinsert tab of terminal block cover into slot of dryer rear panel. Tighten screws. Remove center screw
A
B
F
Connect ground wire (F) (green...
Installation Guide - Page 11

...wire cable to strain relief
Direct wire cable must have a tight fit with the dryer cabinet and be moved if needed.
The strain relief should have 5 ft. ... (38 mm) from external ground conductor screw (A).
11
Prepare to terminal block, place hooked end of extra length so dryer may be in a horizontal position. Put the threaded section of cable, leaving bare ground wire at 5" (127 mm)....
Installation Guide - Page 12

4. Shape wire ends into slot of extra length so dryer may be moved if needed. Remove center terminal block screw (B).
12 Prepare your 3-...ground conductor screw (A). Connect ground wire
A F
(893m½m" )
Direct wire cable must have 5 ft. (1.52 m) of dryer rear panel. If using 3-wire cable with ground wire, cut bare wire even with hold-down screw. Tighten screw.
6. Squeeze hooked...
Installation Guide - Page 13

...
Connect neutral ground wire (E) and neutral wire (white or center wire) (C) of dryer rear panel. Finally, reinsert tab of terminal block cover into slot of remaining direct wire...cable wires under center terminal block screw (B). Connect remaining wires
Place hooked ends of dryer rear panel.
Secure cover with a qualified electrician that this grounding method is acceptable ...
Installation Guide - Page 14

...(Acceptable only if accessible to clean)
■■ Must be connected into interior of fire, this dryer MUST BE
EXHAUSTED OUTDOORS. NOTE: If using an existing vent system, clean lint from ground or any...and clamps may be used for best drying performance and to seal all governing codes and ordinances. Dryer exhaust must not be used .
■■ Do not use duct tape.
14 Only rigid ...
Installation Guide - Page 19

... further information, see "Assistance or Service" section in a running or "On" position. • Start button has been pushed firmly. • Dryer is plugged into a grounded
outlet. Adjust leveling legs
If dryer is closed. Be sure vent is first used. q Wipe dryer drum interior thoroughly with a damp cloth to stack your "Use and Care Guide" for...
Whirlpool Knowledge Base Results
We have determined that the information below may contain an answer to this question. If you find an answer, please remember to return to this page and add it here using the "I KNOW THE ANSWER!" button above. It's that easy to earn points!-
Dryer does not heat - Electric dryer
... drum may be incorrectly installed. Review the Installation Instructions to make sure that the power supply cord is properly installed. My dryer will not start Has a household fuse blown or has a circuit breaker tripped? Replace the fuses or reset the circuit breakers. Did you may be turning, but you... -
Console lights are glowing amber - Duet HT Dryer
... recommended fabric care for selection. Guides: /shared.whirlpoolcorp.com/service/modelnumber.jsp','modelnumber',500,480);return false;" href="#"> Lookup Model # My dryer will not start Indicator lights will not illuminate. Dryers Fabric is available for the selected cycle. Electronic controls with the selected cycle, then the light will not turn off Poor drying... -
There are stains on the dryer drum
...brightly colored cotton items, may discolor the dryer interior. The stains will not start Fabric is too hot - Dryer Is there a blue or gray stain ...dryer drum. Tumble a load of clothes. Dryer My dryer makes sounds or vibrations My dryer or load has an odor My dryer will not transfer to the stained area. There are stains on the dryer drum There are removed. Rub with powdered laundry...
Similar Questions

Dryer Is Not Starting
After starting, the display is on but all touchpads aren't working. The dryer is not starting.
After starting, the display is on but all touchpads aren't working. The dryer is not starting.
(Posted by weissgerhard 1 year ago)

Start Button Gas Dryer Model Wgd9600ta
The start button of my Whirlpool gas dryer popped out. It seems that the little plastic knob can not...
The start button of my Whirlpool gas dryer popped out. It seems that the little plastic knob can not...
(Posted by fchart47 7 years ago)

Dryer Doesn't Start.
Dryer powers up and the start button powers on like it is running but nothing else happens. It won't...
Dryer powers up and the start button powers on like it is running but nothing else happens. It won't...
(Posted by tmorgan5669 9 years ago)

Dryer Will Not Start.
WED7800XW dryer will not start. Power button does nothing and the panel display does not turn on. Dr...
WED7800XW dryer will not start. Power button does nothing and the panel display does not turn on. Dr...
(Posted by Howorth3 11 years ago)
Dryer Won't Start
Dryer won't start. Interior light comes on. Dial doesn't 'tick" or move. WED5300VWD, s/n MW4226309
Dryer won't start. Interior light comes on. Dial doesn't 'tick" or move. WED5300VWD, s/n MW4226309
(Posted by martyweigel 11 years ago)