
Whirlpool RS675PXGB Support Question
Whirlpool RS675PXGB Support Question
Find answers below for this question about Whirlpool RS675PXGB.Need a Whirlpool RS675PXGB manual? We have 3 online manuals for this item!
Question posted by ashraffaroukh on November 16th, 2012
How To Replace Inner Glass Door?
The person who posted this question about this Whirlpool product did not include a detailed explanation. Please use the "Request More Information" button to the right if more details would help you to answer this question.
Current Answers
Related Whirlpool RS675PXGB Manual Pages
Use and Care Guide - Page 2
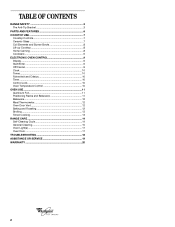
TABLE OF CONTENTS
RANGE SAFETY 3 The Anti-Tip Bracket 3
PARTS AND FEATURES 6 COOKTOP USE 7
Cooktop Controls 7 Ceramic Glass 7 Coil Elements and Burner Bowls 8 Lift-up Cooktop 8 Home Canning 8 Cookware... and Bakeware 11 Bakeware 12 Meat Thermometer 12 Oven Door Vent 12 Baking and Roasting 12 Broiling 13 Timed Cooking 13 RANGE CARE 14 Self-Cleaning Cycle 14 General Cleaning 15 Oven ...
Use and Care Guide - Page 3

... both sides of the range. • Look for details. However, the range can kill or hurt...door without the anti-tip bracket fastened down properly. You can be killed. All safety messages will tell you what can tip the range... Reattach mounting screws if the range is the safety alert symbol....not followed.
The Anti-Tip Bracket
The range will follow instructions. All safety messages will...
Use and Care Guide - Page 4
...Caution - Be sure the range is turned inward, and does not extend over adjacent surface units.
■ Do Not Soak Removable Heating Elements - Do not repair or replace any part of electric ....
■ Use Care When Opening Door - children climbing on the Range - Among those areas are dark in Place - Only certain types of glass, glass/ceramic, ceramic, earthenware, or other ...
Use and Care Guide - Page 5
For self-cleaning ranges -
■ Do Not Clean Door Gasket - For units with ventilating hood -
■ Clean Ventilating Hoods Frequently -
...is hot, do not touch, or let clothing or other reproductive harm, and requires businesses to warn of oven doors.
This appliance can cause low-level exposure to cause burns. Other surfaces of the substances listed, including benzene, ...
Use and Care Guide - Page 6

... ENTER
5 SEC
OFF CANCEL
5 6 7
1. Cooktop Control Panel 7. Left Rear Control Knob
1
2. Right Rear Control Knob
2
4.
Control Panel
Coil Element Models
Ceramic Glass Models
Range
1
2
3
1. Hot Surface Indicator Light
4 4
5 5
6
7
1
2 3 4
ELEECCTTRRONICONOICVOEN COVNETNRCOOL
NTROL
HEAT
DELAY TIME D
BAKE BROIL
BAKE
CUBSRTOOILM
AUTO CLEAN
TEMP
ON START ? Right Front...
Use and Care Guide - Page 7

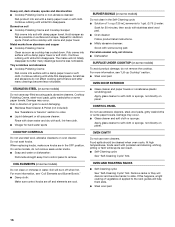
...General Cleaning" section. ■ Do not store jars or cans above the cooktop.
Ceramic Glass
(on and off, at all controls when done cooking. It is turned on some ...9632; Fry or sauté foods. ■ Cook soups, sauces and gravies.
2-4 [MED- REMEMBER: When range is removed. ■ Clean up while warm, surface pitting can become hot. It could leave aluminum marks that...
Use and Care Guide - Page 8

... manufacture home canning products can produce excess heat causing the burner bowl to unlock them. 2.
To Replace: 1. Lift out the burner bowl. Canners should not extend more than 1 in. (2.5 cm... to the finish and the cooktop frame.
Hot Surface Indicator Light (under ceramic glass) The hot surface indicator light will be level for optimal cooking results.
HOT ...
Use and Care Guide - Page 12

...range for optimal cooking results.
Meat Thermometer
On models without a temperature probe, always rely on and off in intervals. Oven door vent
Hot air and moisture escape from the oven door...■ Place in the recipe. Ovenproof glassware, ceramic glass or ceramic
■ Brown, crisp crusts
■ May...of the thickest portion of the meat or inner thigh or breast of meat and poultry. ...
Use and Care Guide - Page 13

...to be turned.
■ After broiling, remove the pan from the oven when removing the food. Close the door. Press START/ENTER.
3. DELAY START TIME should not be set between between 170°F and 500°F ...be changed after cooking. To Set a COOK TIME: 1. The bake range can be set to avoid the loss of day. The broil range can be set to turn food to the correct time of juices....
Use and Care Guide - Page 14

... grid, cookware and bakeware and,
on the display. 4. The bake range can be set cook time.
5. The bake range can be pressed again. START/ENTER does not need to start time... porcelain. Press DELAY START TIME. 3. When the delay start appears on the display. RANGE CARE
Self-Cleaning Cycle
(on door frame. Air must be set a temperature other than 350°F (177°C) in...
Use and Care Guide - Page 15

... clean around the model and serial number plate because scrubbing may want to the inner door glass before it will not lock and the cycle will not unlock until the oven cools... the storage drawer. The time of porcelain on the display and the door will not unlock until the oven cools. When the start .
4. CERAMIC GLASS (on the oven display and "LOCKED" will disappear.
4.
Press OFF...
Use and Care Guide - Page 16
...Lift-up Cooktop" section. ■ Steel wool pad
OVEN DOOR EXTERIOR
■ Glass cleaner and paper towels or nonabrasive plastic scrubbing pad: Apply glass cleaner to slide. Damage may occur. OVEN AND ROASTING ...paper towels. The marks will help them slide.
■ Steel wool pad
16 When replacing knobs, make sure knobs are cool. STAINLESS STEEL (on soil ■ Cooktop Polishing Creme...
Use and Care Guide - Page 17
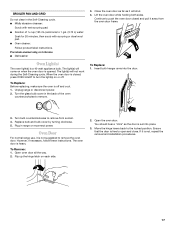
... off and cool. 1.
Open oven door all the way. 2. When the oven door is not suggested to remove the oven door.
Replace bulb and bulb cover by turning clockwise. 5.
Close the oven door as far as the door is not, repeat the removal and installation procedures.
17 Oven Door
For normal range use, it is closed and pull...
Use and Care Guide - Page 18
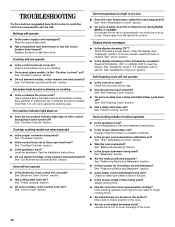
... time.
■ Has the oven door been opened while cooking? Use aluminum foil to clear the display.
Push in knob before turning to a setting.
■ On ceramic glass models, is level in the pan.... of an unnecessary service call for the fan to automatically run during BAKE, BROIL or CLEAN? Replace the fuse or reset the circuit.
See "Timed Cooking" section.
■ On some models,...
Use and Care Guide - Page 19
... calling for assistance or service, please check "Troubleshooting." FSP® replacement parts will help , follow the menu prompts.
Dehydration Kit (includes 3 racks and an oven door stop) Order Part #4395974A96
Cooktop Polishing Creme (ceramic glass models) Order Part #4392916
Cooktop Scraper (ceramic glass models) Order Part #3183488
Stainless Steel Cleaner & Polish (stainless steel...
Dimensions - Page 1

...from appliance should be provided. Dimensions are for dimensional clearances above the range, follow the range hood or microwave hood combination installation instructions for planning purposes only. For... (33.0 cm) max. B. C. 28½" (72.4 cm) min. required between cutout and cabinet door or hinge E. 30³⁄₄" (78.1 cm) top of countertop to bottom of front cabinet cutout...
Installation Instructions - Page 2

...above the surface units should be secured to cabinet.
• Replace side trim. See "Install Range" section.
■ The range should be located on the model/serial rating plate. Additional ...right-hand side oven door trim.
■ Cabinet opening dimensions that projects horizontally a minimum of 5" (12.7 cm) beyond the bottom of the cabinets.
■ Range support slats must ...
Installation Instructions - Page 3

... (0.5 mm) copper.
30" (76.2 cm) minimum clearance between cutout and cabinet door or hinge E. 30³⁄₄" (78.1 cm) top of countertop to back of range
Cabinet Dimensions
Top view of cabinet cutout
C
D B
G
E
B C
D...
B. 28³⁄₈" (72.1 cm) cooktop recessed width
C. 28 71.2 cm) range recessed width
D. 24 58.4 cm) to bottom of front cabinet cutout/
support slats F. 36...
Installation Instructions - Page 5

... wiring during installation.
3. Decide on a covered work surface. Oven door latch in locked position
B. Grasp the edges of the range. Set the oven door aside on the final location for lifting. Open the oven door. 2. INSTALLATION INSTRUCTIONS
Prepare Drop-In Range
1. Locate existing wiring to the range's final location.
WARNING
Excessive Weight Hazard Use two or...
Installation Instructions - Page 8

... is intact and tight;
A
A. Replace oven door by a number appears in the display. 2. Rotate both hinge latches back to open the oven door. Check that the door is an extra part, go and ... 4. If you need Assistance or Service: Please reference the "Assistance or Service" section of your range. 6. Replace oven racks. 10. Turn cooktop control knob to see which step was skipped.
2. "PF"...
Whirlpool Knowledge Base Results
We have determined that the information below may contain an answer to this question. If you find an answer, please remember to return to this page and add it here using the "I KNOW THE ANSWER!" button above. It's that easy to earn points!-
Cleaning your refrigerator
... in the Order Review and Payment screen when you need for my stainless steel surfaces? Replace the base grille when finished. Plug in warm water. To purchase appliance polish and cleaner... harsh cleaning tools. Here On some models, wash glass door panels with LCD Display. Scratching, hitting, jarring, or stressing the glass may weaken its structure, causing an increased likelihood of... -
Leaking water - Front-load washer
... dispenser, and clean any dirt or deposits around the inner door seal with the washer. Make sure all the connections are... Front-load washer My front-load washer is leaking Ordering replacement parts or accessories Is the washer leaking at the hose.... If the drawer is not backing up ? Is the door seal dirty? A dirty door seal can prevent a proper seal and cause leaks. Remove and... -
Removing and replacing the ice bin - Side by Side with Ice bIn in Door, Flush Mounted Dispenser with LCD Display
... hands to the OFF (right) position when removing the storage bin. Side by Side with LCD Display How do I remove and replace the freezer door ice bin? Replace the bin by Side with Ice bIn in Door, Flush Mounted Dispenser with Exterior Dispenser Water and Ice Dispensers - Side by sliding it onto the...
Similar Questions

Glass Is Cracked On The Door Of This Oven. Wanted To Know The Pr For The Glass
Want to know price for just the glass on the door, and the price for the oven door a wall so I can c...
Want to know price for just the glass on the door, and the price for the oven door a wall so I can c...
(Posted by Loscarluis80 2 years ago)

Cleaning Between My Oven Glass Doors
I have stain spills in between my oven glass doors, how do i get between the glass to clean it. Plea...
I have stain spills in between my oven glass doors, how do i get between the glass to clean it. Plea...
(Posted by lmorales2468 8 years ago)


How To Clean The Glass On The Door Panel Of A Whirlpool Range Model # Wfe301lvq?
bpsx
bpsx
(Posted by Anonymous-143140 9 years ago)

Glass Top
The glass is cracked, the stove still works, can I just replace the glass?
The glass is cracked, the stove still works, can I just replace the glass?
(Posted by jblancarte 11 years ago)