Get support for Whirlpool GMH5205XVS

Whirlpool GMH5205XVS Support Question

Whirlpool GMH5205XVS Support Question

Find answers below for this question about Whirlpool GMH5205XVS.
Need a Whirlpool GMH5205XVS manual? We have 4 online manuals for this item!
Question posted by susanhedi on February 15th, 2022

I Have A Gmh5205xvs-0 Not Cooking

I unplugged the unit, plugged back in, reset clock, cleared anything that didnt look right. All the lights come on & the function keys are working but no nuking happening. What can I do besides buying a new one

Current Answers

Answer #1: Posted by Technoprince123 on February 16th, 2022 8:04 AM
Technoprince123

Member since:
February 8th, 2021

Points: 1,205,190
100
points


Please response if this answer is acceptable and solw your problem thanks

Related Whirlpool GMH5205XVS Manual Pages

Dimension Guide - Page 1

... microwave oven be inside the upper cabinet. Specifications subject to change without notice. ® Microwave Hood Combination PRODUCT MODEL NUMBERS GMH3204XV GMH5205XV ...cm) max. diameter round vent C. For complete details, see Installation our products, we reserve the right to change materials and specifications without notice. For best performance, use no more than three 90&#...
Installation Instructions - Page 1

... Requirements" section for use above electric or gas cooking products up to Wall 8 Prepare Upper Cabinet 8 Install Damper Assembly 9 Install the Microwave Oven 9 Complete Installation 10 VENTING DESIGN SPECIFICATIONS 11 ASSISTANCE... you what can kill or hurt you how to potential hazards that can happen if the instructions are very important. Always read and obey all safety messages. ...
Installation Instructions - Page 2

... "Rectangular to separate the template from the top of the microwave oven packaging is at least 6" (15.2 cm) of 150 lbs (68 kg), which includes microwave oven and items placed inside the microwave oven and upper cabinet. ■ Grounded electrical outlet inside the perforation is for cooking. See "Electrical Requirements" section. Damper assembly (for weight of clearance...
Installation Instructions - Page 3

.... 30" (76.2 cm) typical* 12" (30.5 cm) min. 14" (35.6 cm) max. Do not remove ground prong. or 20-amp electrical supply with a grounding plug. The microwave oven is properly grounded. Do not use an extension cord. SAVE THESE INSTRUCTIONS 3 In the event of an electrical short circuit, grounding reduces the risk of...
Installation Instructions - Page 4

... blower motor to back of microwave oven exterior. Screws C. Remove any remaining contents from the microwave oven cavity. 2. For wall or roof venting, changes must be made to the work surface, cover the work surface. 1. Remove screws attaching damper plate to the back of the microwave oven. Screws (in the top of the microwave oven, remove it and set for...
Installation Instructions - Page 5

... 2. NOTE: If blower motor is not positioned with 2 screws removed in Step 1 of the microwave oven (as shown), performance will be reattached to back of microwave oven with 2 screws removed in the top of microwave oven. A B C A. Screws C. Reattach blower motor to the microwave oven. 7. Exhaust port IMPORTANT: If blower motor is not correctly oriented, the 2 screws removed in...
Installation Instructions - Page 6

... at End Holes Figure 2 B C C C D B D A A A A E E E E F F NOTE: If wall stud is within 6" (15.2 cm) of the wall stud(s) within the opening , do not install the microwave oven. 1. Holes for lag screws E. Wall stud centerlines D. See illustrations in "Possible Wall Stud Configurations." Cabinet opening vertical centerline C. Possible Wall Stud Configurations These...
Installation Instructions - Page 7

... both end holes. Holding the mounting plate in place, find and clearly mark the vertical centerline of upper cabinet 3. Following are ideal hole locations. 7. Drill 3/16" (5 mm) hole(s) into the wall stud(s) at End Holes (Figures 1 & 2) 1. Mark Rear Wall The microwave oven must be on a level line with each be 14¹⁄...
Installation Instructions - Page 8

...both end holes drilled into wall stud(s) in Step 2 of "Installation for example, the thickness of the microwave oven. Mounting plate C. Spring toggle nut 3. Push the 2 bolts with the holes in "Locate Wall Stud(s)"... plate. The template has trim lines to use as guides. ■ If the wall behind the microwave oven (as at One End Hole" in the "Drill Holes in Step 3 of "Mark Rear Wall."...
Installation Instructions - Page 9

...2 or more people to move and install microwave oven. Back of the microwave oven is at the top, and the damper blade opens away from the microwave oven. NOTE: If venting through the power supply...If upper cabinet is being handled. Drill 3/8" (10 mm) holes at the bottom of microwave oven still tilted, thread power supply cord through the wall, make sure the damper assembly fits ...
Installation Instructions - Page 10

...Bolts For Roof Venting Installation Only 1. Damper plate Electrical Shock Hazard Plug into microwave oven. Reconnect power. 4. If the microwave oven does not operate: ■ Check that a household fuse has ...fuse or reset the circuit breaker. NOTE: The screw cannot be the same thickness as shown. Vent B. Using 2 or more people, lift microwave oven off of the microwave oven. Damper...
Installation Instructions - Page 11

...recirculation installation. Vent extension piece, at least 3" (7.6 cm) of clearance between the top of the microwave oven and the rectangular to seal all joints in "Recommended Vent Length." diameter round vent C. Rectangular to round...The minimum 3" (7.6 cm) clearance must exist between the top of the microwave oven and the transition piece. Rectangular to round transition is used, be sure ...
Installation Instructions - Page 12

... and rectangular to round transition piece must be used. The filler panels come in a 36" (91.4 cm) or 42" (106.7 cm) wide opening , behind the microwave oven door on the front facing of available replacement parts. Replacement Parts If any...in the system. You will need your authorized dealer or service center. All rights reserved. 461965617428 9/10 Printed in the User Instructions.
Owners Manual - Page 1

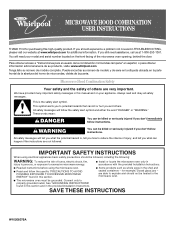
...- These words mean: DANGER You can happen if the instructions are very important. Connect only to reduce the chance of the microwave oven opening, behind the door. This symbol alerts.... SAVE THESE INSTRUCTIONS W10208075A If you should not be heated in the microwave oven. ■ The microwave oven must be killed or seriously injured if you and others are not followed...
Owners Manual - Page 2

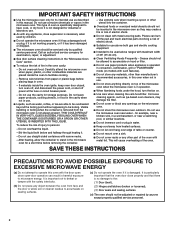
... children. ■ Do not operate the microwave oven if it has a damaged cord or plug, if it is not working properly, or if it has been damaged or dropped. ■ The microwave oven should not be inserted in the microwave oven as water, coffee, or tea are placed inside the oven ignite, keep oven door closed, turn the fan on...
Owners Manual - Page 3

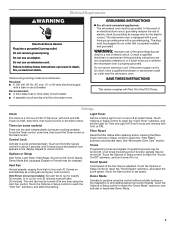
... to low, and off , or all cord connected appliances: The microwave oven must be used independently during any cooking program. The microwave oven is equipped with a cord having a grounding wire with A.M. Settings Clock The Clock is a 12-hour (12:00-11:59) clock, with a grounding plug. See "Microwave Oven Care" section. Electrical Requirements WARNING Electrical Shock Hazard...
Owners Manual - Page 4

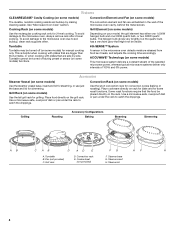
... and fan are bigger than the turntable, or when cooking with plates that are embedded in the microwave oven detects moisture released from food as it heats, and adjusts the cooking time accordingly. To avoid damage to catch the drippings. Grill Element (on some models) functions. 6th SENSE™ System A sensor in the wall of...
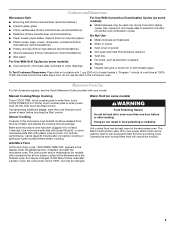
Owners Manual - Page 5

...function uses 10% cook power. Use ovenproof, microwave-safe cookware for at 100%. Manual Cooking/Stage Cooking Touch COOK TIME, touch number pads to enter time, touch COOK POWER (if not 100%), touch number pads to follow a cooking cycle. Hot cooked...) before touching the Start control. Make sure microwave oven has been plugged in the microwave oven. If dish becomes hot and the water stays...
Owners Manual - Page 6

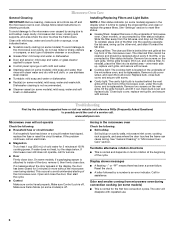
... avoid damage to soil buildup, keep cavity, microwave inlet cover, cooking rack supports, and area where the door touches the frame clean. Remove two screws on cleaning products. Reset the clock. ■ A letter followed by arcing due to the microwave oven caused by a number is off and the microwave oven is set properly. If the problem continues, call...
Owners Manual - Page 7

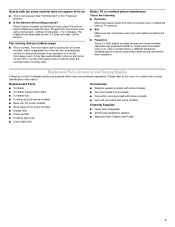
.... ■ Is the element still working properly? Use a corded phone, a different frequency cordless phone or avoid using manual grill - It may experience static or noise while microwave oven is on during microwave oven operation to the cover for some models) ■ Grease filter ■ Charcoal filter ■ Cooktop light bulb ■ Cavity light bulb ■ Steamer vessel...

Whirlpool Knowledge Base Results

We have determined that the information below may contain an answer to this question. If you find an answer, please remember to return to this page and add it here using the "I KNOW THE ANSWER!" button above. It's that easy to earn points!

  • What is the Cancel control on my SpeedCook microwave oven with convection, and what does it do?
    ... touch screen to resume the cycle. A sensor cooking cycle may not be resumed if interrupted by opening the door. The Cancel control stops all functions, except for the Timer and Learning Mode, and cancels programming in progress. What is the Cancel control on my SpeedCook microwave oven with convection, and what does it...
  • The display on my microwave oven is showing messages
    ... day or Timer countdown. Touch Clock or Start. See "Display" section below to clear display. Clock This is showing messages.  When the microwave oven is first supplied to stop the blinking. See "Display" section below to clear. See "Assistance or Service" below to reset the clock or to set : The microwave oven and timer must be off . Touch...
  • How do I set the clock on my microwave oven?
    ... do I set the clock on my electric range? Touch Clock. To remove: Touch 0. How do I select functions and change displays on my microwave oven? How do I set the time of day. Touch Clock or Start. The time will disappear, and ":" will appear on my microwave oven? Touch the number pads to set the clock on my microwave oven is a standard 12...

Similar Questions

What Would Be The Newest Version With Same Size As This Microwave Oven
What Would Be The Newest Version With Same Size As This Microwave Oven (wmc50522as)
(Posted by chicity1992 5 months ago)
Gmh5205xvs Will Not Work
Only 2.5 years old and stopped heating. Ugh!!! Can I repair this? The touchpad works and the plate r...
(Posted by pagreenwald 11 years ago)
Problems With Newer Wpgmh6185xvq-1 Microwave Oven
I purchased a WP OTR Microwave Convention Oven #GH6185XVQ-1 about 1.5 years ago. All functions are s...
(Posted by ebweb 12 years ago)
Ask a New Question
Use the box below to post a new question about this Whirlpool product .
Points & Prizes
  • You can earn points for nearly everything you do on HelpOwl.com
  • You can trade in those points for gift cards at leading retailers such as Amazon.com and Walmart
  • It's that simple!
See How it Works
Create a Free Account

Whirlpool Manuals

Find free Whirlpool GMH5205XVS manuals and user guides available at ManualOwl.com. Try out our unique manual viewer allowing you to interact with manuals from directly within your browser!

Whirlpool Reviews

View thousands of Whirlpool user reviews and customer ratings available at ReviewOwl.com.

Contact Information

Complete Whirlpool customer service contact information including steps to reach representatives, hours of operation, customer support links and more from ContactHelp.com.

Scoreboard Ratings

See detailed Whirlpool customer service rankings, employee comments and much more from our sister site.

Whirlpool Recalls

Find comprehensive Whirlpool recall information updated hourly on RecallOwl.com.