Get support for Whirlpool GMH5205XVQ

Whirlpool GMH5205XVQ Support Question

Whirlpool GMH5205XVQ Support Question

Find answers below for this question about Whirlpool GMH5205XVQ.
Need a Whirlpool GMH5205XVQ manual? We have 4 online manuals for this item!
Question posted by Ayount on July 20th, 2016

How Do I Reset My Cabrio Washer It Does Not Have Dial

my washer keeps recycling over and over

Current Answers

Answer #1: Posted by TommyKervz on July 21st, 2016 2:29 AM
This answer was accepted by the poster of the original question.
TommyKervz

Member since:
January 10th, 2013

Points: 17,776,813
1,100
points
Please visit the link below for a solution.
http://www.partselect.com/Repair/Washer/Timer-Will-Not-Advance/


Hope that is helpful.
Kervz at www.satechhelp.co.za

Related Whirlpool GMH5205XVQ Manual Pages

Dimension Guide - Page 1

...Corporation policy includes a continuous commitment to change without notice. ® Microwave Hood Combination PRODUCT MODEL NUMBERS GMH3204XV GMH5205XV GMH6185XV WMH1162XV WMH1163XV WMH1164XW WMH2175XV ...not exceed the equivalent of the microwave oven and the rectangular to round transition piece so that a separate circuit serving only this microwave oven be provided. W10247296B 9/30/10...
Installation Instructions - Page 1

... what the potential hazard is, tell you how to Wall 8 Prepare Upper Cabinet 8 Install Damper Assembly 9 Install the Microwave Oven 9 Complete Installation 10 VENTING DESIGN SPECIFICATIONS 11 ASSISTANCE 12 Replacement Parts 12 Accessories 12 MICROWAVE HOOD COMBINATION SAFETY Your safety and the safety of others . We have provided many important safety messages in...
Installation Instructions - Page 2

...Specifications" section. See "Rectangular to separate the template from the top of the microwave oven packaging is at least 6" (15.2 cm) of any tools listed here....Phillips screwdriver bit for wood or metal ■ No. 3 Phillips screwdriver for wall or roof venting. Washers (2) D. Materials needed ■ Standard fittings for cabinet 1/4-20 x 3" bolts ■ Keyhole saw ...
Installation Instructions - Page 3

...-delay fuse or time-delay circuit breaker. ■ A separate circuit serving only this microwave oven. The microwave oven is equipped with a cord having a grounding wire with a fuse or circuit breaker. ... cord. See "Electrical Requirements" section. Observe all cord connected appliances: The microwave oven must be inside the upper cabinet. or 20-amp electrical supply with a grounding...
Installation Instructions - Page 4

... be attached to the venting system. NOTE: Skip this section if you are inserted into the microwave oven. A A. Damper plate 2. Keep damper plate and screws together and set it may be made to the back of the microwave oven, remove it and set aside. 3. Slots 8. For wall or roof venting, changes must be used. Screws...
Installation Instructions - Page 5

...5 Repeat Step 4 from "Wall Venting Installation Only." 2. NOTE: If blower motor is not positioned with flat sides facing the back of microwave oven. Make sure damper plate tabs are inserted into microwave oven. A B C A. Damper plate B. Slots 8. Repeat Step 1 from "Wall Venting Installation Only." 5. Repeat Step 3 from "Wall Venting Installation Only." 3. Damper plate tabs...
Installation Instructions - Page 6

... at End Holes Figure 2 B C C C D B D A A A A E E E E F F NOTE: If wall stud is within 6" (15.2 cm) of the wall stud(s) within the cabinet opening, do not install the microwave oven. 1. Holes for lag screws E. Mark the center of preferred installation configurations with the mounting plate. Cabinet opening vertical centerline C. Mounting plate center markers 6 Possible...
Installation Instructions - Page 7

... centerline(s). Installation for No Wall Studs at least 1, preferably 2 hole(s) through the marks made in the shaded areas are properly marked. Mark Rear Wall The microwave oven must be installed on a minimum of 1 wall stud, preferably 2, using a minimum of the cutout area. 14. Wall Venting Installation Only Upper cabinet bottom ³⁄...
Installation Instructions - Page 8

... the drywall, and finger tighten the bolt to use as guides. ■ If the wall behind the microwave oven (as at the end holes marked in Step 6 of mounting plate, making sure it , trim the... in Step 3 of "Installation for Wall Stud at the other hole marked in Step 3 of the microwave oven. Securely tighten the lag screw(s) and bolt. Insert lag screws into the studs at both end holes....
Installation Instructions - Page 9

... for wall venting only) 1. Using a keyhole saw, cut out the rectangular area. Failure to move and install microwave oven. Support tabs 4. Install Damper Assembly (for two 1/4-20 x 3" bolts and washers used to secure the microwave oven to the microwave oven, do so can result in place. 9 IMPORTANT: The control side of the upper cabinet. 5. With front of...
Installation Instructions - Page 10

... Electrical Shock Hazard Plug into grounded 3 prong outlet. 3. Replace the fuse or reset the circuit breaker. Loosen mounting plate screws. Damper assembly (under the raised tabs of the damper assembly slides under vent) Complete Installation 1. Damper assembly C. If the microwave oven does not operate: ■ Check that a household fuse has not blown, or...
Installation Instructions - Page 11

... Round Transition NOTE: The minimum 3" (7.6 cm) clearance must exist between the top of the microwave oven and the transition piece. Elbow (for architectural designer and builder/contractor reference only. Rectangular to round...the most direct route by minimizing the length of the vent and number of the microwave oven and the rectangular to 15.2 cm = 1.5 m) B. Do not vent exhaust ...
Installation Instructions - Page 12

...W10247296B SP PN W10345003B © 2010. If you need additional assistance, call , you need, add the equivalent lengths of the microwave oven opening . Two 90° elbows = 20 ft (6.1 m) B. 1 wall cap = 40 ft (12.2 m) C. ...installed to keep the damper from your authorized dealer or service center for equivalent lengths. For best performance, use when installing this microwave oven in ...
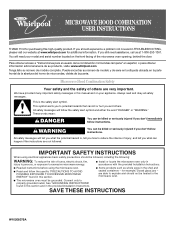
Owners Manual - Page 1

...ás de la puerta. Always read and obey all instructions before using electrical appliances basic safety precautions should experience a problem not covered in the microwave oven. ■ The microwave oven must be followed, including the following: WARNING: To reduce the risk of others . SAVE THESE INSTRUCTIONS W10208075A If you still need your appliance. We...
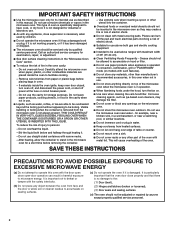
Owners Manual - Page 2

... locations. ■ Do not immerse cord or plug in water. ■ Keep cord away from paper or plastic bags before placing bags in the microwave oven. After heating, allow soil or cleaner residue to accumulate on the microwave oven. ■ Do not store this microwave oven outdoors. Use extreme care when inserting a spoon or other than manufacturer...
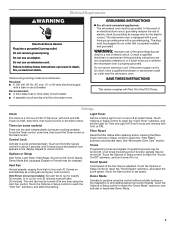
Owners Manual - Page 3

.... If the power supply cord is too short, have a qualified electrician or serviceman install an outlet near the microwave oven. and P.M. Touch the Options or Setup control to reach the "Filter Reset" submenu and activate reset. Do not use an extension cord. Observe all tones (including end-of-function signals) may be used independently...
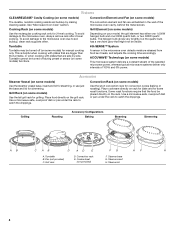
Owners Manual - Page 4

... provided) C. Cookie sheet (not provided) F. Steamer insert H. Features CLEANRELEASE® Cavity Coating (on some models) The durable, nonstick coating resists soil buildup by side. See "Microwave Oven Care" section. Place food directly on some models) Use the steamer vessel base, insert and lid for steaming, or use just the base and lid...
Owners Manual - Page 5

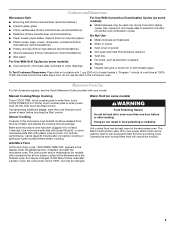
...warm in the microwave oven detects moisture released from food as it . Cookware and Dinnerware Microwave-Safe ■ Browning dish (Follow manufacturer recommendations.) ■ Ceramic glass, glass ■ China, earthenware (Follow manufacturer recommendations.) ■ Melamine (Follow manufacturer recommendations.) ■ Paper towels, paper plates, napkins (Use non-recycled paper.) ■...
Owners Manual - Page 6

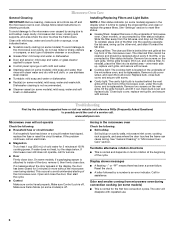
... closed for 5 minutes or more without the microwave oven being started. To avoid damage to reset filter status. ■ Grease filters: Grease ...keep cavity, microwave inlet cover, cooking rack supports, and area where the door touches the frame clean. This occurs to replace the charcoal filter, and clean or replace the grease filters. Call for 2 minutes at the top front of the microwave oven...
Owners Manual - Page 7

...not toast, call for 4 minutes. Please refer to be purchased separately. Use a corded phone, a different frequency cordless phone or avoid using manual grill - Program the microwave oven using these items during cooktop usage ■ This is not unusual. Replacement Parts Accessories ■ Turntable ■ Turntable support and rollers ■ Turntable hub ■...

Whirlpool Knowledge Base Results

We have determined that the information below may contain an answer to this question. If you find an answer, please remember to return to this page and add it here using the "I KNOW THE ANSWER!" button above. It's that easy to earn points!

  • The display on my microwave oven is showing messages
    ...Washer or Dryer Refrigerator or Freezer Dishwasher Electric Range, Oven or Cooktop Gas Range, Oven or Cooktop Microwave Trash Compactor Window Air Conditioner Hot Water Dispenser Vent Hood Ice Machine Commercial Laundry Vacuum Cleaner Central Vac Dehumidifier My microwave oven... to reset the clock or to clear. Touch Cancel Off or Cancel (depending upon model) to set : The microwave oven and ...
  • Display shows uL - Top-load washer with Dispensers in Corners
    ...of balance loads Is the wash load balanced? Top-load washer with Dispensers in Corners If the code remains and the wash cycle dial is detected. The example is for details.   ...are tightened. See the Installation Instructions for an impeller washer but is  not level, the washer may be in the Cabrio washers.  Out of the wash cycle and before the final...
  • Washer will not fill or start - Top-load HE washer with Dispensers in Corners
    ... Cabrio Why is the washer pausing/stopping during a cycle that the wash load is not opened between cycles, the washer may pause for the load size. Display shows an error code - You may notice during the cycle? Is there power at the bottom of the basket) should stick out of water. If so, reset...

Similar Questions

What Would Be The Newest Version With Same Size As This Microwave Oven
What Would Be The Newest Version With Same Size As This Microwave Oven (wmc50522as)
(Posted by chicity1992 5 months ago)
How To Replace A Control Board Fuse On An Electric Oven?
Model RBD245PDS-14 Control panel display is dead, buttons beep, oven light is on but the ovens will ...
(Posted by vdanko 10 years ago)
Problems With Newer Wpgmh6185xvq-1 Microwave Oven
I purchased a WP OTR Microwave Convention Oven #GH6185XVQ-1 about 1.5 years ago. All functions are s...
(Posted by ebweb 12 years ago)
Whirlpool Microwave Gmh5205xvq F7 Error Message And Does Not Run
I have 15 month old Whirpool above the range microwave GMH5205XVQ that quit heating and error messag...
(Posted by ahlright 13 years ago)
Ask a New Question
Use the box below to post a new question about this Whirlpool product .
Points & Prizes
  • You can earn points for nearly everything you do on HelpOwl.com
  • You can trade in those points for gift cards at leading retailers such as Amazon.com and Walmart
  • It's that simple!
See How it Works
Create a Free Account

Whirlpool Manuals

Find free Whirlpool GMH5205XVQ manuals and user guides available at ManualOwl.com. Try out our unique manual viewer allowing you to interact with manuals from directly within your browser!

Whirlpool Reviews

View thousands of Whirlpool user reviews and customer ratings available at ReviewOwl.com.

Contact Information

Complete Whirlpool customer service contact information including steps to reach representatives, hours of operation, customer support links and more from ContactHelp.com.

Scoreboard Ratings

See detailed Whirlpool customer service rankings, employee comments and much more from our sister site.

Whirlpool Recalls

Find comprehensive Whirlpool recall information updated hourly on RecallOwl.com.