Get support for Whirlpool GH7208XRB - Microwave

Whirlpool GH7208XRB Support Question

Whirlpool GH7208XRB Support Question

Find answers below for this question about Whirlpool GH7208XRB - Microwave.
Need a Whirlpool GH7208XRB manual? We have 4 online manuals for this item!
Question posted by eandscohen1 on June 8th, 2021

Glowing And Burning Smell Inside Top Of Cavity.

Every time I close the door of the microwave in the grill covered cavity on the left side (inside top) something glows red hot and smells burning. No controls have been pushed. Had to unplug unit to stop it from happening.

Current Answers

Answer #1: Posted by techyagent on June 9th, 2021 6:03 AM
This answer was accepted by the poster of the original question.
techyagent

Member since:
June 17th, 2014

Points: 4,799,780
1,100
points
Burning odors such as melting plastic or burned wires when the microwave is in use indicate that the electrical components within your microwave are failing. Do not attempt to repair or troubleshoot electrical issues with your microwave, especially if you smell burned plastic or wiring.


https://homeguides.sfgate.com/microwave-failing-37935.html


Thanks


Techygirl

Related Whirlpool GH7208XRB Manual Pages

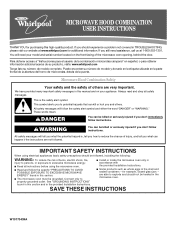
Owners Manual - Page 1

...covered in TROUBLESHOOTING, please visit our website at 1-800-253-1301. IMPORTANT SAFETY INSTRUCTIONS When using the microwave oven...burns, electric shock, fire, injury to persons, or exposure to potential hazards that can kill or hurt you what the potential hazard is the safety alert symbol. for purchasing this section. ■ The microwave oven...the microwave oven opening, behind the door....
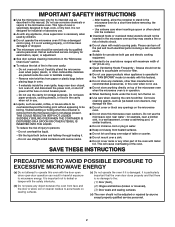
Owners Manual - Page 2

... not cover or block any appliance, close properly and that the oven door close supervision is specifically designed to be boiling. Do not use . ■ As with the door open since open-door operation can burn off power at the fuse or circuit breaker panel. - Carefully attend the microwave oven when paper, plastic, or other part of the microwave oven when the microwave oven...
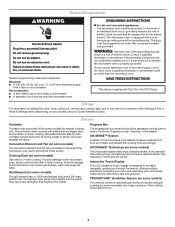
Owners Manual - Page 3

..., and adjusts the cooking time accordingly. Grill Element (on some models) The convection element and fan are side by providing an escape wire for 2-level cooking. ACCUWAVE® Technology (on if the cooktop below gets too hot. 3 Recommended: ■ A time-delay fuse or time-delay circuit breaker. ■ A separate circuit serving only this microwave oven. Consult a qualified...
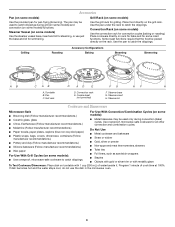
Owners Manual - Page 4

...for grilling. Use ovenproof, microwave-safe cookware for some roast functions. Program 1 minute of water beside it. If dish becomes hot ...insert and lid for steaming, or use the dish in the microwave oven. 4 Grill rack D. Place cookware directly on rack for bake and for...Place dish on turntable with 1 cup (250 mL) of cook time at 100%. Accessories Pan (on some models) Use the provided...
Owners Manual - Page 5

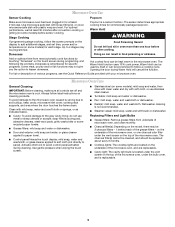
... dishwasher. Food Poisoning Hazard Do not let food sit in the microwave oven. Add or subtract time from underside of the microwave oven, or one hour before sensor cooking. To avoid damage to soil buildup, keep cavity, microwave inlet cover, cooking rack supports, and area where the door touches the frame clean. Use gentle pressure when wiping the touch...
Owners Manual - Page 6

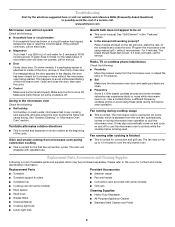
... be purchased separately. Arcing in the display, the door has been closed for the first few convection cycles. without the microwave oven being used. Please refer to inside of bread on the tall grill rack, place the rack on cavity walls, microwave inlet cover, cooking rack supports, and area where the door touches the frame can cause arcing. Troubleshooting First...
Owners Manual - Page 8

Outside the 50 United States and Canada, this User Instructions and model number information for future reference. ITEMS EXCLUDED FROM WARRANTY This limited warranty does not cover: 1. Service calls to ...China All rights reserved. ® Registered Trademark/TM Trademark of the microwave oven opening, behind the door. Repairs when your model number and serial number on the label located...
Dimension Guide - Page 1

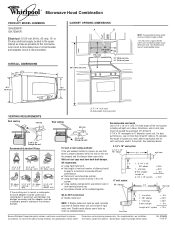
... 3 prong outlet must be inside the upper cabinet. *30... 20-amp electrical supply located in the upper cabinet as close as standard elbows. A time-delay fuse or circuit breaker and separate circuit is proper... is round, a rectangularto-round adapter must be uniform. ✔ using duct tape to the microwave oven hood. wall cap If the existing vent is chosen, be used in the vent system. &#...
Installation Instructions - Page 1

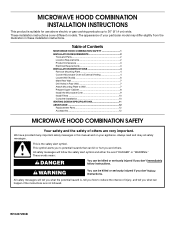
... INSTALLATION REQUIREMENTS 2 Tools and Parts 2 Location Requirements 2 Product Dimensions 3 Electrical Requirements 3 INSTALLATION INSTRUCTIONS 4 Remove Mounting Plate 4 Convert Microwave Oven to 36" (91.4 cm) wide. W10247293B These installation instructions cover different models. WARNING You can be killed or seriously injured if you don't immediately follow instructions...
Installation Instructions - Page 2

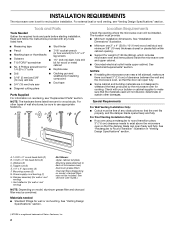
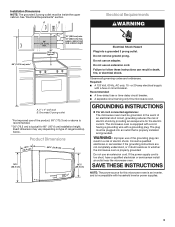
... other types of wall structures, be free of 150 lbs (68 kg), which includes microwave oven and items placed inside the microwave oven and upper cabinet. ■ Grounded electrical outlet inside upper cabinet. See "Rectangular to exist above the microwave oven so that the door can open fully. ■ Some cabinet and building materials are for cabinet 1/4-20 x 3" bolts...
Installation Instructions - Page 3

...Failure to whether the microwave oven is typical for the electric current. Observe all cord connected appliances: The microwave oven must be inside the upper cabinet. ...source for this microwave oven. See "Electrical Requirements" section. Recommended: ■ A time-delay fuse or time-delay circuit breaker. ■ A separate circuit serving only this microwave oven is an inverter...
Installation Instructions - Page 4

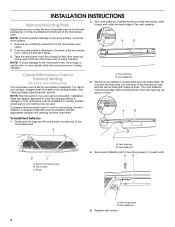
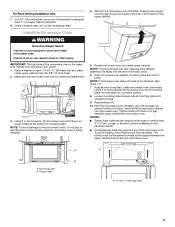
... the work surface, cover the work surface. 1. To Install Vent Deflector: 1. Vent opening B. Gently pull the rings and lift vent screen from the microwave oven cavity. 2. Remove any remaining contents from the top of microwave oven B. NOTE: To avoid damage to the microwave oven, do not grip or use the door or door handle while the microwave oven is being handled. Vent...
Installation Instructions - Page 5

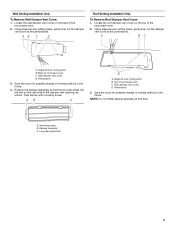
... Back of microwave oven C. Save the cover for possible change of the microwave oven. 2. Save the cover for possible change of the microwave oven. 2. Diagonal wire cutting pliers B. Perforations 3. Then secure with mounting screw. Top of microwave oven C. Mounting screw B. Long tab (inside slot) 5 A B C D A. Damper assembly C. Locate the roof damper vent cover on the...
Installation Instructions - Page 6

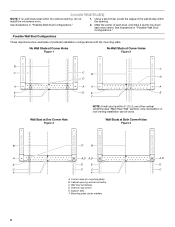
... examples of the vertical centerline (see "Mark Rear Wall" section), only recirculation or roof venting installation can be done. Cabinet opening , do not install the microwave oven. 1. Holes for lag screws E. No Wall Studs at Corner Holes Figure 1 No Wall Studs at Corner Holes Figure 2 MOUNTING PLATE MOUNTING PLATE MOUNTING PLATE MOUNTING...
Installation Instructions - Page 7

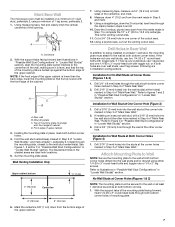
... mounting plate to the centerline on a second wall stud, drill a 3/16" (5 mm) hole into the wall stud at Corner Holes (Figures 1 & 2) 1. Mark Rear Wall The microwave oven must align with the front edge of the cabinet. If the holes are 3 installation configurations. Installation for Wall Studs at the hole(s) marked in Step...
Installation Instructions - Page 8

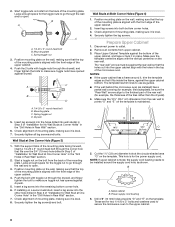
...align to be installed around it fits inside the frame, against the upper cabinet ...supply cord hole, as installed) has a partial wall covering (for example, tile backsplash), be against the bottom of... A C A. 1/4-20 x 3" round-head bolt B. Push the 2 bolts with the front edge of "Installation for ...guides. ■ If the wall behind the microwave oven (as shown. Cut the 1¹⁄₂...
Installation Instructions - Page 9

... area "F" on a covered surface. 8. Support tabs A. 1/4-20 x 3" flat-head bolts 9 Make sure the microwave oven door is required, rotate microwave oven downward. Using 2 or more people to be the same thickness as the space between upper cabinet and microwave oven. NOTE: If microwave oven does not need to move and install microwave oven. If adjustment is closed and taped shut...
Installation Instructions - Page 10

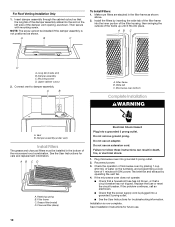
... has not tripped. Retaining spring B. Do not remove ground prong. Check the operation of microwave oven by operating the vent fan. 4. Test vent fan and exhaust by placing 1 cup (250 mL) of water on the left side of the microwave hood combination. For Roof Venting Installation Only 1. Insert damper assembly through the cabinet cutout...
Installation Instructions - Page 11

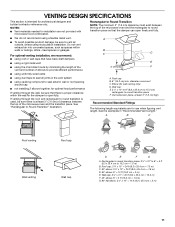
...extension piece, at least 3" (7.6 cm) of clearance between the top of the microwave oven and the rectangular to round transition is used, be sure that have back draft dampers...rigid metal vent ■ using the most direct route by minimizing the length of the vent and number of the microwave oven and the transition piece. A B C Roof venting Roof cap Wall venting Wall cap D E F G A....
Installation Instructions - Page 12

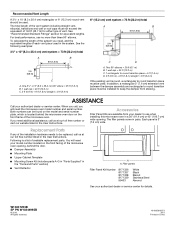
... us at our toll free number listed in a 36" (91.4 cm) or 42" (106.7 cm) wide opening , behind the microwave oven door on the model and serial number plate, which is a list of the microwave oven opening . Replacement Parts If any of each vent piece used . When you call, you need your authorized dealer or...

Whirlpool Knowledge Base Results

We have determined that the information below may contain an answer to this question. If you find an answer, please remember to return to this page and add it here using the "I KNOW THE ANSWER!" button above. It's that easy to earn points!

  • Self-cleaning issues
    ... inside oven cavity frame, being careful not to clean this area. The setting will appear on my cooking appliance FAQs Knowledgebase search tips Blank display The door will appear on the door frame. The cycle time includes a 30-minute cool-down time. Close door. This area does not get hot enough during the Self-Cleaning cycle. Exposure to another closed...
  • How do I clean my microwave oven?
    ... goes on oven or control panel. Here For stainless steel exterior surfaces: To clean your microwave oven looks good and works well for a long time, you check out. Steam will soften soil. Before cleaning, make sure your stainless steel surface see, Damage may occur. Steam will soften the soil. Microwave Inlet Cover: The microwave inlet cover should...
  • Self-cleaning issues
    ... not lock and the cycle will automatically determine the length of cleaning time. Press Off/Cancel or open the door to keep them shiny. Let range cool and wipe out excess ashes from the storage drawer. Press Start. Hand-clean inside oven cavity frame, being careful not to move birds to the fumes may...

Similar Questions

Notification Door
The latch must of gotten messed up. It is saying the door is not closed and the interior light is st...
(Posted by roxyrainesgmailcom 7 years ago)
When We Are Warming Something In The Microwave, It Ususally Works Successfully.
when we are warming , say for one minute or so, it is successful. Open the door -check the temp-need...
(Posted by smallfriends 7 years ago)
The Cover Plate In Top Of Oven Cavity Where Microwaves Enter Is Burnt.
can a replacement part be purchased? Will it just burn up again?
(Posted by Anonymous-149470 9 years ago)
Gh7208xr Microwave Convection Oven
the screen will rapidly skip from onescreen to another and be beeping all by it's self. The machine ...
(Posted by narquiette 10 years ago)
How Do You Replace The Lightbulb In The Whirlpool Gh7208xrb Microwave?
The screw in the light bulb cover has no grooves for a screw driver to fit. I showed a picture of th...
(Posted by Iwakuni16 11 years ago)
Ask a New Question
Use the box below to post a new question about this Whirlpool product .
Points & Prizes
  • You can earn points for nearly everything you do on HelpOwl.com
  • You can trade in those points for gift cards at leading retailers such as Amazon.com and Walmart
  • It's that simple!
See How it Works
Create a Free Account

Whirlpool Manuals

Find free Whirlpool GH7208XRB - Microwave manuals and user guides available at ManualOwl.com. Try out our unique manual viewer allowing you to interact with manuals from directly within your browser!

Whirlpool Reviews

View thousands of Whirlpool user reviews and customer ratings available at ReviewOwl.com.

Contact Information

Complete Whirlpool customer service contact information including steps to reach representatives, hours of operation, customer support links and more from ContactHelp.com.

Scoreboard Ratings

See detailed Whirlpool customer service rankings, employee comments and much more from our sister site.

Whirlpool Recalls

Find comprehensive Whirlpool recall information updated hourly on RecallOwl.com.