Whirlpool ET1PHKXPQ Support Question
Whirlpool ET1PHKXPQ Support Question
Find answers below for this question about Whirlpool ET1PHKXPQ.Need a Whirlpool ET1PHKXPQ manual? We have 4 online manuals for this item!
Question posted by Crlbrand6 on March 5th, 2017
Both Right Front And Rear Rollers Have Broken, How Do I Replace Each One?
I dont see how I. An remove the axle pin at rear in order to reace with new roller. As for front is it nust the roller or whole assembly that must be replaced?
Current Answers
Answer #1: Posted by Odin on March 5th, 2017 3:14 PM
Odin

Member since:
April 10th, 2010 Points: 41,236,700

Member since:
April 10th, 2010 Points: 41,236,700
Hope this is useful. Please don't forget to click the Accept This Answer button if you do accept it. My aim is to provide reliable helpful answers, not just a lot of them. See https://www.helpowl.com/profile/Odin.
Related Whirlpool ET1PHKXPQ Manual Pages
Owners Manual - Page 1
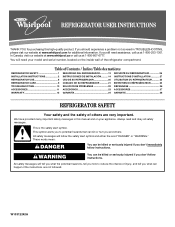
...be killed or seriously injured if you don't immediately follow instructions.
Table of Contents / Índice / Table des matières
REFRIGERATOR SAFETY 1 INSTALLATION INSTRUCTIONS 2 REFRIGERATOR USE 8 REFRIGERATOR CARE 9 TROUBLESHOOTING 10 ACCESSORIES 11 WARRANTY 12
SEGURIDAD DEL REFRIGERADOR 13 INSTRUCCIONES DE INSTALACIÓN........... 14 USO DE SU REFRIGERADOR 20 CUIDADO DE...
Owners Manual - Page 2
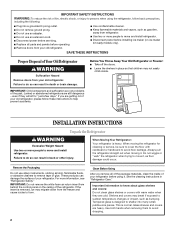
... cleaner. ■ Keep flammable materials and vapors, such as gasoline,
away from refrigerator. ■ Use two or more people to move and install refrigerator. ■ Disconnect power before operating. ■ Remove doors from your refrigerator. Important information to remove tape or glue.
Remove the Packaging
Do not use an extension cord. ■ Disconnect power before using...
Owners Manual - Page 3
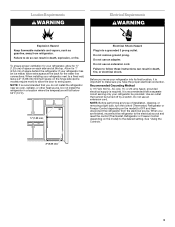
... cm) of space on the hinge side (some models require more) to the desired setting. When installing your refrigerator, allow for 1" (2.54 cm) of installation, cleaning, or removing a light bulb, turn the control (Thermostat, Refrigerator or Freezer Control depending on the model) to allow extra space at the top.
Before you do so...
Owners Manual - Page 4
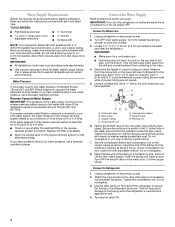
... tubing.
7. Tighten the compression nut.
Water Pressure
A cold water supply with any tools listed here.
Replace the filter if necessary.
■ Allow the storage tank on the lower left rear of water.
3. Connect to clear line of refrigerator to operate the water dispenser and ice maker. Turn ON nearest faucet long enough to...
Owners Manual - Page 5
...-Head Handle Screw
Cabinet
1.
Keep all parts together. Remove the door stop. Set aside the door until
you are ready to follow the instructions for a right-hand swing refrigerator (hinges factory installed on the right).
■ If you only want to reverse your model, you want to remove and replace the doors, see "Replace Doors and Hinges."
Owners Manual - Page 6
... Top Hinge graphic. For Style 2, slide trim into a grounded 3 prong outlet.
4. Remove the cabinet hinge hole plugs from refrigerator door.
Do not remove ground prong. Replace the refrigerator door. Move it to the opposite side hinge holes as shown in the Top Hinge graphic.
2. Assemble the parts of the handle and drive the bottom screw.
8. See...
Owners Manual - Page 7
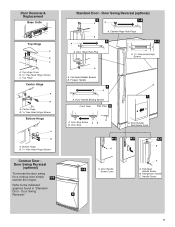
... Hole Plug
A. Cabinet Hinge Hole Plugs
3
1-1
1
A
A Hex-Head Hinge Screws
A
A. Refrigerator Handle C. Standard Door - Flat-Head Handle Screws B. Door Stop
A.
Flat-Head Handle Screw
B. ... Hinge B Hex-Head Hinge Screws
Bottom Hinge
A
B
A. Door Stop Screw A B B. Door Removal & Replacement
Base Grille
Top Hinge
A
B C
A. Bottom Hinge B Hex-Head Hinge Screws
Contour Door Door ...
Owners Manual - Page 8
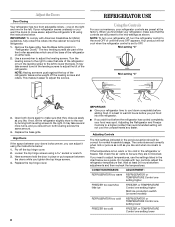
... to the right.
Open both leveling screws to lower the refrigerator.
1. Pry off the leveling screws and rollers. The controls are preset at least 24 hours between your refrigerator controls are ... one on either side.
2. Replace the base grille. Adjusting the Refrigerator and Freezer Controls to the word OFF or until the word OFF appears. Remove the base grille. This makes it...
Owners Manual - Page 9
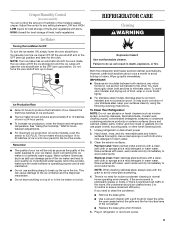
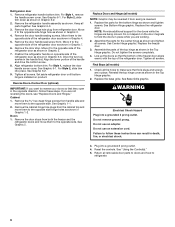
...arm up spills immediately.
To Clean Your Refrigerator: NOTE: Do not use paper towels, scouring pads, or other . Hand wash, rinse, and dry removable parts and interior
surfaces thoroughly. Stainless steel:...of the ice maker and lead to produce the first batch of the condenser.
■ Replace the base grille when finished.
5. To help avoid corrosion of fruits and vegetables with a...
Owners Manual - Page 10
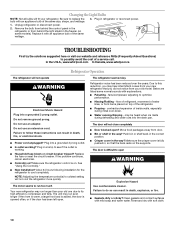
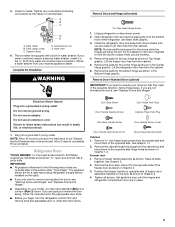
...refrigerator or disconnect power.
2. Replace
the fuse or reset the circuit breaker. NOTE: Adjusting the temperature control(s) to cool completely. Due to this reduction, you did not notice from behind the light shield in the way? Remove...run longer than your old model. The door will fit your new refrigerator that the back rests on . If the problem continues, call .
The door...
Owners Manual - Page 11
....
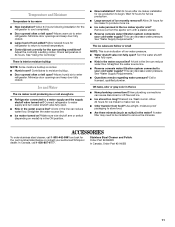
There is interior moisture buildup
NOTE: Some moisture buildup is too warm
■ New installation? Minimize door openings and keep door fully closed .
■ Large load of...refrigerator to begin. Stainless Steel Cleaner and Polish: Order Part #4396095
In Canada, Order Part #31462B
11
Turn the water shutoff
valve fully open ? Use airtight, moisture proof packaging to remove...
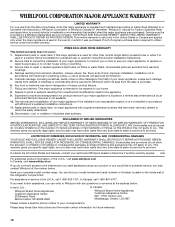
Owners Manual - Page 12

...cover:
1. Pickup and delivery. Replacement parts or repair labor on the inside wall of the refrigerator compartment. This warranty gives you specific legal rights, and you on the duration ...(hereafter "Whirlpool") will pay for future reference.
12
Service calls to province. The removal and reinstallation of your major appliance, to instruct you also may not apply to Whirlpool...
Warranty - Page 1
...to be provided by a Whirlpool designated service company. This warranty gives you specific legal rights, and you . LIMITATION OF REMEDIES; If outside the 50 United States and Canada,... refrigerator or freezer product failures.
7.
Please keep these limitations and exclusions may not apply to you also may have been removed, altered or cannot be easily determined.
12. Replacement...
Energy Guide - Page 1
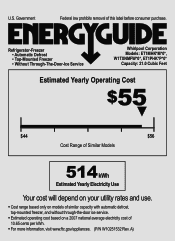
Government
Federal law prohibits removal of
10.65 cents per kWh.
• For more information, visit www.ftc.gov/appliances. (P/N W10251532 Rev. Refrigerator-Freezer • Automatic Defrost • Top-Mounted Freezer • Without Through-The-Door-Ice Service
Whirlpool Corporation Models: ET1MHK*M*0*, W1TXNMFW*0*, ET1PHK*P*0* Capacity: 21.0 Cubic Feet
...
Dimension Guide - Page 1
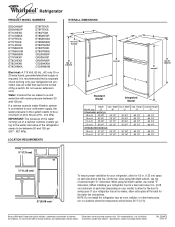
... notice.
It is recommended that cannot be a minimum of the refrigerator needs to be provided. If a reverse osmosis water filtration...refrigerator near an oven, radiator, or other heat source, nor in . (5.08 cm) minimum on each side (depending on each side and at the back for the water line connections. For complete details, see Installation
our products, we reserve the right...
Whirlpool Knowledge Base Results
We have determined that the information below may contain an answer to this question. If you find an answer, please remember to return to this page and add it here using the "I KNOW THE ANSWER!" button above. It's that easy to earn points!-
My cooktop cooking results on my gas range are not what I expected
... finish will produce a flame. Before setting a control knob, place filled cookware on a hot surface cooking area, element or surface burner. Burner (on some models) The right rear burner has an adjustable heat setting for cookware material characteristics. After burner lights, turn knob counterclockwise to a setting. My gas cooktop doesn't work on my... -
Door not closing easily - Side by side refrigerator
... more to lower that side of the roller assemblies which are aligned. Steps to adjust the front roller leveling screw. This makes it counterclockwise to the rear by side refrigerator Door pops open - Turn the roller leveling screw clockwise to close more easily, adjust the tilt of the refrigerator on models where applicable. If not, slightly... -
How to level your refrigerator
...toward you like . If not, tilt the refrigerator slightly more to the rear by turning both front adjustment screws to the right. Remove the bracket cover. Turn both adjustment screws ...the floor; this will keep the refrigerator from side to side. Replace the bracket cover. Using a 3/8" hex driver, raise or lower the front roller adjustment screws (B) as you should ...
Similar Questions

Whirlpool Refrigerator Gb2fhdxwb Door Handle Removal
the door handles need to be tightened. in fact one side of the bottom freezer handle has come off.ho...
the door handles need to be tightened. in fact one side of the bottom freezer handle has come off.ho...
(Posted by robmtk 7 years ago)

Fridge Warm, Freezer Cold, Noticed Fan In Freezer Is Not Running
My fridge suddenly stopped working but the freezer is still cold. There is lots of condensate on the...
My fridge suddenly stopped working but the freezer is still cold. There is lots of condensate on the...
(Posted by jwhite85030 9 years ago)

Whirlpool Refrigerator Ed5lvaxvq00 How To Remove Water Filter
(Posted by samwmmar 9 years ago)

Water Ocassionally Drips From The Right Corner Of My Whirlpool Gi7fvcxwy Freezer
(Posted by davidalanstory 11 years ago)