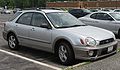
2002 Subaru Outback Support Question
2002 Subaru Outback Support Question
Find answers below for this question about 2002 Subaru Outback.Need a 2002 Subaru Outback manual? We have 2 online manuals for this item!
Question posted by Xanekbla on November 11th, 2013
How To Remove Electrical Connector From 2002 Suburu Outback Headlight
The person who posted this question about this Subaru automobile did not include a detailed explanation. Please use the "Request More Information" button to the right if more details would help you to answer this question.
Current Answers
Related Manual Pages
Owner's Manual - Page 56
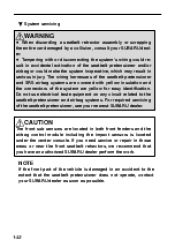
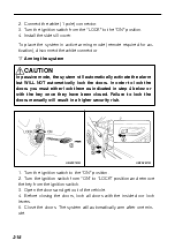
Do not use electrical test equipment on any circuit related to the extent that you need service or repair in ...your SUBARU dealer. WARNING
CAUTION
The front sub sensors are yellow for easy identification. D Tampering with yellow insulation and the connectors of the vehicle is located under the center console. The wiring harnesses of the seatbelt pretensioner and SRS airbag systems are ...
Owner's Manual - Page 87
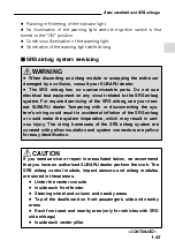
...light when the ignition switch is first turned to the SRS airbag system. Do not use electrical test equipment on front passenger's side and nearby areas D Each front seat and nearby area... and nearby areas D Top of the SRS airbag system are covered with yellow insulation and system connectors are stored in serious injury.
Tampering with SRS side airbags) D Inside each center pillar
- ...
Owner's Manual - Page 106
...sill cover on the driver's side. 1) Open the driver's door. 2) Remove the two clips fastening the front portion of the cover with yellow insulation and... stop flashing. n To enter the passive mode
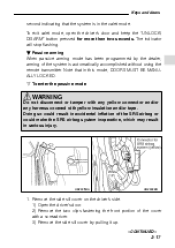
WARNING
Do not disconnect or tamper with any yellow connector and/or any harness covered with a screwdriver. 3) Remove the side sill cover by the dealer, arming of the SRS airbag or could make the SRS...
Owner's Manual - Page 107
...doors, lock all doors with the key once they have been closed. Connect the white (1 pole) connector. 3. To place the system in a higher security risk. Open the doors and get out of ...to "LOCK" position and remove the key from the "LOCK" to lock the doors manually will result in active arming mode (remote required for activation), disconnect the white connector. Install the side sill cover...
Owner's Manual - Page 154
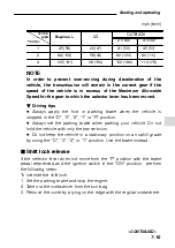
... you for the day position. If deicing is turned to the "ACC" or "LOCK" position. To turn the deicer on the windshield wiper deicer, remove any snow from headlights.
- CONTINUED -
3-31 If the wiper blades have to push the switch to turn it away for the night position.
The indicator light located...
Owner's Manual - Page 156
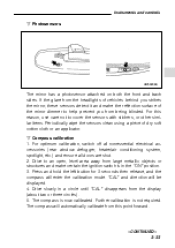
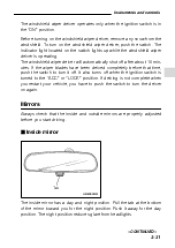
... optimum calibration, switch off all nonessential electrical accessories (rear window defogger, heater/air conditioning system, spotlight, etc.) and ensure all doors are shut. 2. Drive slowly in the "ON" position. 3. The compass will be displayed. 4. Further calibration is now calibrated. If the glare from the headlights of vehicles behind you strikes the mirror...
Owner's Manual - Page 263
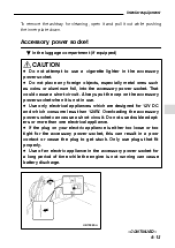
...B In the luggage compartment (if equipped)
D Do not attempt to get stuck. D Use of an electric appliance in the accessory power socket for a long period of time while the engine is not running can cause ...a short circuit.
Interior equipment
To remove the ashtray for cleaning, open it and pull it is either too loose or too tight for ...
Owner's Manual - Page 273
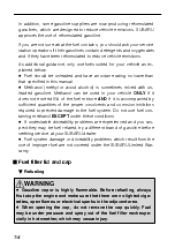
...the fuel contains, you suspect they have an octane rating no lighted cigarettes, open flames or electrical sparks in your vehicle ONLY if it does not exceed 5% of the fuel mixture AND if ... out of improper fuel are designed to reduce vehicle emissions. D When opening the cap, do not remove the cap quickly. As additional guidance, only use of the fuel filler neck especially in this manual....
Owner's Manual - Page 288
.... 3. Take out the screwdriver from the "P" position with only the transmission. Use the brake instead. Remove the cover by using the "D", "3", "2", or "1" position. Set the parking brake and stop the ...Vehicle type Position
Brighton, Brighton L 35 (56) 64 (103) 100 (161)
GT 29 (47) 58 (93) 96 (154)
OUTBACK 2.5 liter 31 (50) 62 (100) 102 (164) 3.0 liter 35 (57) 69 (111) 111 (178)
1 2 3
NOTE...
Owner's Manual - Page 314
...vehicle. Water entering the engine air intake or the exhaust pipe or water splashing onto electrical parts may damage your SUBARU off road, you do take unnecessary risks by driving ... D Do not drive across steep slopes. But please keep in dangerous areas or over end. B OUTBACK Because of marked traffic lanes, banked curves, traffic signs and the like. D Avoid sharp turning maneuvers,...
Owner's Manual - Page 363
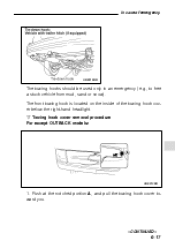
... portion A, and pull the towing hook cover toward you.
- CONTINUED -
9-17 In case of the towing hook cover below the right-hand headlight. n Towing hook cover removal procedure For except OUTBACK models:
HB9013BB
1. The front towing hook is located on the inside of emergency
HB9010BB
The towing hooks should be used only in...
Owner's Manual - Page 437

... is required, consult your SUBARU dealer for proper adjustment of the headlight aim. Maintenance and service
J Headlight
CAUTION
Halogen headlight bulbs become very hot while in use. B For GT and OUTBACK models
HBB039BA
HBB040BB
Remove the headlight bulb cover, by turning it counterclockwise.
- CONTINUED -
11-57 If you touch the bulb surface with bare hands or...
Owner's Manual - Page 438
n Low beam light bulbs
HBB041BB
HBB042BA
1. 2. 3. 4. 5. Remove the retainer spring. Disconnect the electrical connector for black cable. Reconnect the electrical connector for the black cable. Remove the bulb from the bulb. 2. Install the headlight bulb cover. Disconnect the electrical connector from the headlight assembly by turning it counterclockwise. 3. n High beam light bulbs...
Owner's Manual - Page 439

... light bulbs can be replaced.
Install the headlight bulb cover. When the headlight assembly has been removed and then reinstalled, it clicks. 6. Install the new bulb. 5. Remove the electrical connector. Remove the bulb from the headlight assembly by turning it clockwise until it may be
- CONTINUED -
11-59 B Except GT and OUTBACK models
HBB045BB
HBB046BA
1. To install the...
Owner's Manual - Page 440

... socket. 5. Set the bulb socket into the vehicle body. Remove the bulb socket from the socket by turning it and turning counterclockwise. Set the headlight assembly into the headlight assembly and turn it clockwise until it locks. 6. HBB039CB
HBB020BA
3. Remove the bulb from the headlight assembly by pushing it counterclockwise. 4. made at the top of...
Owner's Manual - Page 363

... of emergency
HB9010BB
The towing hooks should be used only in an emergency (e.g., to free a stuck vehicle from mud, sand or snow). n Towing hook cover removal procedure For except OUTBACK models:
HB9013BB
1. In case of the towing hook cover below the right-hand...
Owner's Manual - Page 437
..., causing the bulb to break. B For GT and OUTBACK models
HBB039BA
HBB040BB
Remove the headlight bulb cover, by turning it counterclockwise.
- CONTINUED -
11-57 NOTE
If headlight aiming is required, consult your SUBARU dealer for proper adjustment of the headlight aim. Maintenance and service
J Headlight
CAUTION
Halogen headlight bulbs become very hot while in use.
If you...
Owner's Manual - Page 438

... light bulbs
HBB041BB
HBB042BA
1. 2. 3. 4. 5. Remove the retainer spring. Install the headlight bulb cover. Disconnect the electrical connector for black cable. Remove the bulb from the bulb. 2. At this time, use care not to touch the bulb surface. 11-58 n High beam light bulbs
HBB043BA
HBB044BB
1. Disconnect the electrical connector from the headlight assembly by turning it...
Owner's Manual - Page 439
... the electrical connector while pressing the lock release tab. 2. Install the bulb holder in the headlight assembly by turning it is recommended that the headlight aiming adjustment be replaced.
When the headlight assembly has been removed and then reinstalled, it locks. 6. B Except GT and OUTBACK models
HBB045BB
HBB046BA
1. Remove the bulb from the headlight assembly...
Owner's Manual - Page 440
made at the top of and the front of the headlight assembly using a phillips screwdriver or an open-end wrench. 2. Remove the headlight assembly mounting screws located at a SUBARU dealer. Set the headlight assembly into the headlight assembly and turn it clockwise until it locks. 6.
Remove the bulb socket from the socket by turning it and turning...
Similar Questions

How To Remove Window Switch From 2002 Subaru Outback
(Posted by smalSLRK 9 years ago)


Where Do You Front End Align A Suburu 2002 Awl Outback
(Posted by jefffixx 10 years ago)

2002 Subaru Outback How To Remover Tow Hook Cover
(Posted by traizahby 10 years ago)