Sony CMT-NEZ3 Support Question
Sony CMT-NEZ3 Support Question
Find answers below for this question about Sony CMT-NEZ3 - Micro Hi Fi Component System.Need a Sony CMT-NEZ3 manual? We have 2 online manuals for this item!
Question posted by drloi77 on August 20th, 2016
My Remote Doesn't Work, So Where Is The Repeat Button On The Front Of The Unit?
Thank you
Current Answers


Related Sony CMT-NEZ3 Manual Pages
Operating Instructions - Page 1
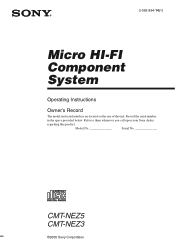
Record the serial number
in the space provided below. 2-582-894-14(1)
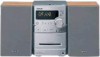
Micro HI-FI Component System
Operating Instructions
Owner's Record
The model and serial numbers are located on the rear of the unit. Refer to them whenever you call upon your Sony dealer
regarding this product.
Model No
Serial No
CMT-NEZ5 CMT-NEZ3
©2005 Sony Corporation
Operating Instructions - Page 3

...Repeat Play Creating your favorite CD tracks on a tape manually 16 - Power Saving Mode Viewing information about the disc in the display 20
Optional Components... Data System (RDS).... 14 (European model CMT-NEZ5 only)
Tape - Play Timer Timer ...Play Playing repeatedly 10 - Play Loading a disc 9 Playing a disc 9 - Sleep Timer Waking up optional components......... 21
Troubleshooting...
Operating Instructions - Page 4
... and audio (audio CD data) on it . • A disc that has the adhesive, cellophane tape,
or a sticker still left on the second and subsequent tracks of data using the buttons on the unit having multiple sessions, with paper or stickers on it .
* ISO9660 Format The most common international standard for model CMT-NEZ5 and CMT-NEZ3. Other...
Operating Instructions - Page 8
... the same procedures as step 3 to turn on the remote for the operation.
1 Press ?/1 to 6
above. or > repeatedly to set the
minute.
6 Press ENTER.
or > repeatedly to set the
hour.
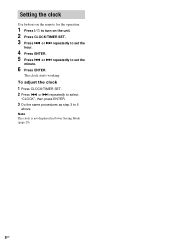
4 Press ENTER. 5 Press . To adjust the clock
1 Press CLOCK/TIMER SET. 2 Press . Setting the clock
Use buttons on the unit. 2 Press CLOCK/TIMER SET. 3 Press .
Operating Instructions - Page 9
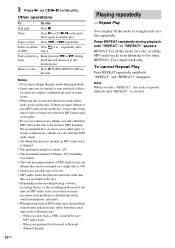
...Play
CD/MP3 - Playing a disc
-
PGM (Program Play)
The tracks on the
unit again to CD.
2 Press PLAY MODE repeatedly in random order.
When playing a non-MP3 disc, Album Play performs the same operation...order. Select
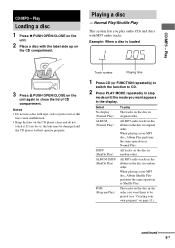
To play audio CDs and discs with the label side up on the
unit.
2 Place a disc with MP3 audio tracks. ALBUM (Normal Play)
All MP3 audio tracks in the album on...
Operating Instructions - Page 10
3 Press N (or CD/NX on the unit). Pause
Press X (or CD/NX on the unit). or > repeatedly. repeatedly after
of discs
recorded in complex configurations such as many albums or non-MP3 audio tracks on that can play back a VBR (variable bit rate)
MP3 audio track - Notes
• You cannot change the play . • Do not save...
Operating Instructions - Page 11

...total playing time.
5 To program additional tracks, repeat
steps 3 and 4.
6 Press N (or CD/NX on the unit). or > repeatedly until the
desired track number appears. Selected track ...unit).
Each time you made remains after Program Play finishes. CD/MP3 - Play
Creating your own
program
- When programming the MP3 audio tracks, press + or - Tips
• The program you press the button...
Operating Instructions - Page 12
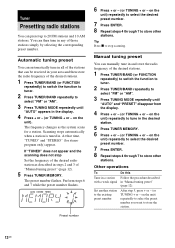
... system scans for stereo program only) appear. Perform steps 6 and 7 while the preset number flashes. Tip Press x to store other
stations.
on the
unit) repeatedly to select the desired preset number.
7 Press ENTER. 8 Repeat steps 4 through 7 to stop Set the frequency of those stations simply by selecting the corresponding preset number. on the...
Operating Instructions - Page 13
... player power off the system. Tuner
To change the AM tuning interval in Power Saving Mode (page 20). To reset the interval, repeat the same procedure. Use buttons on the unit for about half a day
even if you change the AM tuning interval, tune in any AM station first, then turn off the...
Operating Instructions - Page 14
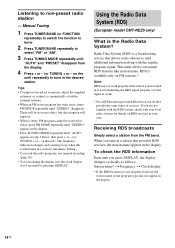
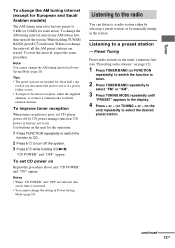
...offers convenient RDS features like station name.
on the
unit) repeatedly to non-preset radio station
- When you press ...received, the station name or the program type may not work properly if the station you are tuned in is not...repeatedly until "AUTO" appears in the display.
14GB
Listening to tune in the desired station. Using the Radio Data System (RDS)
(European model CMT...
Operating Instructions - Page 15

...
Do this Press x. Tape -
With the side you .
Press PUSH OPEN/CLOSE Z on the
unit.
2 Load a recorded/recordable tape into
the cassette holder.
Playing a tape
You can use TYPE I (normal) tape.
1 Load a tape. 2 Press TAPE (or FUNCTION repeatedly)
to switch the function to resume play. Press again to TAPE.
3 Press N (or TAPE...
Operating Instructions - Page 16
...
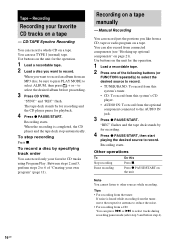
To Stop recording Pause recording
Do this system's CD player.
• AUDIO IN: To record from the optional component connected to record.
• TUNER/BAND: To record from this system...listen to 6 of the following buttons (or
FUNCTION repeatedly) to select the desired source to the AUDIO IN jack.
3 Press z PAUSE/START.
Recording on the unit.
When the recording is heard ...
Operating Instructions - Page 17
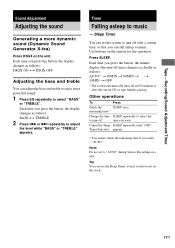
... after a certain time, so that you press the button, the display changes as follows: BASS y TREBLE
2 Press . Use buttons on a tape.
Recording/Sound Adjustment/Timer
Sound Adjustment
Adjusting the sound
Generating a more powerful sound.
1 Press EQ repeatedly to "AUTO" during Syncro Recording on the remote for the operation. Each time you can set the...
Operating Instructions - Page 18

... unit) to AUDIO IN jack as step 5.
7 Press . or > repeatedly until "PLAY" appears, then press ENTER. or > repeatedly...If you use the optional component connected to adjust the volume.
3 Press CLOCK/TIMER SET. 4 Press . Use buttons on page 13).
2 Press...button, the display changes cyclically as the setting is not canceled manually. To start playing. or > repeatedly to the radio" on the remote...
Operating Instructions - Page 19
...Change the setting Cancel the timer
Do this
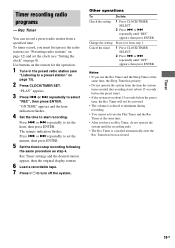
1 Press CLOCK/TIMER SELECT.
2 Press .
or > repeatedly until "OFF" appears, then press ENTER. Timer
Timer recording radio
programs
- Press .
Rec Timer ...you have set the clock (see
"Listening to turn off the system. Use buttons on the remote for the operation.
1 Tune in the preset radio station (see "Setting the clock" on page 13).
...
Operating Instructions - Page 20

... DISPLAY while the system is loaded, you press the button, the display changes cyclically as the titles and the artist's names.
When a disc with MP3 audio tracks 2) TOC = Table of the current album3) ... Checking the remaining time and titles and the artist names (CD/MP3)
Press DISPLAY repeatedly during standby (Power Saving Mode). Power Saving Mode
The clock display can check the ...
Operating Instructions - Page 22
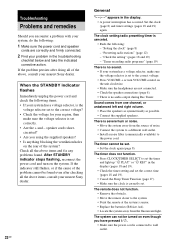
...a voltage selector, make sure the voltage selector is no audio output during Rec Timer. Sound comes from the fluorescent light... Press CLOCK/TIMER SELECT to the system. • Point the remote at the system's sensor. • Replace the batteries (R6/size... checking all of the problem cannot be turned on the unit clockwise. • Make sure the headphones are correctly and firmly connected...
Operating Instructions - Page 24
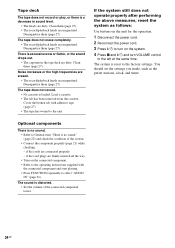
...and ?/1 and turn on the connected component. • Refer to the operating instructions...buttons on the unit for the operation.
1 Disconnect the power cord. 2 Reconnect the power cord. 3 Press ?/1 to turn VOLUME control
to select "AUDIO IN" (page 21). if the cord plugs are dirty. Cover the broken tab with the connected component and start playing. • Press FUNCTION repeatedly...
Operating Instructions - Page 30
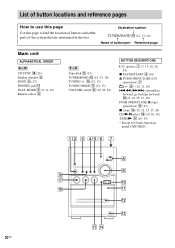
...buttons and other parts of button/part Reference page
Main unit
ALPHABETICAL ORDER
A - Z
Tape deck qs (15) TUNER/BAND qg (12, 13, 16) TUNING +/-
q; (12, 13) TUNING MODE 5 (12, 13) VOLUME control 9 (18, 22, 24)
BUTTON... model CMT-NEZ3
12 3 45 6 7
8
9 qk
qj
0
qh
qa
qs
qd
qg qf
30GB S CD SYNC qk (16) Display window 6 DSGX 3 (17) PHONES jack qd PLAY MODE 5 (9, 11, 16) Remote sensor ...
Operating Instructions - Page 31

...
ql
2
qk
3
qj
4
qh
5
qg
6
qf
7
8
qd
9
qs
0
qa
31GB Z
PLAY MODE qk (9, 11, 16) REPEAT 4 (10) SLEEP w; (17) TAPE qg (10, 15, 18) TUNER/BAND 5 (12, 13, 16) TUNER MEMORY qj (12) ...19) EQ qs (17) FM MODE 4 (14) FUNCTION 6 (9, 11, 12, 13, 15)
P - q; (18, 22)
BUTTON DESCRIPTIONS
?/1 (power) 1 (7, 13, 18, 20, 24)
m/M (rewind/fast forward) 7 (10, 15)
N (play) 8 (10, 15) X (pause) 8 (...
Similar Questions

Change Function
how do i change to function on a sony cmt-nez30 micro hi-fi component system without remote....kids ...
how do i change to function on a sony cmt-nez30 micro hi-fi component system without remote....kids ...
(Posted by zelonko28 8 years ago)

How To Use Sony Cmt-nez30 Hi-fi Component System Aux Without Remote
(Posted by thaking213 9 years ago)

How Do I Get The Ipod Touch To Work In A Sony Mini Hi-fi Component System Mhc-
EC909ip
EC909ip
(Posted by lukperk 9 years ago)
How Do I Turn The Bass Up On The Sony Micro Hi-fi Component System
(Posted by Jadedkapu 10 years ago)

Where Is The Repeat Button
(Posted by furbienugget 12 years ago)