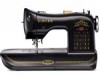
Singer The SINGER 160 Support Question
Singer The SINGER 160 Support Question
Find answers below for this question about Singer The SINGER 160.Need a Singer The SINGER 160 manual? We have 5 online manuals for this item!
Question posted by Fourwittigs on October 23rd, 2015
How Do I Make Buttonholes?
Current Answers
Answer #1: Posted by waelsaidani1 on October 23rd, 2015 8:34 PM

Member since:
May 12th, 2013 Points: 19,501,797

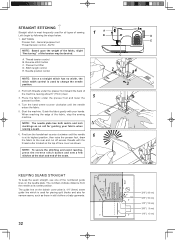
* Use an interfacing in the area of the garment where
buttonholes are placed. Stabilizer or regular interfacing can
be used.
* Make a practice buttonhole on a scrap of the actual fabric
from your project. Then try the buttonhole with your button.
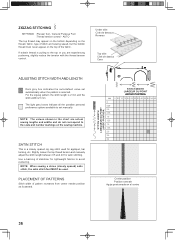
1. Select one of buttonhole patterns.
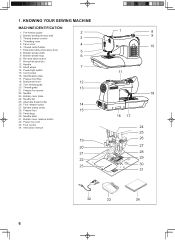
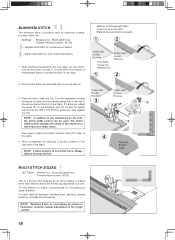
2. Replace the presser foot with the buttonhole foot. (Refer to
"Changing presser foot" on page 24 - 25.)
3. Insert the button into the buttonhole foot. (Refer to "Using
buttonhole foot" above.
4. Lower the buttonhole lever (C) so that it drops down
vertically between the stoppers (A) and (B).
5. Carefully mark the position of buttonhole on your garment.
6. Place the fabric under the foot. Pull out the bobbin thread
underneath the fabric to a length of about 4 inches to the
rear.
7. Align the buttonhole mark on the fabric with the mark on
the buttonhole foot, and then lower the buttonhole foot.
8. While holding the top thread, start the machine.
Related Singer The SINGER 160 Manual Pages


Similar Questions

where is the timing adjuster on a Singer 160 anniversary edition

Error message E7 is up on my Singer Stylist model 7258 sewing machine. It is not working at all. I t...

How to make coverstitch with singer 160 and can i use twins needle how to apply and show me what typ...

My sewing machine will beep and stop sewing after three inches of sewing. I have taken it to be repa...

I lost the bobbin cover plate for singer machine 160 can you find me one