Singer CE-250 Futura Support Question
Singer CE-250 Futura Support Question
Find answers below for this question about Singer CE-250 Futura.Need a Singer CE-250 Futura manual? We have 1 online manual for this item!
Question posted by mmquilliam on October 20th, 2022
Error Code 88.
singer futura ce250 send error code 88 when I turn it on. worked fine last time and didn;t change anything this time. checked bobbin lever and rethreaded sereral times. It has been sent in 3 time for the same problem
Current Answers
Answer #1: Posted by SonuKumar on October 20th, 2022 10:30 PM
SonuKumar

Member since:
May 9th, 2021 Points: 16,598,000

Member since:
May 9th, 2021 Points: 16,598,000
https://www.manualslib.com/manual/1070595/Singer-Futura-Ce-250.html?page=91#manual
What do the "Thread Break", "Flashing Lights", "Beeping Sound" OR "88" Error Message Mean? All of the Error Messages signify that the upper tension path is not threaded correctly. Check that the transparent thread path located at the top of the machine is threaded correctly.
Please respond to my effort to provide you with the best possible solution by using the "Acceptable Solution" and/or the "Helpful" buttons when the answer has proven to be helpful.
Regards,
Sonu
Your search handyman for all e-support needs!!
Related Singer CE-250 Futura Manual Pages
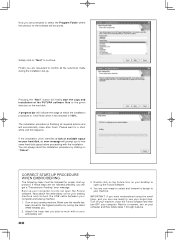
Instruction Manual - Page 3
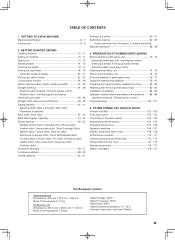
... 104 - 105 Changing presser foot 104 - 105 Operation switches 106 - 107 Needle, thread and fabric chart 108 - 109 Performance checklist 110 - 111 Cleaning hook area and feed dogs 112 - 113 Oiling inside the face cover 114 - 115 Special accessories 116 - 117 Helpful messages 118 - 121
For European version
Sewing machine Dimensions: 428 mm...
Instruction Manual - Page 6
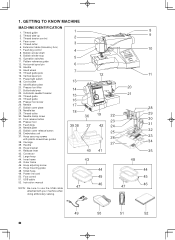
... threader 23. Presser foot screw 26. Needle clamp screw 31. Bobbin cover release button 36. Release lever 42. Hoop mounting plate 48. Power line cord 50. 1. Thread guide 2. Extension table (Accessory box) 7. Feed dogs 34. Hoop securing screws
with your machine when doing embroidery sewing.
1 2 3 4 5 6 7 13 14 15 16 17 18
39 38
47...
Instruction Manual - Page 8
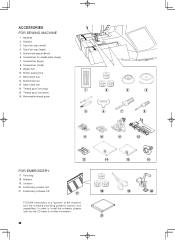
...Bobbins 19. Scissors 20. Needles 2. Buttonhole opener/Brush 6. Button sewing foot 11. Thread spool net (long) 15. Embroidery software CD
17
FUTURA embroidery is a "system" of the machine and the software providing powerful options and capabilities. Spool pin cap (small) 4. Buttonhole foot 13. Thread spool net (short) 16. Embroidery presser foot 21. ACCESSORIES FOR SEWING MACHINE...
Instruction Manual - Page 10
... "ON" Interruptor corriente/luz "ON" Check the balance of the machine after adjustment.
(1)
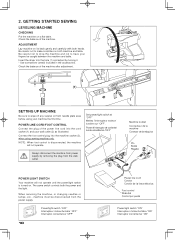
SETTING UP MACHINE
Be sure to wipe off any surplus oil from needle plate area before using sewing machine only.
NOTE: When foot control is disconnected, the machine
will not operate until the power/light switch is turned on its back gently and carefully...
Instruction Manual - Page 26
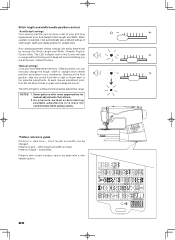
... circled numbers cannot be changed. At each of the potential adjustments.
A n a l t e r n a t e m e t h o d o f d e t e r m i n i n g available adjustments is selected, it will automatically sew at an Auto/Default Stitch Length and Width. Patterns in green and a beep will sound. Stitch length and width/needle position controls
*Auto/Default settings Your sewing machine will produce most of...
Instruction Manual - Page 28

...sewing mode. Twin needle mode switch Commutateur de mode d'aiguilles Interruptor de modo de aguja doble
28 Doing so will preclude any possibility of the stitch you selected. This will reduce the stitch width automatically and save broken needles and possible damage to your machine... the direct selection button. Turning off the machine returns the machine to selecting a pattern.
...
Instruction Manual - Page 34

...lever H. Stitch length control I
4
2. Start the machine. When reaching the edge of the face cover, as those in its center position.
KEEPING SEAMS STRAIGHT
To keep the seam straight, use one of
the machine, leaving about 6" (15cm) clear. 3. The guide line on the bobbin.... First turn the handwheel toward you until the needle is used . Needle stop the sewing machine.
6. ...
Instruction Manual - Page 38
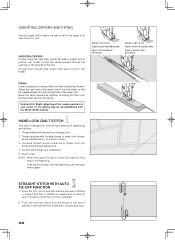
... Create a piping by covering a filler cord with desired top stitching color. 2. Thread bobbin with a bias strip of fabric. If the machine stops from the beginning, push the start switch again. INSERTING ZIPPERS AND PIPING
Use the zipper foot to sew to the right or left side of zipper foot to presser foot holder...
Instruction Manual - Page 62

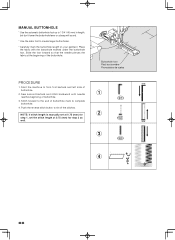
...is helpful to remove the extension table when sewing a buttonhole, to "Using buttonhole foot"....
* Make a practice buttonhole on page 104 - 105.)
3. Set the buttonhole lever (C) so that it drops down vertically between tab A and tab B.
2. Select one.... Buttonholes can be sewn to "Changing presser foot" on a scrap of buttonhole patterns 85, 86, 87 and 88.
2. Insert the button into the...
Instruction Manual - Page 64

...with the mark on your garment. 6. While holding the top thread, start the machine. 5. When sewing is finished, use a buttonhole opener to cut any of the buttonhole. Be careful not ...bobbin thread
underneath the fabric to a length of buttonhole on the buttonhole foot, and then lower the buttonhole foot.
8. Fabric marking Marque Marque du tissu Marca de material
mark Marque Marca
* Sewing...
Instruction Manual - Page 68
...
4. Stitch forward to the end of buttonhole mark to tie off the stitches.
Start the machine to create larger buttonholes.
* Carefully mark the buttonhole length on your garment. Slide the foot ... Use the automatic buttonhole foot up to 1 3/4 "(45 mm) in length, but don't lower the buttonhole lever or a beep will sound.
* Use the satin foot to form first bartack and left side of
buttonhole....
Instruction Manual - Page 86
... wait for the software will automatically close the Futura software and then turn on your computer, but do not open up your sewing machine.
Make sure the needle has been moved to the highest position by clicking on your hard disk, an error message will get a "Transmission Pending" error message. IMPORTANT: If you have embroidered using...
Instruction Manual - Page 88
...thread tension according to start. Red light indicates machine is operating. Flashing red light indicates a problem or an error.
* Flashing for embroidery to loosen thread tension.
REVERSE...of fabric and threads being used.
88 LED INDICATOR Green light indicates machine is pushed once more, the needle moves and stops at a time (The hoop moves.), after the ...
Instruction Manual - Page 94
... towards the right.
2. In such cases, use the reverse stitch button to move back one stitch at top of thread while sewing
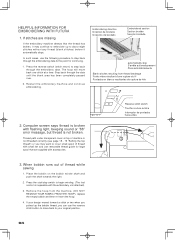
1. HELPFUL INFORMATION FOR EMBROIDERING WITH FUTURA
1. When bobbin runs out of machine is not threaded correctly (see page 18 - 19 "Setting the top thread") or you picked up to step back through...
Instruction Manual - Page 96

...a "high resolution" (200-300 DPI). ¡ Scan at 3-6 times larger than the intended output. Some common formats - .wmf and ....for Auto Punch: ¡ Scan art with AutoPunch.
The Futura software will recalculate the stitch of an imported design when sizing...best result when using the DESIGN>CHANGE SIZE option. The computer sees millions of colors to properly sew out are too narrow to create...
Instruction Manual - Page 106

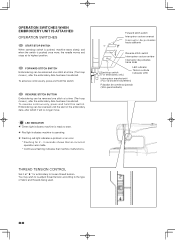
...sewing. Push it again to start. Red light indicates machine is operating. Flashing red light indicates a problem or an error.
* Flashing for tie-off of other stitches ( ) The sewing machine makes 4 tiny tacking stitches to sew... for straight and zigzag stitches ( ) Reverse sewing is carried out while the reverse stitch button is pushed. START/STOP SWITCH
This switch...
Instruction Manual - Page 112

... position.
2. Remove the bobbin case (2).
3
4. Replace the needle plate.
112
(3) (4) Remove the needle plate (1).
(1)
2
3. Raise the needle to keep the essential parts clean at all times.
1. Clean the feed dogs and hook area with the projection (3) positioned
5
against the spring (4). CAUTION
To ensure the best possible operation of sewing machine oil on the hook...
Instruction Manual - Page 114
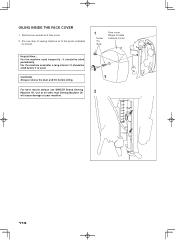
... should be oiled periodically. For the machine used . OILING INSIDE THE FACE COVER
1.
CAUTION: Always remove the dust and lint before it is used after a long interval : It should be oiled before oiling.
F or best results always use SINGER Brand Sewing Machine Oil. Use of sewing machine oil to your machine.
114 Remove two screws and face...
Instruction Manual - Page 118

...Turn off power switch and eliminate the problem that
caused the machine to the sewing machine with bobbin case or rotation interrupted forcibly. Turn off power switch and attach large hoop.
Bobbin winder is moved to right (operating position) during sewing. Check bobbin... is detected. Check threading. Buttonhole lever is displayed, fix the problem following the...
Instruction Manual - Page 124
...bobbin, or changing presser foot, etc." 15. Do not modify the plug in any air openings blocked. This equipment is used as described in this plug is required around the sewing machine needle." 11. "WARNING- "Use this sewing machine." "Do not use bent needles." 13. "Never sew with the recycling symbol. "Switch the sewing machine off before using this sewing machine... Singer ...
Similar Questions

How Do I Clear E7 Error Code On Singer Fashion Mate Model 7256 Sewing Machine
(Posted by cathyhowden1 2 years ago)

Singer Futura Quartet Seqs 6700 Sewing Machine
how to set my singer futura quartet seqs 6700 sewing machine to sew. A distance more than one inch a...
how to set my singer futura quartet seqs 6700 sewing machine to sew. A distance more than one inch a...
(Posted by johour2194 3 years ago)

I Get E7 Error Message On My Singer Model 7258 Sewing Machine. There Is No Refe
Error message E7 is up on my Singer Stylist model 7258 sewing machine. It is not working at all. I t...
Error message E7 is up on my Singer Stylist model 7258 sewing machine. It is not working at all. I t...
(Posted by ebellamybellamy9 5 years ago)

What Does Code E 5 Means In Singer Sewing Machine Model 6199
It shows an E 5 error and doesn't work at all. I also tried to change the thread style but still the...
It shows an E 5 error and doesn't work at all. I also tried to change the thread style but still the...
(Posted by attatariq 9 years ago)

Beeping From Singer Sewing Machine Stylist Ii 5625
My sewing machine will beep and stop sewing after three inches of sewing. I have taken it to be repa...
My sewing machine will beep and stop sewing after three inches of sewing. I have taken it to be repa...
(Posted by arusheria 9 years ago)