Get support for Pfaff hobbylock 784

Pfaff hobbylock 784 Support Question

Pfaff hobbylock 784 Support Question

Find answers below for this question about Pfaff hobbylock 784.
Need a Pfaff hobbylock 784 manual? We have 1 online manual for this item!
Question posted by bertswhynot on September 19th, 2015

I Want To Use Wooly Nylon Thread But The Instructions Say Use The Bottom Looper.

My loopers are labeled right and left. Which is the bottom Looper on a Pfaff 784?

Current Answers

Answer #1: Posted by TommyKervz on October 16th, 2015 8:40 AM
TommyKervz

Member since:
January 10th, 2013

Points: 17,776,813
100
points
Please refer on the owners manual from the link below for any possible option.

https://www.helpowl.com/manuals/Pfaff/hobbylock784/184563


Hope that is helpful.
Kervz at www.satechhelp.co.za

Related Pfaff hobbylock 784 Manual Pages

Owner's Manual - Page 1

747! II. I V instruction manual i;
Owner's Manual - Page 4

... on hobbylock 784 and 786 Adjusting the differential feed (hobbyfock 786) . . & Contents Controls of the sewing machine Electrical connection Master switch and sewing light Foot control Notes on safety Installing the thread spool stand Opening the looper cover Threading guide wires 18 and the thread guides behind the carrying handle . 4-thread overedge seam Threading the right looper Threading...
Owner's Manual - Page 5

...Controls of the sewing machine 1 Thread spool stand 2 Carrying handle 3 Left needle thread tension dial 4 Right needle thread tension dial 5 Right looper thread tension dial 6 Left looper thread tension dial 7 Thread tension cover 8 Lint box 9 Handwheel 10 Looper cover with recess 11 Upper knife 12 Work support (swivel-type) 13 Needle plate 14 Sewing foot 15 Needle bar 16 Sewing foot lifting lever...
Owner's Manual - Page 6

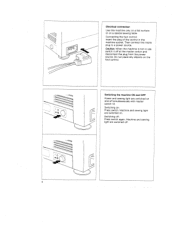
... connect the mains plug to a power source. Electrical connection Use this machine only on a flat surface or on a special sewing table. Connecting the foot control: Insert the plug of the control in use, switch it off . 4 Caution: When the machine is not in the machine socket. Machine and sewing light are switched on and off : Press switch again.
Owner's Manual - Page 8

... pull washer up guide bar and align it so that I thread guides 18 are exactly above the spool holders. 6 Insert four thread spool holders 17 with centering pieces 36 fully in the holes of the thread spool stand. clamp screw A securely. Push thread guiding part 18 into guide bar 19. Pull up to the...
Owner's Manual - Page 9

...locks. A threacing diagram is fixed to the machine behind the carrying handle The machine must be pulled up until it to the left. B and C). right looper (red) 2. C). left looper (yellow) 3. To close the work support, push it to the right. First pull the respective threads through their corresponding guides (Figs. Then thread the tensions in the following sequence: 1. To...
Owner's Manual - Page 10

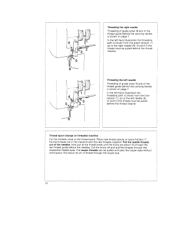
...: In order to 9 and pull approximately 10 cm (4") of thread through the looper eye (the thread path is sewn with two needle threads and two looper threads. Threading the right looper: Thread the right looper in sequence 1 to obtain perfect sewing results, the thread must be pulled between the tension discs when threading the tensions. The 3-thread overedge seam is described on page 17.
Owner's Manual - Page 12

... page 7. Place new thread spools on threaded machine Cut the threads close to the right needle (6>. At point 5 the thread must be pulled behind the thread retainer. •L!J :'1i : Ll rk Threading the left -hand illustration the threading path is shown from the blue tension (1) up to the thread spool. Cut the knots off and pull the threads through the looper eye. 10
Owner's Manual - Page 13

Then push the bottom of the box against the machine. looper cover 10. I Seam allowance If the cutting is guided along below 1 the lint box, use the I -J / / Inserting the lint box: downwards the cover. I After threading the machine, push handle 2 down, and close work support 12 and -
Owner's Manual - Page 14

... on the wheel. Lay the threads back under the sewing foot. Insert test fabric up to the upper knife and lower the sewing foot. Make sure that threads have interlocked correctly. 12 Sewing test After threading, a sewing test test should be made. - - 'I \\ Hold thread ends with your left hand while turning hand wheel with your right hand in the illustration...
Owner's Manual - Page 15

Sew approximately 5 cm beyond the end a scissors to sew. (Also after the machine has been rethreaded.) Sew the first stitches slowly. Since the fabric is fed automatically, do 4 not pull or push the fabric. Points to observe during sewing Place the fabric completely under the sewing foot when starting to cut Use your hand for guiding only.
Owner's Manual - Page 16

... pull the thread chain into the seam. When sewing extremely thick fabrics or workpieces with different thicknesses: On this machine, all kinds of the upper knife holder must be tightened, as shown in the illustration. Securing the seam: Knot the thread chain. Or: Sew about 2 turns, so that the upper knife can be used to extremely...
Owner's Manual - Page 18

...The left looper thread D is too tight (red thread tension> or the left needle thread A is too loose (green thread tension). Top side DC Reverse side The right looper thread C is too tight (yellow thread tension) or the right looper thread C too loose (red thread tension). 16 When turned in (+) direction, the tension is decreased. Correcting the thread tensions When the thread...
Owner's Manual - Page 19

fl Left needle 3-thread overedge seam Right needle !J Standard seam width N * 5,7 mm Max. seam width 5 mm 17 I 3-thread overedge seam: The with 3-thread overedge seam two looper threads and is sewn one needle thread. The left or right needle must be removed. seam width 7.2 mm Standard seam width N 3.5 mm Max.
Owner's Manual - Page 25

...retaining screw. Open the housing cover. Use the brush provided with the accessories to the left. Behind it fully to the right. Replace the thread tension cover by engageing the tabs of... remove dust and lint from between the tensions. Cleaning the thread tensions: Pull thread tension cover 7 with the pins in retainers A of the sewing light is situated. I '\ H Changing the light bulb...
Owner's Manual - Page 27

...,oonnri,,gnhletefetlodloolepoeptrherread see pages 7 to polyester thread 11. right looper, red path polyester thread 2. 3. ster thread. left looper, yellow path needle thread, green path For threading of needle and loopers, see bulk thread polyester thread 120-140 polyester thread 120-140 pages 7 to approx. "N" respective thread 1 tension flat edge, Fig. 2 approx. +5 approx...
Owner's Manual - Page 28

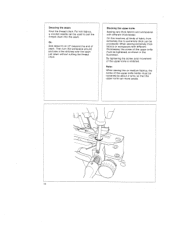
...sewing foot. Remove needle change tool. PKunlilvoesut the mains plug. Turn the hand wheel in hole M of the needle with the screw driver. Remove the needle by pulling it will cause thread ... parts. Changing the knives are used on these machines: System 130/705 H (75-90) Although the correct needle size depends on the material and the thread size used, we recommend needle size 75-90...
Owner's Manual - Page 32

... new needle correctly (see pages 7-10). Do not pull material during sewing. Incorrect needle used . Insert needle correctly (page 26). Incorrect stitch formation Incorrect setting of differential feed. Puckered seams 30 Thread tension too tight. Re-adjust differential feed. Sewing problems and solutions These machines have been developed for light materials) (pages 15, 16). Check...
Owner's Manual - Page 33

...;11 II#ICIIIII*IIIiIlI, Bfl E '1 Accessories 1 Screwdriver (big) t 2 Screwdriver (small) 3 Lint brush 4 Tweezers 5 Upper knife 6 Thread unreeling disc 7 Needles 8 Sewing machine oil I 9 Rolled hem sewing foot 10 Thread spool net 11 Needle change tool I item 6 of the accessories is used for synthetic threads which 1 tend to become loose, unravel and slip down (Fig. 1). Remove...
Owner's Manual - Page 34

... Seam width Stitch length Sewing foot Lubrication Sewing foot height Needle system Number of threads Dimensions Weight Contents of cardboard box 1 machine with motor 1 foot control 1 instruction manual/guarantee certificate 1 lint box 1 thread spool stand 4 thread spool stand bars 1 thread guide 1 machine cover 1.300 stitches/mm. 3-7.2mm 1 -4 mm (HL-786) 1 -5 mm (HL-784) Hinged Manual 5mm 130...

Similar Questions

. Lubricatian
How to lubricate a hobbylock 784 sergerMachine is locked solid,not used for a while
(Posted by Woutlia 6 years ago)
How To Thread The Hobbylock784
I have bought a used hobbylock784 784 however there is no manual with it.I do not know the order of ...
(Posted by Tene020750 6 years ago)
Yellow Tension Thread
Thread always breaks in the yellow tension.
(Posted by rgzrngrace 8 years ago)
Pfaff C1100 Pro Sewing Machine Instruction
Can you please direct me to "easy" to understand instruction on how to "thread" my Pfaff C1100 Pro s...
(Posted by magicfeathers55 10 years ago)
Ask a New Question
Use the box below to post a new question about this Pfaff product .
Points & Prizes
  • You can earn points for nearly everything you do on HelpOwl.com
  • You can trade in those points for gift cards at leading retailers such as Amazon.com and Walmart
  • It's that simple!
See How it Works
Create a Free Account

Pfaff Manuals

Find free Pfaff hobbylock 784 manuals and user guides available at ManualOwl.com. Try out our unique manual viewer allowing you to interact with manuals from directly within your browser!

Pfaff Reviews

View thousands of Pfaff user reviews and customer ratings available at ReviewOwl.com.

Contact Information

Complete Pfaff customer service contact information including steps to reach representatives, hours of operation, customer support links and more from ContactHelp.com.

Scoreboard Ratings

See detailed Pfaff customer service rankings, employee comments and much more from our sister site.