Miele PT 7136 Support Question
Miele PT 7136 Support Question
Find answers below for this question about Miele PT 7136.Need a Miele PT 7136 manual? We have 1 online manual for this item!
Question posted by csnieders on March 2nd, 2021
Front Panel
how do i remove the front panel? i need to reset heating element overload.
Current Answers
Answer #1: Posted by techyagent on March 3rd, 2021 6:21 AM
techyagent

Member since:
June 17th, 2014 Points: 4,799,790

Member since:
June 17th, 2014 Points: 4,799,790
Its not the same but it can work well.
Please check this link below:-
https://www.manualslib.com/manual/1287208/Miele-T-980x.html?page=14
Thanks
Techygirl
Related Miele PT 7136 Manual Pages
Operating and Installation manual - Page 1
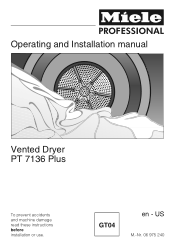
en - US
M.-Nr. 06 975 240 Operating and Installation manual
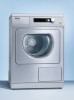
Vented Dryer PT 7136 Plus
To prevent accidents and machine damage read these instructions before installation or use.
Operating and Installation manual - Page 2
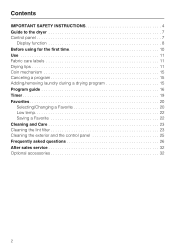
Contents
IMPORTANT SAFETY INSTRUCTIONS 4 Guide to the dryer 7 Control panel 7
Display function 8 Before using for the first time 10 Use 11 Fabric care labels 11 Drying tips 11 Coin mechanism 15 Canceling a program 15 Adding/removing laundry during a drying program 15 Program guide 16 Timer 19 Favorites 20
Selecting/Changing a Favorite 20 Low temp 22...
Operating and Installation manual - Page 4

... or attempt any servicing unless specifically recommended in these Important Safety Instructions.
~ The tumble dryer is only intended for damage caused by qualified personnel. Always close the door after
each ...appliances should be machine dried.
~ Before maintenance, or cleaning
and care disconnect the dryer from the electrical supply pulling the plug or tripping the circuit breaker.
~ Do not...
Operating and Installation manual - Page 5
... and the laundry was then removed immediately it could give off before removing the laundry. mops and floor cloths) or other substances (such as workwear, which have been removed from latex,...may give off a great amount of heat.
~ Do not use sufficient detergent and select a high temperature. items that you remove them (this tumble dryer:
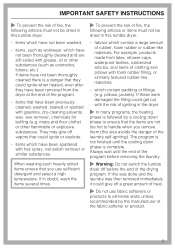
- IMPORTANT SAFETY INSTRUCTIONS
~ To ...
Operating and Installation manual - Page 6
... and ordinances.
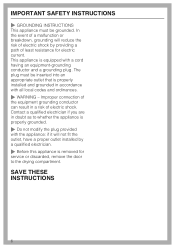
~ WARNING - IMPORTANT SAFETY INSTRUCTIONS
~ GROUNDING INSTRUCTIONS
This appliance must be grounded. Improper connection of electric shock by a qualified electrician.
~ Before this appliance is removed for electric current. SAVE THESE INSTRUCTIONS
6
This appliance is equipped with the appliance: if it will reduce the risk of
the equipment grounding conductor can...
Operating and Installation manual - Page 7
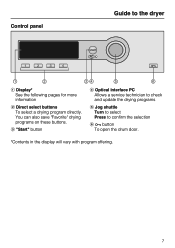
... a service technician to check and update the drying programs
e Jog shuttle Turn to select Press to the dryer
a Display* See the following pages for more information
b Direct select buttons To select a drying program directly.
Control panel
Guide to confirm the selection
f a button To open the drum door.
*Contents in the display will...
Operating and Installation manual - Page 11
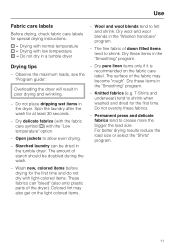
...Smoothing" program.
- Observe the maximum loads, see the "Program guide". Spin the laundry after the wash for the first time. Wash new, colored items before drying for ...press and delicate fabrics tend to felt and shrink. Colored lint may become "rough". Overloading the dryer will result in a tumble dryer
-
Open jackets to shrink when washed and dried for at least 30 seconds.
...
Operating and Installation manual - Page 12
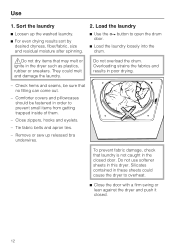
... from getting trapped inside of them.
-
Overloading strains the fabrics and results in order to open the drum door.
^ Load the laundry loosely into the drum. Use
1.
Tie fabric belts and apron ties.
- Check hems and seams, be fastened in poor drying.
- Remove or sew up the washed laundry.
^ For even drying results sort...
Operating and Installation manual - Page 14
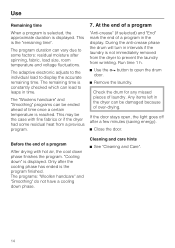
... immediately removed from the dryer to some residual heat from ...wrinkling. The adaptive electronic adjusts to the individual load to open , the light goes off after spinning, fabric, load size, room temperature and voltage fluctuations. This may be damaged because of a program in time. If the door stays open the drum door.
^ Remove the laundry...
Operating and Installation manual - Page 15
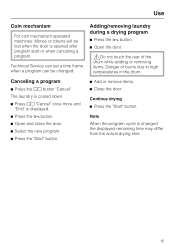
...removing laundry during a drying program
^ Press the a button. ^ Open the door.
,Do not touch the rear of the
drum while adding or removing items. Danger of burns due to high temperatures in the drum.
^ Add or remove... ^ Press the "Start" button. Canceling a program
^ Press the G button "Cancel".
The laundry is cooled down. ^ Press G "Cancel" once more and
"End" is changed . Technical ...
Operating and Installation manual - Page 18
...)
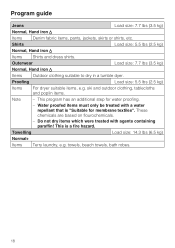
Normal, Hand iron r
Items Shirts and dress shirts.
Proofing
Load size: 5.5 lbs (2.5 kg)
Items
For dryer suitable items, e.g. ski and outdoor clothing, tablecloths and poplin items.
Note
- Towelling
Load size: 14.3 lbs (6.5 kg)
Normal+
Items Terry laundry, e.g. towels, beach towels, bath robes.
18
Do not dry items which were treated with a water...
Operating and Installation manual - Page 23
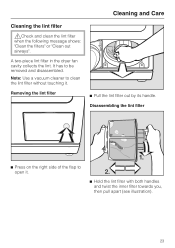
... the inner filter towards you, then pull apart (see illustration).
23
It has to open it . Removing the lint filter
^ Pull the lint filter out by its handle. Disassembling the lint filter
^ Press ...on the right side of the flap to be removed and disassembled. A two-piece lint filter in the dryer fan cavity collects the lint.
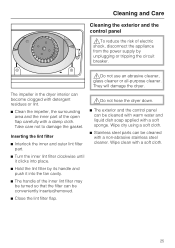
Cleaning and Care
Cleaning the lint filter
...
Operating and Installation manual - Page 24

... they click.
24 dry
Cleaning the fan cavity
Check the fan cavity regularly. Clean only if heavily soiled.
^ Open the door.
^ Remove the lint with your fingers or a vacuum.
The dryer efficiency can be affected by wet lint filters.
^ Turn the knobs, a, of the left and right covers until they click.
^ Holding...
Operating and Installation manual - Page 25
....
^ The handle of the inner lint filter may be turned so that the filter can be conveniently inserted/removed.
^ Close the lint filter flap.
,Do not hose the dryer down.
^ The exterior and the control panel can become clogged with detergent residues or lint.
^ Clean the impeller, the surrounding area and the inner...
Operating and Installation manual - Page 27
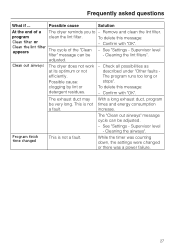
... lint filter
appears
The cycle of a The dryer reminds you to -
Clean out airways
The dryer does not work at its optimum or not efficiently....
-
Cleaning the airways". adjusted. The "Clean out airways" message cycle can be very long.
Supervisor level -
Remove and clean the lint filter. Confirm with "OK".
-
To delete this message: - See "Settings - Frequently asked...
Operating and Installation manual - Page 28
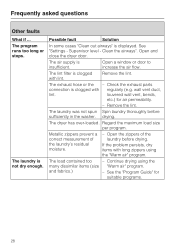
...enough.
Regard the maximum load size per program.
Remove the lint. The laundry was not spun Spin laundry thoroughly before drying. Open the zippers of the laundry's residual moisture.
- Clean the airways".
The ....) for
suitable programs.
28 The dryer has over-loaded. Open and close the dryer door. Frequently asked questions
Other faults
What if ... and fabrics.)
-
Operating and Installation manual - Page 36

b Power cord
c Control panel
d Door e Lint filter flap f Four height adjustable feet g Stand h Retaining clips (for concrete stand)
36 Installation
Front view
a Exhaust connection
The exhaust hose can be installed either at the rear, left or right of the dryer.
Operating and Installation manual - Page 46
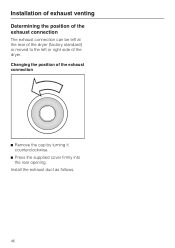
... of exhaust venting
Determining the position of the exhaust connection
The exhaust connection can be left at the rear of the dryer (factory standard) or moved to the left or right side of the exhaust connection
^ Remove the cap by turning it counterclockwise.
^ Press the supplied cover firmly into the rear opening.
Operating and Installation manual - Page 52
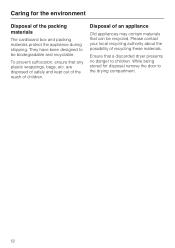
...environment
Disposal of an appliance
Old appliances may contain materials that can be biodegradable and recyclable. Caring for disposal remove the door to be recycled.
Ensure that any plastic wrappings, bags, etc. Disposal of the packing materials
...authority about the possibility of children.
To prevent suffocation, ensure that a discarded dryer presents no danger to children.
Operating and Installation manual - Page 55
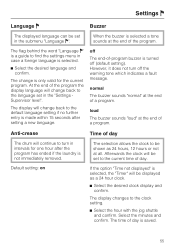
.... The flag behind the word "Language J" is a guide to the default language setting if no further entry is not immediately removed. The display will continue to be shown as a 24 hour clock.
^ Select the desired clock display and confirm. off the... a foreign language is only valid for one hour after the program has ended if the laundry is made within 15 seconds after setting a new language.
Similar Questions


T8003 Stopped Heating
suddenly my T8003 stopped heating. Drum turns and air blows but no heat
suddenly my T8003 stopped heating. Drum turns and air blows but no heat
(Posted by fobes2003 2 years ago)
Hi My Dryer Is Not Heating Up. What Can The Problem Be ?
Hi my dryer is not heating up. What can the problem be ?
Hi my dryer is not heating up. What can the problem be ?
(Posted by Payalkedia 6 years ago)
