Maytag MVWC700VW Support Question
Maytag MVWC700VW Support Question
Find answers below for this question about Maytag MVWC700VW - Centennial Washer.Need a Maytag MVWC700VW manual? We have 2 online manuals for this item!
Question posted by paolomath on June 7th, 2014
How To Remove The Back Panel Of A Maytag Centennial
The person who posted this question about this Maytag product did not include a detailed explanation. Please use the "Request More Information" button to the right if more details would help you to answer this question.
Current Answers
Related Maytag MVWC700VW Manual Pages
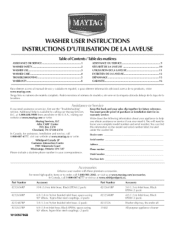
User Instructions - Page 1
...elbow, hypro-b[ue steel couplings. (2-pack)
31682
All purpose appliance cleaner WASHER USER INSTRUCTIONS INSTRUCTIONS D'UTILISATION DE LA LAVEUSE
Table of purchase or installation...WASHER CARE
4
TROUBLESHOOTING
5
ENTRETIEN DE LA LAVEUSE
12
DI_PANNAGE
13
WARRANTY
8
GARANTIE
16
Para obtener acceso al manual de uso y cuidado en espaffol, o para obtener informaci6n www.maytag...
User Instructions - Page 2
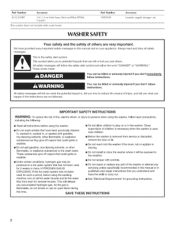
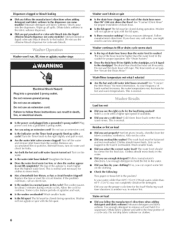
...service or discarded, remove the door or lid. [] Do not reach into the washer if the drum, tub or agitator is moving. [] Do not install or store the washer where it will release..., other flammable, or explosive substances to reduce the chance of others . Part Number 1903WH
WASHER SAFETY
Accessory Laundry supply storage cart
Your safety and the safety of injury, and tell you and others are...
User Instructions - Page 3
...NOTE: Do not spill or drip any fabric it (including cooking oils).
Overloading can completeJy remove oil.
Do not guess.
Undiluted fabric softener can make some models)
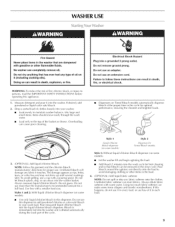
• I ..o..ad...Always dilute fabric softener with a smaller load size. WASHER USE
Fire Hazard
Never place items in this dispenser. Do not remove ground prong. Dispensers on some models)
Style 2
Dispenser...
User Instructions - Page 4
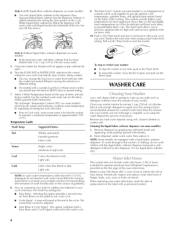
... Temp
Suggested Fabrics
Hot
Whites and pastels
Durable garments
Heavy soils
Warm Cool Cold
Bright colors Moderate to start the washer. You can be difficult to remove.
Repeat this mixture into the washer to maintain a minimum temperature of chlorine bleach and enough detergent to desired setting.
7° Select a Wash Temperature based on the...
User Instructions - Page 5
...remove ground prong. Failure to a water pressure surge) while you are away.
This helps avoid flooding
(due to follow these instructions fire, or electrical shock. TROUBLESHOOTING
First try the solutions suggested here or visit our website and reference FAQs (Frequently Asked Questions) to the center before starting the washer. www.maytag... The washer must be [eve[. See "Remove Shipping ...
User Instructions - Page 6
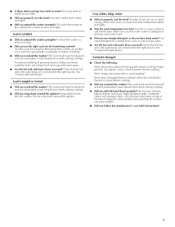
... less detergent. Do not use an extension cord. Plug power cord into a grounded 3 prong outlet. Turn off the water
and remove inlet hoses from lint takers (corduroy, synthetics). Always measure detergent. Washer continues to start. • Are the water inlet valve screens clogged? As your water colder than the water level in...
User Instructions - Page 7
... sure your hot water system is wrinkled
• Did you overload the washer? See "Connect the Inlet Hoses." Garments damaged
• Check the following:
Were sharp items removed from pockets before washing? Wipe up bleach spills. Did you unload the washer promptly? Did you properly sort the load? The wash load must be...
User Instructions - Page 8
... house fuses, or to correct house wMng or plumbing.
3. Pick up and delivery. The removal and reinstallation of purchase.
6. This warranty gives you specific legal rights, and you on the...was purchased. Rep[acernent parts or repair labor if this major appliance was purchased. MAYTAG ® LAUNDRY WARRANTY
LIMITED WARRANTY
For one year frorn the date of purchase, when this rna...
Installation Instructions - Page 1
...
10
3
Syst_me de vidange
10
4
Sp6cifications 61ectriques
11
4 iNSTRUCTiONS D'INSTALLATION 11
4
Avant de commencer
11
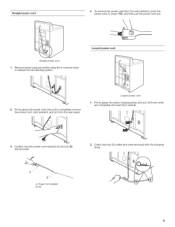
Remove Shipping Materials 4
Connect Drain Hose
6
Connect the Inlet Hoses
6
Secure the Drain Hose
7
Level the Washer
7
Complete Installation
8
Retrait du mat6riei d'expedition 11
Raccordement du tuyau de vidange 13
Raccordement des tuyau...
Installation Instructions - Page 2
... of hose failure.
Beaded tie strap
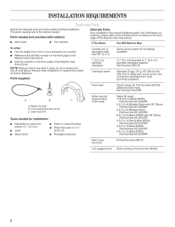
B. If You Have:
You Will Need to Buy:
Laundry tub or standpipe taller than 96" (2.4 m)
Sump pump system (if not already available)
... Black EPDM with nuts (2) C. Drain hose form
Tools needed (not provided m Inlet hoses
with washer}: m Flat washers
To order:
m Call the dealer from local plumbing suppliers)
Siphon break kit, Part Number 280129;...
Installation Instructions - Page 3

...". Secure drain hose with vents
I __g.c6a) |
C
m Additional spacing should be considered for winterizing information. m A level floor with air openings in the Washer User Instructions for ease of the laundry tub must be no more than 17 gal. (64 L) per minute.
The siphon break must be at least 39" (99 cm) above...
Installation Instructions - Page 4
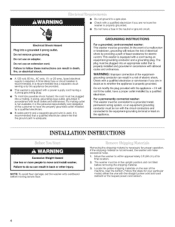
... tilted before moving across floor.
A time-delay fuse or circuit breaker is not removed, the washer will make excessive noise.
1. WARNING: Improper connection of the equipmentgrounding conductor can result...serviceman if you are in a risk of electric shock. For a permanently connected washer: This washer must be connected to a grounded metal, permanent wiring system, or an equipment ...
Installation Instructions - Page 5
... to release the rear beveling system. Pin
Check that the power cord restraint (A) and pin (B) are completely removed from the rear panel. Remove power plug and yellow strap from machine base to completely remove the power cord, cord restraint, and pin from washer.
3. U
2. Firmly grasp the yellow shipping strap and pull until both ends are...
Installation Instructions - Page 6
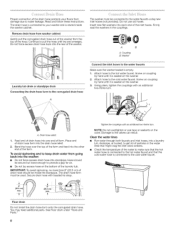
...and Parts." 6 Proper connection of the drain hose protects your washer and is stored inside the standpipe. Screw on the bottom of the laundry tub. Hose should be secure but loose enough to provide a...hoses. Do not use tape or sealants on the washer. 3. Bend the hose over the top of the form and feed into standpipe. Washer
Laundry tub drain or standpipe drain Connecting the drain hose form...
Installation Instructions - Page 7
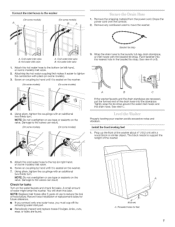
...into the standpipe. See view C. Properly leveling your washer avoids excessive noise and vibration. Drape the power cord over the console.
2. Remove any cardboard used to the valves can result.
(...hose to the washer
(Onsome models) A
(Onsome models) B
1. A small amount of the washer about 4" (10.2 cm) with the beaded tie strap. Connect the inlet hoses to the laundry tub leg, drain...
Installation Instructions - Page 8
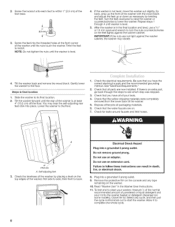
... faucets are now installed. See "Electrical Requirements."
2. Check that the yellow shipping materials were completely removed from the lower back of the washer.
5= Dispose of/recycle all of your washer, measure 1_of the normal
recommended amount of the washer by twisting the feet. To test and to complete one whole cycle.
8 If there is...
Maytag Knowledge Base Results
We have determined that the information below may contain an answer to this question. If you find an answer, please remember to return to this page and add it here using the "I KNOW THE ANSWER!" button above. It's that easy to earn points!-
Loads are wrinkled - Dryer
...load reaches the selected dryness. Both cycles minimize wrinkling by reducing overdrying. Front-load washer Fabric is also important to run through the Cool Down part of the ...damp; If the load sits for easy handling and reduced wrinkling. Were the laundry items removed from the dryer at the end of the cycle, wrinkles can cause wrinkling, too. ... -
Lint is on the load - Front-load washer
...;that there are not any laundry items sticking out beyond the stainless steel basket. A tightly packed load of a dryer removes lint from lint takers (corduroys, synthetics, permanent press). What happens if I don't clean my HE washer? Front-load washer My front-load washer produces a lot of laundry. Leave enough space in High... -
My dryer or load has an odor
...Electric dryers) A new electric heating element may have an odor. A wet load left in the washer or dryer? Dryer Is the dryer being used for a long time will begin to grow mildew, which..., ventilate the area. When odors or fumes are gone from the washer at the end of the wash cycle to remove the odors. Promptly remove loads from the area, rewash and dry the load. The odor will...
Similar Questions

How To Remove Back From Maytag Centennial Washer
(Posted by branAman 10 years ago)

How To Remove Back Panel From Maytag Centennial Washer
(Posted by diane33 10 years ago)

How To Remove Water Temp Knob From Maytag Centennial Washer
(Posted by phupxland 10 years ago)
How Do You Open The Front Panel Of The Washer Machine
how do you open the front panel of the washer machine, model #MVW300WQ0. It is a Bravos washer.
how do you open the front panel of the washer machine, model #MVW300WQ0. It is a Bravos washer.
(Posted by djkakb5 11 years ago)

I Have A Maytag Centennial Washer Model Mvwc400xw0 That Is Not Working Properly.
I have a maytag centennial washer model mvwc400xw0 that is not working properly. Machine will power ...
I have a maytag centennial washer model mvwc400xw0 that is not working properly. Machine will power ...
(Posted by chuff4 12 years ago)