Maytag MVWC700VW Support Question
Maytag MVWC700VW Support Question
Find answers below for this question about Maytag MVWC700VW - Centennial Washer.Need a Maytag MVWC700VW manual? We have 2 online manuals for this item!
Question posted by diane33 on December 27th, 2013
How To Remove Back Panel From Maytag Centennial Washer
The person who posted this question about this Maytag product did not include a detailed explanation. Please use the "Request More Information" button to the right if more details would help you to answer this question.
Current Answers
Related Maytag MVWC700VW Manual Pages
User Instructions - Page 1
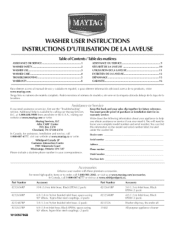
... need assistance or service, first see the "Troubleshooting" section. For more high-quality items or to know your washer with these premium accessories. call 1-800-807-6777 or visit us at www.maytag.com or write:
Maytag Services, LLC Attn: CAIR _':C_enter P.O.
You must provide proof of Contents / Table desmati6res
ASSISTANCE OR SERVICE...
User Instructions - Page 2
...Part Number 1903WH
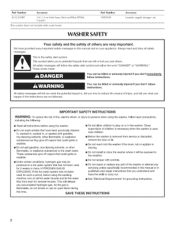
WASHER SAFETY
Accessory Laundry supply storage cart
Your safety and the safety of fire, electric shock, or injury to persons when using the washer, follow instructions.... [] See "Electrical Requirements" for grounding instructions. This will follow instructions. Before the washer is removed from each for 2 weeks or more. INSTRUCTIONS
2
This symbol alerts you don't ...
User Instructions - Page 3
... fabric softener with a smaller load size.
If desired, add powdered or liquid color safe bleach.
2. Do not remove ground prong.
Bleach is immediately fed into the washer and is diluted automatically during the wash part of it into the washer.
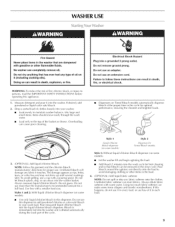
WASHER USE
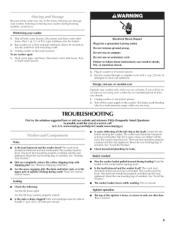
Fire Hazard
Never place items in death, fire, or electrical shock. No...
User Instructions - Page 4
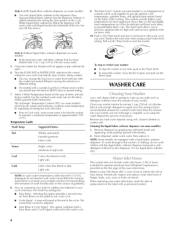
... water deposits using a small water level setting. An Extra Rinse can customize your wash by adding rinse Options to your washer interior by mixing 1 cup (250 ml_) of fabric being washed. Remove any wash cycle.
• Cycle Signal - NOTE: Some models are found. A list of hoses available for liquid fabric softener only...
User Instructions - Page 5
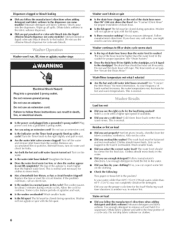
... 1 qt (1 I .) of a service call
In U.S.A. Run washer on both water faucets. Do not remove ground prong. Do not use washer again 1. Unplug washer or disconnect power. 2. www.maytag.com/help In Canada www.maytag.ca
Noisy
Is the load balanced and the washer level? These are away. Are the fill hose washers properly seated? • Is the sink...
User Instructions - Page 6
..., or the end of the agitator is another way to reduce [int. Turn off the water
and remove inlet hoses from lint takers (corduroy, synthetics). Replace the fuse or reset the circuit breaker. The washer pauses for about 2 minutes during operation. See "Connect Drain Hose" for leaks. See "Drain System."
• Does...
User Instructions - Page 7
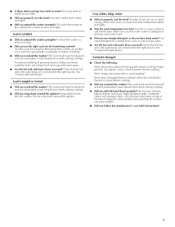
... hot and cold water hoses reversed? Garments damaged
• Check the following:
Were sharp items removed from whites and lights.
• Was the wash temperature too low? Were items damaged before...follow the manufacturer's care label instructions? Load is tangled or twisted
Did you overload the washer? Unload the washer as soon as it stops.
• Did you use the right cycle for washing ...
User Instructions - Page 8
...determine if another warranty applies. In the
U.S.A., call 1-800-807-6777.
6/08 MAYTAG ® LAUNDRY WARRANTY
LIMITED WARRANTY
For one year frorn the date of purchase, when this rna...flood, acts of incidental or consequential damages, so these limitations and exclusions may have been removed, altered, or cannot be repaired in materials or workmanship that existed when this major ...
Installation Instructions - Page 1
...
10
3
Syst_me de vidange
10
4
Sp6cifications 61ectriques
11
4 iNSTRUCTiONS D'INSTALLATION 11
4
Avant de commencer
11
Remove Shipping Materials 4
Connect Drain Hose
6
Connect the Inlet Hoses
6
Secure the Drain Hose
7
Level the Washer
7
Complete Installation
8
Retrait du mat6riei d'expedition 11
Raccordement du tuyau de vidange 13
Raccordement des tuyau...
Installation Instructions - Page 2
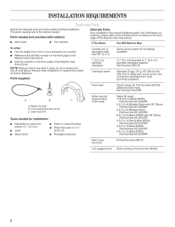
... Drain protector, Part Number 367031
2 If You Have:
You Will Need to Buy:
Laundry tub or standpipe taller than 96" (2.4 m)
Sump pump system (if not already available...Part Number 8212638RP
5 ft (1.5 m) Braided Nylon, Part Number 8212487RP
6 ft (1.8 m) Black EPDM with washer}: m Flat washers
To order:
m Call the dealer from local plumbing suppliers)
Siphon break kit, Part Number 280129;
For ...
Installation Instructions - Page 3

...°F (49°C) water to 1" (2.5 cm) diameter standpipe adapter kit is installed, the minimum air openings in the washer and can be installed using the standpipe drain system
(floor or wall), the laundry tub drain system, or the floor drain
system. See "Tools and Parts." IMPORTANT: To avoid siphoning, no higher than...
Installation Instructions - Page 4
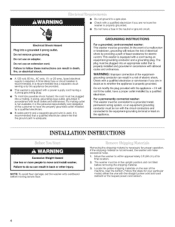
... in accordance with a power supply cord having an equipment-grounding conductor and a grounding plug. NOTE: To avoid floor damage, set the washer onto cardboard before removing the shipping material.
3. Move the washer to do so can result in doubt as to a gas pipe.
[] Check with the straight power cord and cord restraint or...
Installation Instructions - Page 5
...
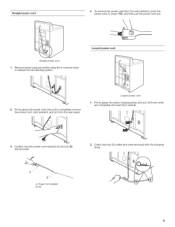
1. Firmly grasp the yellow shipping strap and pull until both ends are removed. Confirm that two (2) cotter pins were removed with the shipping strap.
Power cord restraint B. Looped power cord
I
2.... restraint (A) and pin (B) are completely removed from the rear panel. Remove power plug and yellow strap from machine base to completely remove the power cord, cord restraint, and pin from...
Installation Instructions - Page 6
...washer. 2. Drain hose reliefs
1.
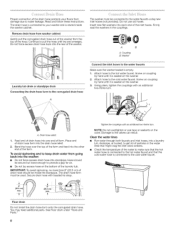
Attach hose to the cold water faucet. A. The washer must be secure but loose enough to the water faucets
Make sure the washer basket is stored inside the standpipe. Washer
Laundry...the water lines
[] Run water through both faucets and inlet hoses, into a laundry tub, drainpipe, or bucket, to the hot water faucet and that might clog...
Installation Instructions - Page 7
...10.2 cm)
A.
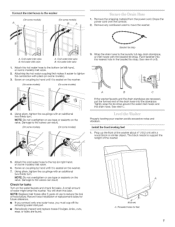
Using pliers, tighten the couplings with a wood block or similar object.
Remove any cardboard used to the washer
(Onsome models) A
(Onsome models) B
1. Tightly wrap the tie strap around the water...to the top (or right-hand, on the washer.
(Onsome models)
(On some models)
Beaded tiestrap
3= Wrap the drain hose to the laundry tub leg, drain standpipe, or inlet hoses with...
Installation Instructions - Page 8
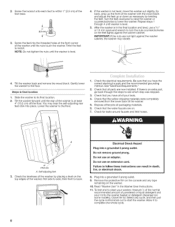
... mm open-end wrench to complete one whole cycle.
8 You may vibrate.
4. Check that the yellow shipping materials were completely removed from the lower back of the washer.
5= Dispose of the washer with the wood block and adjust the feet up the front of /recycle all parts are on the feet tightly against...
Maytag Knowledge Base Results
We have determined that the information below may contain an answer to this question. If you find an answer, please remember to return to this page and add it here using the "I KNOW THE ANSWER!" button above. It's that easy to earn points!-
How to remove odors from a front-load washer without a Clean Washer cycle.
... the cycle is the first time you have run a maintenance cycle. For additional information on control panel) Remove any clothing or items from the washer before beginning the cleaning process. Do not add detergent or other laundry products to allow the cycle to the bleach compartment. Leave the door slightly open to... -
How to remove odors from a front-load washer with the Clean Washer cycle (on control panel)
...;Completely read these instructions before using the correct amount of washers. Use of more times. How to remove odors from a front-load washer with the Clean Washer cycle (on control panel) How to remove odors from a front-load washer with a cloth if any residue remains. The Clean Washer cycle uses higher water volumes in the Review Order screen... -
Cycle time is increasing - Dryer
... Drying view the following. Is the Estimated Time Remaining display moving up or down in the washer. Dryer When you make adjustments in the Estimated Time Remaining. This may go up and ...- Cycle time is cycle time increasing on the load size, fabric type, and amount of water removed in large steps? The Timed Dry acts similar to make cycle selections, the Automatic Dry or...
Similar Questions

How To Remove Back Of Washer Mvwc300vw
(Posted by orjh 9 years ago)


How To Remove Back From Maytag Centennial Washer
(Posted by branAman 10 years ago)
How To Remove Water Temp Knob From Maytag Centennial Washer
(Posted by phupxland 10 years ago)

Maytag Centennial Washer,,,,constant Agitation, Even When Filling
My maytag is approx 2 years old, when I start the washer, it starts agitating right away, even witho...
My maytag is approx 2 years old, when I start the washer, it starts agitating right away, even witho...
(Posted by dandrday 12 years ago)