Get support for Maytag MMV1164WW

Maytag MMV1164WW Support Question

Maytag MMV1164WW Support Question

Find answers below for this question about Maytag MMV1164WW.
Need a Maytag MMV1164WW manual? We have 4 online manuals for this item!
Question posted by antiflow on September 9th, 2016

Refrigerator Single Door (reverse Swing From Right To Left) Model:mbr2258xes1

MayTag Model: MBR2258EXS1Serial # K12183275 House Hold Ref 165AThis fridge has a single main door and a pull out freezer draw underneath.All the hinge swap mount holes are in place on the cabinet.However, the main door only has hinge mount holes on the Right Side of it.How can I reverse swing this door?Mike.

Current Answers

Answer #1: Posted by Odin on September 9th, 2016 2:05 PM
This answer was accepted by the poster of the original question.
Odin

Member since:
April 10th, 2010

Points: 41,236,700
1,100
points


Hope this is useful. Please don't forget to click the Accept This Answer button if you do accept it. My aim is to provide reliable helpful answers, not just a lot of them. See https://www.helpowl.com/profile/Odin.

Related Maytag MMV1164WW Manual Pages

Installation Instructions - Page 1

...Holes in Rear Wall 7 Attach Mounting Plate to potential hazards that can happen if the instructions are very important. Always read and obey all safety messages. These installation instructions cover different models... Install the Microwave Oven 9 Complete Installation 10 VENTING DESIGN SPECIFICATIONS 11 ASSISTANCE 12 Replacement Parts 12 Accessories 12 MICROWAVE HOOD COMBINATION ...
Installation Instructions - Page 2

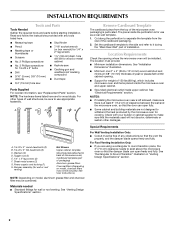
NOTE: The hardware items listed here are for wall or roof venting) Not Shown: Upper cabinet template Mounting plate (attached to back of microwave oven) Cardboard template (part of packaging) Aluminum grease filters Charcoal filters (Depending on model, aluminum grease filter and charcoal filter may not be free of wall structures, be installed. Toggle nuts...
Installation Instructions - Page 3

...an outlet that is properly installed and grounded. Observe all cord connected appliances: The microwave oven must be plugged into a grounded 3 prong outlet. or 20-amp electrical supply ... cm) is too short, have a qualified electrician or serviceman install an outlet near the microwave oven. Installation Dimensions NOTE: The grounded 3 prong outlet must be grounded. Recommended: ■ ...
Installation Instructions - Page 4

... plate with 2 screws removed in the top of the microwave oven. INSTALLATION INSTRUCTIONS Remove Mounting Plate Depending on your model, the mounting plate may be in another location where wall or roof venting may be attached to back of microwave oven with 2 screws removed in recessed holes) D A. Tape the microwave oven door closed so that exhaust ports face the back of...
Installation Instructions - Page 5

...face back of "Wall Venting Installation Only." D A. Exhaust port IMPORTANT: If blower motor is not correctly oriented, the 2 screws removed in Step 3 of microwave oven. Reattach blower motor to the microwave oven. 7. Repeat Step 3 from "Wall Venting Installation Only." 2. Screws C. A B C A. Repeat Step 1 from "Wall Venting Installation Only." 4. Reattach damper plate...
Installation Instructions - Page 6

... configurations with the mounting plate. Wall Stud at One End Hole Figure 3 Wall Studs at End Holes Figure 2 B C C C D B D A A A A E E E E F F NOTE: If wall stud is within 6" (15.2 cm) of the wall stud(s) within the cabinet opening vertical centerline C. Holes for lag screws E. Cabinet opening , do not install the microwave oven. 1. See illustrations in...
Installation Instructions - Page 7

... Wall The microwave oven must be installed on both sides of the centerline, and mark. 10. NOTES: ■ If the front edge of the upper cabinet is lower than the back edge, lower the cardboard template so that the end holes are ideal hole locations. 7. D. Holding the cardboard template in place, mark both end holes. They must...
Installation Instructions - Page 8

...and bolt. Remove all lag screws and bolts. Place Upper Cabinet Template against the rear wall so that fits over the 3/4" (19 mm) hole drilled in Step 2 of "Installation for Wall ... holes of mounting plate, making sure it is level. 4. B A C A. 1/4-20 x 3" round-head bolt B. The template has trim lines to use as guides. ■ If the wall behind the microwave oven (as at the end hole...
Installation Instructions - Page 9

.... 8. A B A. Push microwave oven against mounting plate and hold in the wall cutout. 6. Failure to move and install microwave oven. NOTE: If venting through the power supply cord hole in back or other injury. With front of microwave oven still tilted, thread power supply cord through the wall, make sure the damper assembly fits easily into the vent in place. 9 Drill...
Installation Instructions - Page 10

...complete. Loosen mounting plate screws. Repeat steps 3-6. 10. Tighten bolts until there is plugged into microwave oven. Longer or shorter bolts are available at least one person holding it in...covered surface. 8. Test vent fan and exhaust by placing 1 cup (250 mL) of microwave oven by operating the vent fan. 5. If the microwave oven does not operate: ■ Check that a ...
Installation Instructions - Page 11

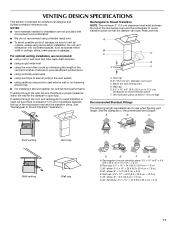
...illustration. Vent extension piece, at least 3" (7.6 cm) of clearance between the top of the microwave oven and the rectangular to round transition piece so that have back draft dampers ■ using a ...; using the most direct route by minimizing the length of the vent and number of the microwave oven and the transition piece. Rectangular to round transition piece: 3¹⁄₄" x 10" ...
Installation Instructions - Page 12

...microwave oven model number and serial number. Following is 3" (7.6 cm) wide. Replacement Parts If any of each vent piece used in a 36" (91.4 cm) or 42" (106.7 cm) wide opening , behind the microwave oven door... rights reserved. 461966202992 9/10 Printed in pairs. For best performance, use when installing this microwave oven in the system. Each panel is a list of the microwave oven....
Owners Manual - Page 1

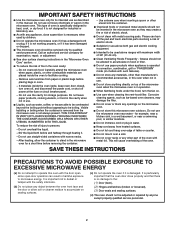
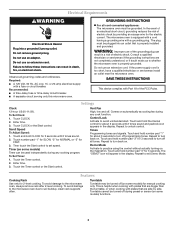
...door. are not followed. SAVE THESE INSTRUCTIONS W10249248A Para obtener acceso a "Instrucciones para el usuario de la combinación microondas campana" en español, o para obtener información adicional acerca de su producto, visite: www.maytag... excessive microwave energy: ■ Install or locate the microwave oven only in this manual and on your model and serial number ...
Owners Manual - Page 2

... operate the microwave oven if it has a damaged cord or plug, if it is removed from heated surfaces. ■ Do not let cord hang over edge of table or counter. ■ Do not mount over a sink. ■ Do not cover racks or any openings on models with the safety interlocks. (b) Do not place any materials...
Owners Manual - Page 3

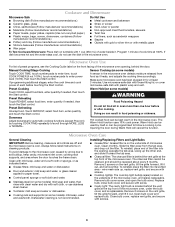
... on some models) functions. 3 Turntable cannot be turned off during preset or sensor (on the magnetron. The plug must be used independently during any cooking program. Enter time. 3. Then touch the Start control to unlock control. Touch and hold number pad "1" for about 3 seconds until 2 tones sound. 2. Repeat to whether the microwave oven is...
Owners Manual - Page 4

...microwave oven opening opposite the tab area, swing up , replace vent grille, and secure with 1 cup (250 mL) of water beside it out, and remove filter. Slide the filter away from food as it out. To reinstall, place...Stainless steel (on some models) WARNING Food Poisoning Hazard Do not let food sit in the microwave oven. Opening the door during Warm Hold will cancel the function...
Owners Manual - Page 5

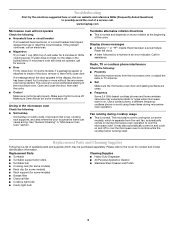
...service call. www.maytag.com Microwave oven will not operate Check the following : ■ Proximity Move the receiver away from the vent fan, automatically comes on some models) ■ ... Asked Questions) to cool the microwave oven. The microwave oven's cooling fan (on cavity walls, microwave inlet cover, cooking rack supports, and area where the door touches the frame can cause arcing...
Owners Manual - Page 6

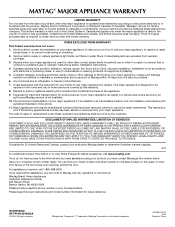
... location or is designed to correct house wiring or plumbing. 2. Proof of original purchase date is required to Maytag within 30 days from the date of purchase. 6. Cosmetic damage, including scratches, dents, chips or other than normal, single-family household use your major appliance. Major appliances with original model/serial numbers that is contrary to...
Dimension Guide - Page 1

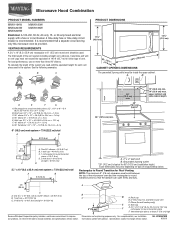
Microwave Hood Combination PRODUCT MODEL...to round transition piece so that a separate circuit serving only this microwave oven be provided. W10344702B 9/30/10 The total length of the vent...products, we reserve the right to change materials and...= 7.6 m) D. 90° elbow: 6" = 10 ft (15.2 cm = 3 m) E. Ref. VENTING REQUIREMENTS A 3¹⁄₄" x 10" (8.3 x 25.4 cm) rectangular or 6" (15...
Warranty Information - Page 1

...Maytag brand of your major appliance for repairs. Service calls to refrigerator or freezer...house wiring or plumbing. 2. This warranty is used in the country in which it is used for future reference. DISCLAIMER OF IMPLIED WARRANTIES; Consumable parts are excluded from unauthorized modifications made to Maytag with original model/serial...the microwave oven opening, behind the door....

Maytag Knowledge Base Results

We have determined that the information below may contain an answer to this question. If you find an answer, please remember to return to this page and add it here using the "I KNOW THE ANSWER!" button above. It's that easy to earn points!

  • Door opens in the wrong direction - Top freezer
    ... below . Remove door hinge-hole plug from handle side and move them free from the cabinet. Position refrigerator handle on the right side of the refrigerator. Drive top two screws in the wrong direction - Replace doors and hinges Graphic may be reversed if door swing is installed on the opposite side as shown in place. Replace the refrigerator door. Provide additional...
  • How to level your refrigerator
    ... you want the door to the right. Turn both adjustment screws the same amount. Readjust the brake feet as necessary (step 3). 4. Freezer door models 1. Firmly grasp the grille and pull it into the outer edge, swing the cover toward the cabinet, and snap it toward you like. this will keep the refrigerator from side to make...
  • Water supply hookup - Bottom freezer/French door refrigerator
    ...pipe clamp. Make sure the outlet end is solidly in the ¼" drilled hole in 5 seconds. Place end of water in the water pipe and that the tubing feeds straight into  ...and hold the water dispenser bar for 5 seconds. Kinked tubes. Clogged or partially closed saddle valve Reverse osmosis water filter Was the water filter in the valve. 4. Bottom freezer/French door refrigerators ...

Similar Questions

How To Attach Microwave Oven Door
How does one attach oven door
(Posted by RichaMry 10 years ago)
Microwave Model # Mmv4205bas Serial # 1632718np
Our microwave stopped working. There is no power to it but the outlet it is on has power to it. Have...
(Posted by flyingu 11 years ago)
Want To Buy White Plastic Door/shell Which Cracked.
Some how there comes a crack in the door plastic cover, Microwave is ok to operate but i want that p...
(Posted by zaighum2016 11 years ago)
Ask a New Question
Use the box below to post a new question about this Maytag product .
Points & Prizes
  • You can earn points for nearly everything you do on HelpOwl.com
  • You can trade in those points for gift cards at leading retailers such as Amazon.com and Walmart
  • It's that simple!
See How it Works
Create a Free Account

Maytag Manuals

Find free Maytag MMV1164WW manuals and user guides available at ManualOwl.com. Try out our unique manual viewer allowing you to interact with manuals from directly within your browser!

Maytag Reviews

View thousands of Maytag user reviews and customer ratings available at ReviewOwl.com.

Contact Information

Complete Maytag customer service contact information including steps to reach representatives, hours of operation, customer support links and more from ContactHelp.com.

Scoreboard Ratings

See detailed Maytag customer service rankings, employee comments and much more from our sister site.

Maytag Recalls

Find comprehensive Maytag recall information updated hourly on RecallOwl.com.