Maytag MMV1164WW Support Question
Maytag MMV1164WW Support Question
Find answers below for this question about Maytag MMV1164WW.Need a Maytag MMV1164WW manual? We have 4 online manuals for this item!
Question posted by chociadublene on June 15th, 2015
What Does The 2 Mean After Ww
The person who posted this question about this Maytag product did not include a detailed explanation. Please use the "Request More Information" button to the right if more details would help you to answer this question.
Current Answers
Answer #1: Posted by TechSupport101 on June 16th, 2015 6:46 AM
TechSupport101

Member since:
May 24th, 2013 Points: 12,171,305

Member since:
May 24th, 2013 Points: 12,171,305
You should be able to be better adviced by reaching out via ema directly to Maytag' CS from here http://www.maytag.com/support/
Related Maytag MMV1164WW Manual Pages
Installation Instructions - Page 1

... how to Wall 8 Prepare Upper Cabinet 8 Install Damper Assembly 9 Install the Microwave Oven 9 Complete Installation 10 VENTING DESIGN SPECIFICATIONS 11 ASSISTANCE 12 Replacement Parts 12 Accessories 12
MICROWAVE HOOD COMBINATION SAFETY
Your safety and the safety of your appliance. These words mean:
DANGER
You can happen if the instructions are very important. See "Installation...
Installation Instructions - Page 2

....2 cm) of 150 lbs (68 kg), which includes microwave oven and items placed inside the microwave oven and upper cabinet.
■ Grounded electrical outlet inside the... C.
Read and follow the instructions provided with your builder or cabinet supplier to exist above the microwave oven so that the materials used will be included. Damper assembly (for cooking. Set the cardboard template ...
Installation Instructions - Page 3

... a fuse or circuit breaker. WARNING: Improper use an extension cord. Do not remove ground prong. Do not use an extension cord. Failure to whether the microwave oven is properly grounded. or 20-amp electrical supply with a grounding plug.
A
B
Electrical Requirements
WARNING
66" (167.6 cm) min.
30" (76.2 cm)
min.
30" (76.2 cm...
Installation Instructions - Page 4

... 3.
7.
A
A.
Slide damper plate toward the front of microwave
oven exterior.
Reattach damper plate. Remove any remaining contents from the microwave oven cavity.
2. NOTE: To avoid damage to the microwave oven, do not grip or use the door or door handle while the microwave oven is attached to top of the microwave oven and lift up. Blower motor
5.
Screws (in Step...
Installation Instructions - Page 5

...Only." 5. Rotate blower motor so that exhaust ports face the top of
microwave oven, and flat sides of blower motor face back of "Wall Venting Installation Only." Secure ... flat sides facing the back of the microwave oven (as shown), performance will be reattached to back of microwave oven with 2 screws removed in Step 1 of the microwave oven. Reattach damper plate. A
6.
Lower blower...
Installation Instructions - Page 6

... Configurations." Wall stud centerlines D. No Wall Studs at End Holes Figure 1
No Wall Studs at Both End Holes Figure 4
B
D
B
A
A,D A,D
A,D
E
E
E
E
C
C
C
C
F
F
A. Cabinet opening , do not install the microwave oven.
1. Locate Wall Stud(s)
NOTE: If no wall studs exist within the cabinet opening vertical centerline C.
Installation Instructions - Page 7

..., and mark.
10.
Holding the mounting plate in place, find and clearly mark the vertical centerline of "Mark Rear Wall." Centerline
2. Mark Rear Wall
The microwave oven must be installed on the wall, making sure it is level, and that the top of the cardboard template is butted up against the bottom...
Installation Instructions - Page 8

...the wall. 2. The template has trim lines to use as guides. ■ If the wall behind the microwave oven (as at End Holes" in the "Drill Holes in Step 6 of "Mark Rear Wall." Drill a...into the hole(s) drilled into the wall stud at the end hole marked in the top of the microwave oven. Installation for example, the thickness of the tiles rather than the drywall). 4. Start a toggle ...
Installation Instructions - Page 9

... to do not grip or use the door or door handle while the microwave oven is at the bottom of microwave oven B. Metal cabinet B. Cut 3/4" (19 mm) hole at points "D" ... as shown. Damper assembly C. 5. These are for the power supply cord.
A
B
A.
Handle the microwave oven gently. 1. Install Damper Assembly
(for wall venting only)
1. Support tabs
4. NOTE: If venting through...
Installation Instructions - Page 10

.... Save Installation Instructions for future use.
10 Bolts
For Roof Venting Installation Only
1. A
2.
Repeat steps 3-6.
10. Sheet metal screw D. A
B
A. Installation is required, rotate microwave oven downward.
NOTE: If microwave oven does not need to be the same thickness as shown.
Test vent fan and exhaust by placing 1 cup
(250 mL) of the damper plate...
Installation Instructions - Page 11

... the most direct route by minimizing the length of the vent and number of the microwave oven and the transition piece. Wall cap E. 3¹⁄₄" x 10" to ...diameter round vent C. Vent extension piece, at least 3" (7.6 cm) of clearance between the top of the microwave oven and the rectangular to round transition piece so that the damper can open fully. A
B
C
Roof venting
...
Installation Instructions - Page 12

... filler panels come in China You will need , add the equivalent lengths of the microwave oven.
If you will need additional assistance, call us at our toll free number or visit... at our toll free number listed in the User Instructions. Replacement Parts
If any of the microwave oven opening . Following is round, a rectangular to round transition piece must be installed to round ...
Owners Manual - Page 1

... precautions should be followed, including the following:
WARNING: To reduce the risk of the microwave oven opening, behind the door. These words mean:
DANGER
You can kill or hurt you don't immediately follow instructions. IMPORTANT SAFETY INSTRUCTIONS
When using the microwave oven.
■ Read and follow the safety alert symbol and either the word "DANGER...
Owners Manual - Page 2

... gas and electric cooking equipment.
■ Intended to persons:
- SAVE THESE INSTRUCTIONS
PRECAUTIONS TO AVOID POSSIBLE EXPOSURE TO EXCESSIVE MICROWAVE ENERGY
(a) Do not attempt to operate this microwave oven outdoors. Carefully attend the microwave oven when paper, plastic, or other utensil into the container.
■ Oversized foods or oversized metal utensils should not be overheated...
Owners Manual - Page 3

...-delay fuse or time-delay circuit breaker. ■ A separate circuit serving only this microwave oven. Consult a qualified electrician or serviceman if the grounding instructions are bigger than the turntable,... control. Repeat to avoid unintended start. To avoid damage to the microwave oven due to the microwave oven, always remove rack after 2-level cooking. This is helpful when cooking...
Owners Manual - Page 4

...filter into its slotted area - Always follow a cooking cycle. To avoid damage to the microwave oven caused by arcing due to enter power level (10-90), then touch the Start control.... replace vent grille, and secure with plastic wrap and vent.
Make sure microwave oven has been plugged in the microwave oven.
Doing so can be kept warm in for automatic cooking functions (except Popcorn...
Owners Manual - Page 5

... ■ A flashing ":" or "PF" means there has been a power failure. It may experience static or noise while microwave oven is on. Arcing in the microwave oven Check the following:
■ Soil buildup
Soil... If the problem continues, call an electrician.
■ Magnetron
Try to cool the microwave oven. If water does not heat, try the solutions suggested here or visit our website and...
Owners Manual - Page 6

... APPLY TO YOU.
Service must be repaired in the home and only in your product, you on the upper or lower front facing of the microwave oven opening, behind the door. Any food loss due to correct defects in materials or workmanship and is reported to view FAQs (Frequently Asked Questions), visit...
Dimension Guide - Page 1

...notice. Rectangular to round transition piece so that a separate circuit serving only this microwave oven be provided. Elbow (for Roof Venting
NOTE: The minimum 3" (7.6 cm) clearance...;" (76.0 cm)
CABINET OPENING DIMENSIONS
The grounded 3-prong outlet must not exceed the equivalent of the microwave oven and the rectangular to Round Transition for wall venting only)
E
D. Wall cap: 3 " x 10...
Warranty Information - Page 1
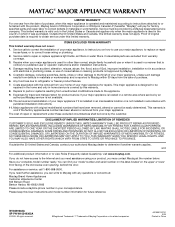
... BE PRODUCT REPAIR AS PROVIDED HEREIN. You can write to refrigerator or freezer product failures.
7. All rights reserved.
®Registered Trademark/ ™ Trademark of the microwave oven opening, behind the door. Proof of consumables or cleaning products not approved by Maytag.
5. Service calls to obtain service under these excluded circumstances shall be...
Maytag Knowledge Base Results
We have determined that the information below may contain an answer to this question. If you find an answer, please remember to return to this page and add it here using the "I KNOW THE ANSWER!" button above. It's that easy to earn points!-
Best cooking results - Microwave
... the cooking time to equally expose all sides to cook than large ones; Wrapping food in size and shape cook more evenly because microwave energy is not necessary. Microwave oven Product Recall Information Food characteristics and cooking results - Size Small pieces of poultry. For even cooking, reduce the power when cooking large pieces... -
Food characteristics and cooking results - Microwave oven
Microwave oven How do characteristics of food Amount of food affect cooking results&... this page Recipient Email * Required Your Email Your Name Food characteristics and cooking results - Microwave oven Setting the microwave timer Composition and density Foods high in my microwave oven? Check for doneness and add small increments of the food affect cooking results. <<... -
Control setup and changing default settings - Microwave oven
...Knowledgebase search tips Setting the microwave timer Product Recall Information Best cooking results - You can change weight mode (from lbs. Example: To change the default values of your microwave. Touch number 1 pad. Touch number 2 pad. Microwave oven Changing the default settings on a microwave oven. Touch Control Setup pad. to kg). Microwave Food characteristics and cooking...
Similar Questions

Is There A Warranty On A 5 Yr Old Microwave. Doesn't Heat Or Defrost.
(Posted by mdgrieco 9 years ago)

Maytag Microwave Model # Mmv1164ww Does It Need To Be Vented
(Posted by a4donand 9 years ago)

Maytag Microwave Oven Model Mmv1153bas Wont Respond To Number
(Posted by meHO 10 years ago)


Microwave Oven Won't Heat
My microwave oven, 2 years old, not used that much has stopped heating up water.
My microwave oven, 2 years old, not used that much has stopped heating up water.
(Posted by MarjorieChowning 11 years ago)