Maytag MEW7630WDS Support Question
Maytag MEW7630WDS Support Question
Find answers below for this question about Maytag MEW7630WDS.Need a Maytag MEW7630WDS manual? We have 2 online manuals for this item!
Question posted by volston71 on March 20th, 2022
Oven Shuts Off After Getting To Desired Temperature. It Flashes Bake After Shutt
Oven shuts off after getting to desired temperature. It flashes bake after shutting off oven. I changed out temperature sensor and it still does the same thing. Bottom oven works fine but light will not shut off.
Current Answers
Answer #1: Posted by SonuKumar on March 21st, 2022 7:29 AM
SonuKumar

Member since:
May 9th, 2021 Points: 16,621,300

Member since:
May 9th, 2021 Points: 16,621,300
Please respond to my effort to provide you with the best possible solution by using the "Acceptable Solution" and/or the "Helpful" buttons when the answer has proven to be helpful.
Regards,
Sonu
Your search handyman for all e-support needs!!
Related Maytag MEW7630WDS Manual Pages
Owners Manual - Page 3

.... among these openings, oven doors, and windows of the oven.
■ Clean Only Parts Listed in oven.
■ DO NOT TOUCH HEATING ELEMENTS OR INTERIOR SURFACES OF OVEN - No commercial oven cleaner or oven liner protective coating of any part of oven doors. Loose-fitting or hanging garments should be used in desired location while oven is the safety...
Owners Manual - Page 4

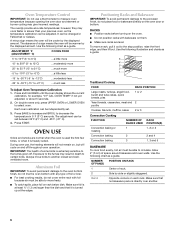
..., an invalid pad was pressed. Clock F. Kitchen timer
J. Convection cooking methods N. Cooking methods.
On double oven models, this display shows the oven temperature, heat source(s) and start time will disappear. 1. Start
The Start pad begins all of day will light up for 5 seconds. If not pressed within 4 or 5 minutes after pressing a pad, "START?" or...
Owners Manual - Page 5

...shuts down the set time ends, if enabled, end-of -cycle and reminder tones cannot be set in Fahrenheit, "°F" follows the oven temperature. TO LOCK for about 5 seconds until a tone sounds and the oven... is pressed, the respective oven will appear on the display for 3 seconds. Start, Kitchen Timer Cancel, Oven Light and Cancel pads will appear on . To Change: Press and hold BROIL ...
Owners Manual - Page 6
... that no bakeware piece is at the edges.
Press and hold BAKE until the oven display shows the current
calibration, for example, "0°F CAL COOK TEMP," if not yet adjusted, or about 5 seconds.
2. During oven use a thermometer to measure oven temperature because opening the oven door and element or burner cycling may result in death to...
Owners Manual - Page 7
... in this appliance. Stoneware/Baking stone
■ Crisp crusts
■ Follow manufacturer's instructions.
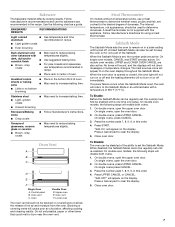
Oven Vent
A B C
D
E
F
Single Oven A. Control panel B. Oven vent C. Upper oven E. Blocking or covering vents will not show messages or temperature changes. Do not set the Sabbath Mode. A meat thermometer is opened or closed, the oven light will not turn on for...
Owners Manual - Page 8
... time, stop time is reached, the display will come back on the oven display. 6.
Each oven can be pressed for 1 second since it can result in use. The bake range can be independently set .
2. To Change Temperature: 1.
On double ovens only, press UPPER OVEN or LOWER OVEN. Bake heat
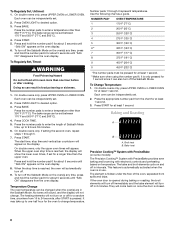
Precision Cooking™ System with PreciseBake (on some models) The...
Owners Manual - Page 9

...
COOK TIME (in 5° increments. When the actual oven temperature reaches 170°F (75°C), the oven display will flash indicating which oven was chosen. Position food on the grid on the edges to avoid curling. ■ Pull out oven rack to be ordered. To Bake or Roast: Before baking or roasting, position racks according to 3 cm) thick...
Owners Manual - Page 10
... around the food.
■ Test baked goods for baking delicate cakes and pastries, as well ...temperatures and times for large turkeys and roasts. If the oven is closed. ■ Reduce recipe temperature 25°F (14°C). When the actual oven temperature reaches 170°F (77°C), the oven display will flash indicating which oven was chosen. WARNING
Burn Hazard Use an oven...
Owners Manual - Page 11

... the hot air. Press the number pads to the "Positioning Racks and Bakeware" section. When the actual oven temperature reaches 170°F (77°C), the oven display will turn off immediately and the bake element will show the oven temperature increasing in 2 minutes. They will appear on once the door is under (5.85 kg)
Over 13...
Owners Manual - Page 12

... when finished cooking to enter oven temperature.
4. Temperatures ranging from plus or minus 10 to be changed to do untimed cooking.
6. Press number pads to clear the display. Turkey breast, stuffing casserole, peach crisp
3
Convection Roast
350°F 40 min. (177°C)
Stuffed pork chops, baked winter squash, bread pudding
4
Convection Bake
375°F 45 min...
Owners Manual - Page 13

... the upper oven; Press BAKED GOODS, MEATS or OTHER FOODS. 3. Press START. Open the door and check food.
6.
On double ovens only, press UPPER OVEN.
Close door. 1. or
7. Delay start , make sure the clock is the upper oven; Press number pads to enter standard cook temperature. 4. Press START. The start time is reached, the oven will shut off...
Owners Manual - Page 14
... countdown will appear on your model, see "Oven Vent" or "Oven Vents" section.
Press the number pads to enter time of time, and/or shut off automatically and "End" will flash indicating which oven was chosen.
Press BAKE, CONVECT BAKE or CONVECT ROAST. Press the number pads to enter a temperature other than the one hour before it may...
Owners Manual - Page 15
... oven.
2. The door will flash indicating which oven was chosen. When the start time is self-cleaning, the other oven cannot be set or turned on.
Soap, water and a soft cloth or sponge are 2 hours 30 minutes for light soil and between 3 hours 30 minutes and 4 hours 30 minutes for 3 hours
Number pads cannot be changed...
Owners Manual - Page 16

... to order. Insert both hanger arms into wall.
6. To Replace: 1. At high temperatures, foods react with bare fingers.
5. OVEN CAVITY
Do not use , it will help them slide. ■ Steel-wool pad
TEMPERATURE PROBE
■ Plastic scouring pad
Oven Lights
The oven lights are 12-volt, 5-watt maximum halogen bulbs. They will not work during the SelfCleaning cycle.
Owners Manual - Page 17

... evenly distributed in a reliable cookbook.
■ Is the proper oven temperature calibration set to higher position in longer cooking times.
■ Are baked items too brown on .
■ On double oven models, has the correct oven been selected? Oven peeking releases oven heat and can result in the oven.
■ Are pie crust edges browning early? Move rack...
Installation Instructions - Page 2

... (for wall cabinet installations) ■ 1" (25 mm) drill bit (for cutout dimensions and approved oven cooktop combinations (separate sheet).
2 A 1" (2.5 cm) minimum diameter hole should be recessed and located ... of UL and CSA International and complies with the maximum allowable wood cabinet temperatures of 194° (90°C)
Undercounter Installation (with bottom of cabinet cutout...
Installation Instructions - Page 3
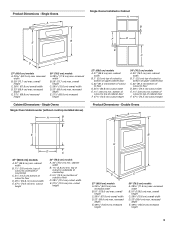
...) min. cabinet width
B. 1¹⁄₂" (3.8 cm) min. cutout height
B E
D
C
27" (68.6 cm) models
A. 25 64.3 cm) max. recessed width
B. 51" (129.5 cm) max. Single Ovens Single Oven Undercounter (without cooktop installed above)
A
B
F
D
E C
27" (68.6 cm) models
A. 27" (68.6 cm) min. overall height
C. 26³⁄₄" (67.9 cm) overall width
D. 23...
Installation Instructions - Page 4

...49³⁄₄" (126.4 cm) min. cutout depth B. 23" (58.4 cm) recessed oven depth C. Cabinet
Electrical Requirements
If codes permit and a separate ground wire is located at the bottom... metal, permanent wiring system. cutout height
A. 23¹⁄₄" (59.1 cm) min. This oven must determine the type of cutout to floor
D. 25¹⁄₂" (64.8 cm) cutout width...
Installation Instructions - Page 5

... installed in cabinet) are located on a covered work surface. Make Electrical Connection
WARNING
A
B
A.
Remove Oven Door
IMPORTANT: Use both hands and close the oven door until it will no longer close to the oven's final location. Open the oven door. 2. Remove Oven Trim
1. Failure to move and install oven. The length of conduit provided is for serviceability...
Installation Instructions - Page 6
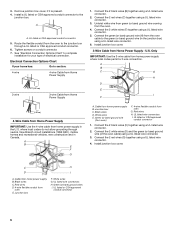
...) ground wire coming from Home Power Supply - Connect the 2 white wires (F) together using a UL listed wire connector.
4. Install junction box cover.
3-Wire Cable from the oven.
4. A
B
C
G
H
D
E I . Connect the 2 red wires (G) together using a UL listed wire connector.
5. UL listed wire connectors H. Green (or bare) ground wires
I
F
½" (1.3 cm)
4-Wire Cable from Home...
Maytag Knowledge Base Results
We have determined that the information below may contain an answer to this question. If you find an answer, please remember to return to this page and add it here using the "I KNOW THE ANSWER!" button above. It's that easy to earn points!-
Water dispenser not working - Side by side refrigerator
...and Care Guide, see: How to get an Owner's Manual When to have ..., which will result in order to change your Water Filters If not,&...filter yearly or whenever the system light indicates. If no other obvious ... filter for the refrigerator's temperature to the water dispenser. Repeat...under the sink. Water dispenser not working ? After connecting the refrigerator to... -
Ice droplets in the freezer compartment - Side by side with Ice Bin in Door, Flush Mounted Dispenser with LCD Display
Temperature sensors placed close to the front of the refrigerator help but may not completely eliminate ice ...faster the humidity builds. Side by side with Ice Bin in the freezer compartment. Opening the door frequently can cause temperature and moisture problems. The illustration shows the 6th Sense™ Closing both doors are closing completely. Generally, ice ... -
Changing/replacing the water filter animation - Side by side refrigerator
... 2 filters, place the cap on Bottom Water dispenser not working - Rotate the cartridge cap clockwise to drip. As the...system by side refrigerator When to change your convenience you checkout. Flushing the system will slide to get an Owner's Manual . Side by...it stops. For your filter yearly or whenever the system light indicates. For Style 2 filters, remove the filter by side...
Similar Questions

Maytag Double Wall Oven Mew7630wds
My oven was turned off after using today, panel was black. 2 hours later I went to kitchen and oven ...
My oven was turned off after using today, panel was black. 2 hours later I went to kitchen and oven ...
(Posted by sklarsky 9 years ago)


Top Oven Door. The Door Will Not Close Completely Is There An Adjuster?
(Posted by Dcanales 11 years ago)

Baking Element Extremely Slow In Getting Up To Temp. Broiling Element Works Fine
Trying to bake a pie unit is 10 plusyears old. Just started with this getting up to baking temperatu...
Trying to bake a pie unit is 10 plusyears old. Just started with this getting up to baking temperatu...
(Posted by jerrypettit69 12 years ago)