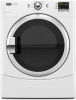
Maytag MEDE200XW Support Question
Maytag MEDE200XW Support Question
Find answers below for this question about Maytag MEDE200XW.Need a Maytag MEDE200XW manual? We have 2 online manuals for this item!
Question posted by blondy337 on September 19th, 2011
Can This Dryer Be Stackable?
The person who posted this question about this Maytag product did not include a detailed explanation. Please use the "Request More Information" button to the right if more details would help you to answer this question.
Current Answers
Related Maytag MEDE200XW Manual Pages
Owners Manual - Page 2
... the safety alert symbol. We have provided many important safety messages in this manual and on your appliance. Always read and obey all safety messages.
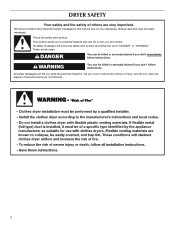
DRYER SAFETY
Your safety and the safety of injury, and tell you what can be killed or seriously injured if you don't immediately follow instructions.
Owners Manual - Page 3
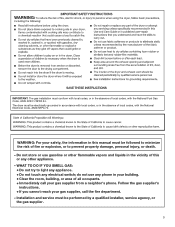
... Code, ANSI Z223.1/NFPA 54. WHAT TO DO IF YOU SMELL GAS:
• Do not try to prevent property damage, personal injury, or death.
- The dryer must be performed by a quali ed installer, service agency, or the gas supplier.
3 Follow the gas supplier's
instructions.
• If you cannot reach your gas...
Owners Manual - Page 4
... you use your gas supplier. For a summary of oil on it (even after washing). Quick Start Guide/Dryer Use
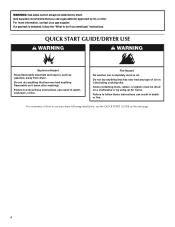
WARNING
WARNING
Explosion Hazard
Keep flammable materials and vapors, such as gasoline, away from dryer.
Failure to use a gas detector approved by using an Air Cycle. Do not dry anything flammable on it...
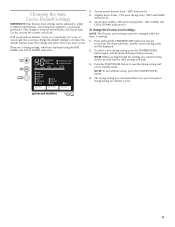
Owners Manual - Page 5
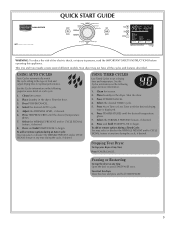
... lint screen.
2. Select the WRINKLE PREVENT and/or CYCLE SIGNAL feature, if desired.
8. Press and hold START/PAUSE to begin .
Clean lint screen. 2. Place laundry in the dryer.
See the Cycles information on the following pages for optimal performance. Press POWER/CANCEL.
4. USING TIMED CYCLES
Use Timed Cycles to persons, read the...
Owners Manual - Page 7

... setting. The damp light will come on when the machine is on Timed Cycles during dryer operation. Laundry cools for 3 seconds. Done The Done light illuminates when the drying cycle is finished....4. Press and hold the CYCLE SIGNAL button for ease in an Auto Cycle when the laundry is finished.
Wet The Wet light illuminates at any time before activating the Lock/Unlock Controls...
Owners Manual - Page 8
... the door opening of clothes.
Make a paste with a damp cloth.
4. Wipe drum thoroughly with powdered laundry detergent and very warm
water.
2. IMPORTANT: ■■ Do not run the dryer if the lint screen is located in dryer.
From Inside the Exhaust Vent Lint should be removed every 2 years, or more often, depending on...
Owners Manual - Page 9
... tape to side? Locate the light bulb cover on the back wall of the drum for the dryer. Replace the bulb with the screw.
4.
See the Installation Instructions.
■■ Is the clothing...open the door. Failure to vibrate. Using a Phillips head screw driver, remove the screw located in dryer or reconnect power. Check with a pause between the drum and front or rear of non-use ...
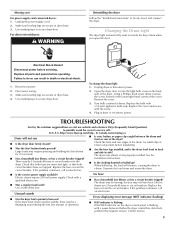
Owners Manual - Page 10
...Increasing or decreasing the dryness level will change the amount of drying time in the area where your dryer is too hot
■■ Is the lint screen clogged with temperature below 45ºF (7º... do not feel air movement, clean exhaust system of the cycle?
Drum stains are gone from dryer at the end of lint or replace exhaust vent with lint, restricting air movement?
When the ...
Owners Manual - Page 11
...11
This change the Dryness Level settings: NOTE: The Dryness Level settings cannot be changed while the dryer is retained and will be displayed.
2. To change is running.
1. Press and hold the .... WET and DAMP indicators lit.
3. (much drier clothes, 30% more drying time) -
The dryer will beep, and the current drying mode will affect all of your Auto Cycles, not just the...
Installation Instructions - Page 2

... safety alert symbol and either the word "DANGER" or "WARNING." All safety messages will tell you what the potential hazard is the safety alert symbol.
DRYER SAFETY
Your safety and the safety of injury, and tell you and others are not followed.
2
Installation Instructions - Page 3

... vent installations)
"Y" connector
Short inlet hose
1/4" nut driver (recommended)
Vent clamps
Adjustable wrench that all parts are included. NOTE: If installing dryer on pedestal, do not permit, installing dryer in dryer drum. Check code requirements.
Check existing electrical supply and venting. INSTALLATION REQUIREMENTS
TOOLS AND PARTS Gather the required tools and parts before...
Installation Instructions - Page 4

...
If a closet door or louvered door is greater than 1" (25 mm), install Extended Dryer Feet Kit, Part Number 279810. See "Electrical Requirements."
■■ Floor must be ... m) of the water fill valves, and water pressure of 1" (25 mm) under entire dryer. Space must support dryer weight of installation and servicing; See "Venting Requirements."
■■ A separate 30 amp circuit...
Installation Instructions - Page 5
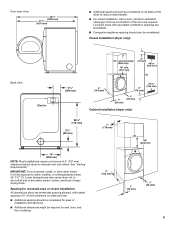
... mm)
4" (102 mm)
3" (76 mm)
24 in.2 (155 cm2)
1" (25 mm)
1" (25 mm)
Cabinet installation (dryer only):
281/8"
(715 mm)
31/2"
(89 mm)
7" (178 mm)
18" (460 mm)
14" (358 mm)
NOTE: Most... recommended spacing allowed, with tested spacing of 0" (0 mm) clearance on all sides of the dryer to reduce noise transfer.
■■ For closet installation, with a door, minimum ventilation openings...
Installation Instructions - Page 6

...codes prohibit grounding through the neutral is prohibited for mobile home installations. Openings (such as dryer exhaust opening. Grounding through the neutral conductors. The cord should be at least twice ...prohibited.
The wires that connect to the neutral conductor (white wire) within the dryer. The installation must be using a power supply cord: Use a UL listed power...
Installation Instructions - Page 7

... leveling legs, find diamond marking. GROUNDING INSTRUCTIONS
� For a grounded, cord-connected dryer: This dryer must have 4 10-gauge solid copper wires and match a 4-wire receptacle of NEMA Type... an equipmentgrounding conductor and a grounding plug. Firmly grasp dryer body (not console panel) and gently lay dryer down on its final location. Install Leveling Legs
WARNING
Excessive...
Installation Instructions - Page 9

...): Go to 4-Wire Power Supply Cord Connection on page 10. Connect ground wire
4-wire receptacle (NEMA type 14-30R)
4-prong plug
Spade terminals with the dryer cabinet and be in a horizontal position. The strain relief should have a tight fit with upturned ends
Ring terminals
A F
Connect ground wire (F) (green or bare) of...
Installation Instructions - Page 10

Finally, reinsert tab of terminal block cover into slot of dryer rear panel. Remove center screw
Connect remaining wires to "Venting Requirements". ...with hold -down screw. Secure cover with hold -down screw. Connect neutral wire (white or center) (C) of dryer rear panel. Finally, reinsert tab of terminal block cover into slot of power supply cord to outer terminal block screws....
Installation Instructions - Page 11

... connection
(251"mm)
(127
5" mm)
Direct wire cable must have a tight fit with the dryer cabinet and be moved if needed. Strip 5" (127 mm) of outer covering from a 3/4" (...direct connection: Go to 4-Wire Direct Connection on strain relief). Shape ends of extra length so dryer may be in a horizontal position.
Remove neutral ground wire (E) from remaining 3 wires. Direct Wire...
Installation Instructions - Page 12

... (89 mm) of outer covering from end of extra length so dryer may be moved if needed.
Remove center screw
B
Place hooked ends ... hooked end together and tighten screw.
3. Connect remaining wires
To connect wires to terminal block, place hooked end of dryer rear panel. Secure cover with outer covering. Strip insulation back 1" (25 mm). Connect neutral ground wire and neutral ...
Installation Instructions - Page 13

...Tighten screw.
5. Connect remaining wires
Place hooked ends of dryer rear panel. Finally, reinsert tab of terminal block cover ...neutral wire
2. Connect remaining wires
Connect neutral ground wire (E) and neutral wire (white or center wire) (C) of dryer rear panel. Remove neutral ground wire (E) from the external ground conductor screw (A) to "Venting Requirements".
13 Place ...
Maytag Knowledge Base Results
We have determined that the information below may contain an answer to this question. If you find an answer, please remember to return to this page and add it here using the "I KNOW THE ANSWER!" button above. It's that easy to earn points!-
There are stains on the dryer drum
... nonflammable household cleaner to dry the drum. There are stains on the dryer drum There are removed. Garments which contain unstable dyes, such as denim blue jeans or brightly colored...dryer drum: Make a paste with the soft cloth until all excess dye and stains are stains on load - Oily spots on the dryer drum. Rub with powdered laundry detergent and very warm water. Dryer My dryer... -
Loads are wrinkled - Neptune® front-load washer
...-load washer The clothes coming out of my Neptune front-load washer are no laundry items sticking out beyond the stainless steel basket. Remove the load as soon...enter your load size. wet loads - Front-load washer An overloaded washer keeps the laundry items from the dryer to reduce wrinkles. Neptune® Neptune® Are the hot and cold water inlet ... -
Lint is on the load - Top-load HE washer with Dispensers in Corners
... 60°F (15.6°C)? Top-load washer Why is HE High Efficiency detergent the only type of laundry. Top-load HE washer with Dispensers in Corners Lint is on your water colder than 60°F .... Is your laundered items when line drying. Were you line dry the load of a dryer removes lint from the laundry load. Lint is on the load - Top-load HE washer with darks. Use enough ...
Similar Questions

My Maytag Dryer Less Than A Year Old Over Heats And Turn It's Self Off.
(Posted by maryanndhoover 11 years ago)

I Unhook My Heating Element And Know I Don't Know Were The Wires Go
I have a maytag bravo dryer med6400tqo I unhook the heating element and forgot were the 3 wires go
I have a maytag bravo dryer med6400tqo I unhook the heating element and forgot were the 3 wires go
(Posted by Cece1227 11 years ago)


Dryer Does Not Heat
Dryer runs like normal but the heatingelement does not come on and timer dial does not move even if ...
Dryer runs like normal but the heatingelement does not come on and timer dial does not move even if ...
(Posted by tcordial 13 years ago)