Maytag MEDB400VQ Support Question
Maytag MEDB400VQ Support Question
Find answers below for this question about Maytag MEDB400VQ - Bravos Electric Dryer.Need a Maytag MEDB400VQ manual? We have 2 online manuals for this item!
Question posted by dmter on January 25th, 2014
Where Is The Bravo Electric Dryer Fuse Located
The person who posted this question about this Maytag product did not include a detailed explanation. Please use the "Request More Information" button to the right if more details would help you to answer this question.
Current Answers
Related Maytag MEDB400VQ Manual Pages
Owners Manual - Page 2
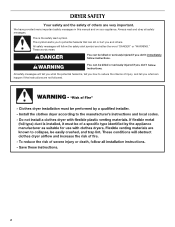
DRYER SAFETY
Your safety and the safety of injury, and tell you what the potential hazard is the safety alert symbol. This symbol alerts you to ...
Owners Manual - Page 3
...Code, ANSI Z223.1/NFPA 54. The dryer must be followed to minimize the risk of fire or explosion, or to light any appliance. • Do not touch any electrical switch; WHAT TO DO IF YOU ... from a neighbor's phone. WARNING: For your safety, the information in this manual must be electrically grounded in accordance with local codes, or in the vicinity of this or any other flammable vapors...
Owners Manual - Page 4
... in death or fire.
Failure to follow these instructions can completely remove oil.
Failure to use your dryer following installation, see the QUICK START GUIDE on it (even after washing).
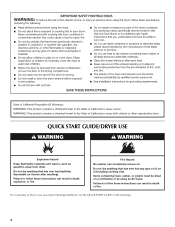
Do not dry anything that... clothesline or by using an Air Cycle. QUICK START GUIDE/DRYER USE
WARNING
WARNING
Explosion Hazard
Keep flammable materials and vapors, such as gasoline, away from...
Owners Manual - Page 5
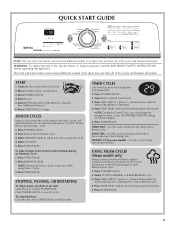
... for optimal performance. Use this cycle if items are still damp after a Sensor cycle. Your dryer may not have all of fire, electric shock, or injury to persons, read the IMPORTANT SAFETY INSTRUCTIONS before each cycle.
1. Place laundry in dry items. See the Cycles information on the following pages for Custom Refresh cycle...
Owners Manual - Page 6
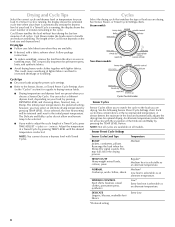
..., or Damp. If a Timed Cycle is running , the display shows the estimated cycle time when your dryer is selectable as tumbling stops. Follow package instructions.
■ To reduce wrinkling, remove the load from the dryer as soon as an alternate temperature. You can select a different dryness level, depending on the load size...
Owners Manual - Page 10
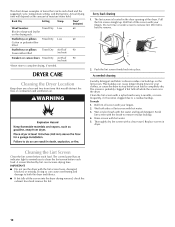
...times for your clothes, or cause the dryer to remove lint. Doing so can cause overheating and damage to complete drying, if needed cleaning Laundry detergent and fabric softener residue can be rack...before each load. The screen is completely dry.
Roll lint off while the screen is located in
dryer. Rinse screen with the lint screen loose, damaged, blocked, or missing. This chart...
Owners Manual - Page 11

...in death or electrical shock.
1. Cleaning should : 1. Because some water may discolor the dryer interior. Unplug dryer or disconnect power. 2. Gas Models: Close shutoff valve in dryer base. 5. ...
Failure to faucet. To use to secure dryer door. Apply a liquid, nonflammable household cleaner to locate, level, and connect the dryer. Wipe drum thoroughly with a soft cloth ...
Owners Manual - Page 12

...the drum light 1. Unplug dryer or disconnect power. 2. Open the dryer door. Locate the light bulb cover on gas models? Remove the screw located in dryer or reconnect power. Remove...the fuse or reset the circuit breaker. Electric dryers require 240-volt power supply. No heat
■ Has a household fuse blown, or has a circuit breaker tripped? Electric dryers use two household fuses or...
Owners Manual - Page 13
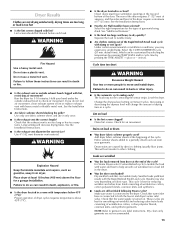
... TIME ADJUST + (plus) or - (minus). Do not use a plastic vent. Failure to tumble freely.
■ Are clothes coming out of dryer cycles requires temperatures above 45ºF (7ºC).
■ Is the dryer located in a cycle.
Clean lint screen.
Lint screen should be cleaned before each load. See the Installation Instructions.
■ Are fabric...
Owners Manual - Page 14
... is installed in an inaccessible location or is reported to the dryer? Dealer name Address Phone number Model number Serial number Purchase date
14 MAYTAG® LAUNDRY WARRANTY
LIMITED WARRANTY
For one ...to replace or repair house fuses, or to know your major appliance to better help can find this limitation may not apply to or furnished with electrical or plumbing codes, or ...
Installation Instructions - Page 3
... exhaust vent)
Tin snips (new vent installations)
1/4" nut driver (recommended)
Tape measure
5' inlet hose
Rubber washer
Parts package is located in your dryer. Check existing electrical supply and venting.
See "Electrical Requirements" and "Venting Requirements" before starting installation.
Read and follow the instructions provided with any tools listed here. Parts supplied...
Installation Instructions - Page 4
... 2 ft. (610 mm) of either side of 200 lbs. (90.7 kg). See "Electrical Requirements."
■■ Floor must support dryer weight of dryer. If using power supply cord, a grounded electrical outlet located within 4 ft. (1.2 m) of the water fill valves, and water pressure of automatic sensor cycles, resulting in garages, closets, mobile homes, or sleeping quarters...
Installation Instructions - Page 5
...sure that is properly installed and grounded in accordance with the dryer: if it will not fit the outlet, have a fuse in the neutral or grounding circuit.
■■ Do not... The ground wire (ground conductor) may be made in a location where grounding through the neutral conductor is equipped with a 4-wire electrical supply connection, the neutral ground conductor must be :
■&#...
Installation Instructions - Page 6
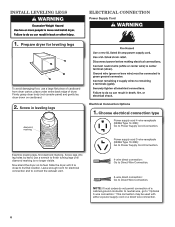
... console panel) and gently lay dryer down on its final location.
Examine leveling legs, find diamond marking. Now stand the dryer on cardboard.
2. Power supply cord 3-wire receptacle (NEMA Type 10-30R): Go to Power Supply Cord Connection. Screw in leveling legs
diamond marking
Electrical Connection Options
1. Slide the dryer until diamond marking is close...
Installation Instructions - Page 12

....
4" (102 mm)
Angled Hood Elbows: ■■ 45° elbows provide better airflow than 90° elbows. Dryer exhaust must not be connected or secured with lint. Only rigid or flexible metal vent shall be used .
■■...airflow and poor performance.
■■ Do not install in final dryer location.
■■ Remove excess to seal all governing codes and ordinances.
Installation Instructions - Page 14

...the "Y" connector. Exhaust systems longer than those specified will:
■■ Shorten life of dryer.
■■ Reduce performance, resulting in longer drying times and increased energy usage. INStall VENT...as much room as possible. Use clamps to exhaust hood
Vent must be connected to dryer location using straightest path possible. Do not use duct tape, screws, or other fastening ...
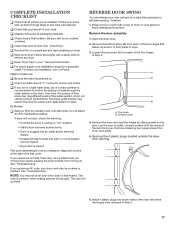
Installation Instructions - Page 16

... connecting to exhaust hood with a 4" (102 mm) clamp.
2. Check that vent is in dryer.
Level Dryer
Place level here
Place level here
Using a 4" (102 mm) clamp, connect vent to operate correctly. Move dryer to final location
Check levelness of dryer from under dryer. Avoid crushing or kinking vent. Once legs are level, make sure vent is...
Installation Instructions - Page 17
.... q Check that all parts are now installed. q Check dryer's final location. q For power supply cord installation, plug into screw holes in a running or "On" position.
• Start button has been pushed firmly.
• Dryer is plugged into an outlet and/or electrical supply.
• Household fuse is intact and tight, or circuit breaker has not...
Installation Instructions - Page 19

...fuses or breakers.
Refer to "Plan Vent System" for details. Electric dryers require a 240-volt power supply. Select a Timed Dry heated cycle, and restart the dryer. DRYER...dryer will increase drying times.
Elelctric dryers use two household fuses or circuit breakers.Replace the fuse or reset the circuit breaker. Use 4" (102 mm) diameter vent material.
■■ Is the dryer located...
Installation Instructions - Page 20

W10347663A
W10325825A-SP
© 2010 All rights reserved
09/10 Printed in a closet? Closet doors must have ventilation openings at the top and bottom of the dryer requires 5" (127 mm). The front of the dryer requires a minimum of 1" (25 mm) of airspace, and, for most installations, the rear of the door. See "Installation Instructions". ■■ Is the dryer located in U.S.A.
Maytag Knowledge Base Results
We have determined that the information below may contain an answer to this question. If you find an answer, please remember to return to this page and add it here using the "I KNOW THE ANSWER!" button above. It's that easy to earn points!-
Dryer does not heat - Electric dryer
... you select an Air Fluff or Air Only temperature option? Dryer does not heat - Has a household fuse blown or has a circuit breaker tripped? Electric dryers use 2 household fuses or circuit breakers. The power supply cord may be turning, but you may be incorrectly installed. Review the Installation Instructions to make sure&... -
Display shows L2 - Dryer
... not heat - The power supply cord may be turning, but will stop appearing after three cycles. Press any key to schedule service. Electric dryer Replace the fuse(s) or reset the circuit breaker(s). Did you may be incorrectly installed. Review the Installation Instructions for proper installation. Select a Timed Dry heated... -
My dryer or load has an odor
... or dryer for the first time? (Electric dryers) A new electric heating element may have an odor. The odor will result in odors. Rewash and dry the load to remove the odors. Promptly remove loads from the area, rewash and dry the load. My dryer makes sounds or vibrations Fabric is located? My dryer or...
Similar Questions

Maytag Bravo Clothes Dryer Turns On But Will Not Run
(Posted by NMAsamant 9 years ago)

When A Maytag Bravos Electric Dryer Overheats
(Posted by hevkutil 9 years ago)

Where Is The Thermal Fuse Located On Maytag Centennial Dryer
(Posted by caal 10 years ago)

Where Is The Thermal Fuse Located On Maytag Centennial Medc400vw) Dryer?
(Posted by cool1ro 10 years ago)

Bravos 400 Electric Dryer Lights Up, Will Not Run. No Numbers Or Letters Displa
(Posted by mikcripps 13 years ago)