
MSI CR420 Support Question
MSI CR420 Support Question
Find answers below for this question about MSI CR420.Need a MSI CR420 manual? We have 1 online manual for this item!
Question posted by fshamisba on July 22nd, 2012
What We Do To Remove Bios Passward
The person who posted this question about this MSI product did not include a detailed explanation. Please use the "Request More Information" button to the right if more details would help you to answer this question.
Current Answers
Related MSI CR420 Manual Pages
User Manual - Page 4

Preface
1-4 ExpressCard Installation...3-38 Removing the ExpressCard 3-38 Installing the ExpressCard ...3-38 Safely Remove Hardware ...3-40 Components Replacement and Upgrade 3-41
BIOS Setup
About BIOS Setup...4-2 When to Use BIOS Setup...4-2 How to Run BIOS Setup...4-2 Control Keys ...4-3
BIOS Setup Menu...4-4 Main Menu...4-5 Advanced Menu...4-7 Boot Menu ...4-9 Security Menu...4-10 Save & ...
User Manual - Page 25
... Start Manual
High-capacity Li-ion battery
AC/DC adapter and AC power cord
Carry bag (optional)
All-in the future. Introductions
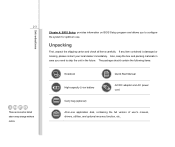
Chapter 4, BIOS Setup, provides information on BIOS Setup program and allows you need to configure the system for optimum use. Unpacking
First, unpack the shipping carton and check all items...
User Manual - Page 29
Yes Introductions
2-7
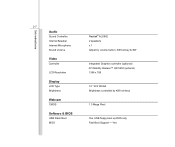
Audio
Sound Controller Internal Speaker Internal Microphone Sound Volume
Video
Controller
LCD Resolution
Display
LCD Type Brightness
Webcam
CMOS
Software & BIOS
USB Flash Boot BIOS
Realtek® ALC662 2 speakers x 1 Adjust by volume button, K/B hot-key & SW
Integrated Graphics controller (optional) ATI Mobility Radeon™ HD 5430 (optional) 1366 x 768
14" ...
User Manual - Page 44

... powered by the battery pack when the AC adapter is positioned on lock status. Once the button is slid to unlock position, the battery is removable.
2. Ventilator
5. Battery Lock/ Unlock Button
4
2.
User Manual - Page 51

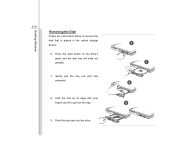
Press the lock/unlock button to your notebook.
To remove the battery pack, following the steps below:
1. Carefully slide the battery pack out of the compartment and then pull the battery pack out. Getting Started
3-6
...
User Manual - Page 52

... it for proper disposal in your local solid waste
officials for details about recycling options or for a period of time. Š Disable unnecessary settings or remove idle peripherals. Š Connect an AC/DC adapter to the system whenever possible. To optimize battery life and avoid a sudden power loss, read the tips...
User Manual - Page 53

... battery life. Š The actual charging time will be recharged while it is installed in use the notebook for a long time, it is suggested to remove the battery pack from your work and close all running programs and shut down and turn off the system
without interrupting the charging process. Š...
User Manual - Page 72
Do not turn off the notebook when the hard disk In-use LED is on . Do not remove or install the hard disk drive when the notebook is equipped with much higher speed and larger capacity than other storage devices, such as the ...
User Manual - Page 75
... the drive's panel and the disk tray will slide out partially.
7. Push the tray back into the drive.
6 7
8 9 Getting Started
3-30
Removing the Disk
Follow the instructions below to remove the disk that is placed in the optical storage device:
6. Gently pull the tray out until fully extended.
8. Hold the disk by...
User Manual - Page 83

... firmly seated. For more information, please refer to install and remove it is smaller and faster than PC Card interface. Removing the ExpressCard
1. Empty Slot
Installing the ExpressCard
5. Push the card...card stretch out first. 3. There might be a dummy card inserted in the slot, remove the ExpressCard or dummy card with its label facing up) 6. The ExpressCard technology takes advantage...
User Manual - Page 84

Getting Started
3-39
Removing the ExpressCard
1
2
2
3
3
Installing the ExpressCard
4
5
5
4 6
User Manual - Page 85

...OK To continue. You can see all connected peripheral devices here. Getting Started
3-40
Safely Remove Hardware
When any of the devices, move the cursor to the device and click Stop. When....
After the devices are stopped they may be stopped. Safely Remove Hardware Select the device you that it is safe to remove any peripheral device is for reference only. Windows will appear on...
User Manual - Page 90

...system by turning it OFF and ON, or simultaneously pressing [Ctrl]+[Alt]+[Delete] keys to Run BIOS Setup?
The actual setting screens and options on the notebook and press the [Del] key during... the system booting up and is requested to reload the default BIOS settings. You may be different because of BIOS update. Be noted that the screen snaps and setting options in this chapter...
User Manual - Page 91

BIOS Setup
4-3
Control Keys
You can use only the keyboard to control the cursor in a sub-menu. Press up a sub-... under the menu title.
In some items, press this key to the previous screen in the BIOS Setup Utility. Bring up help screen providing the information of control keys. 1) Exit the BIOS Setup Utility. 2) Return to change setting options. 2) Bring up arrow to select one menu ...
User Manual - Page 92

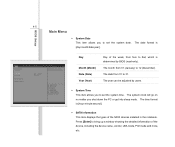
..., USB/ PCI devices, of system time and date. Main Menu Show system overview information about BIOS version, CPU features, memory size and setting of the notebook in order to enter the other ... Security Menu Install or clear the password settings for administrator and user. BIOS Setup
4-4
BIOS Setup Menu
Once you enter the BIOS Setup Utility, the Main Menu will appear on the screen.
Boot Menu...
User Manual - Page 93
... Menu
Š System Date This item allows you to set the system date. The year can be adjusted by BIOS (read-only). The month from 01 to 31. The system clock will go on no matter you shut down the PC or get into sleep ...
User Manual - Page 94

BIOS Setup
4-6 Š System Information This item provides the information about the firmware, processor, and system memory.
User Manual - Page 95
... processor, set the item to enable or disable Intel SpeedStep technology. If you to higher values. When set to enable or disable the AHCI Mode. BIOS Setup
4-7
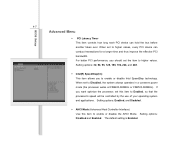
Advanced Menu
Š PCI Latency Timer This item controls how long each PCI device can conduct transactions for a longer time and thus improve the...
User Manual - Page 96

Setting options: Enabled, Disabled and Auto. BIOS Setup
4-8 Š USB Configuration Selecting Enabled allows users to boot the system by USB device. or allows users to use USB devices, such as mouse, keyboard, or portable disk, in DOS system;
User Manual - Page 97
BIOS Setup
4-9
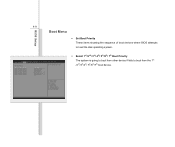
Boot Menu
Š Set Boot Priority These items showing the sequence of boot devices where BIOS attempts to load the disk operating system.
Š Select 1st /2nd/ 3rd/ 4th/ 5th/6th/ 7th Boot Priority The system is going to boot from other device if fails to boot from the 1st /2nd/3rd/4th/ 5th/6th/7th boot device.
Similar Questions

Bios Password Removal
what is the master bios password for msi cr430
what is the master bios password for msi cr430
(Posted by cuteghosthaksya 9 years ago)

