Get support for LiftMaster 8550

LiftMaster 8550 Support Question

LiftMaster 8550 Support Question

Find answers below for this question about LiftMaster 8550.
Need a LiftMaster 8550 manual? We have 1 online manual for this item!
Question posted by armirshahi on December 25th, 2013

Error 11

What is error 11 means on LiftMaster model: 8550 display?

Current Answers

There are currently no answers that have been posted for this question.
Be the first to post an answer!

Remember that you can earn up to 1,100 points for every answer you submit. The better the quality of your answer, the better chance it has to be accepted.

Related LiftMaster 8550 Manual Pages

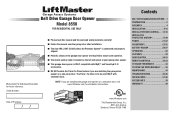
8550 Manual - Page 1

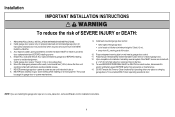
... operation. ■ The model number label is located on the left side panel of the garage door opener are required to be used ONLY with MyQ™ and Security✚®2.0 accessories. ■ DO NOT enable the Timer-To-Close feature if you are installing the garage door opener on a one -piece door. www.liftmaster.com The Chamberlain Group...
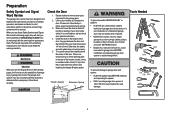
8550 Manual - Page 2

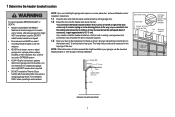
... ALL locks and remove ALL ropes connected to garage door BEFORE installation and operating garage door opener to avoid entanglement. 5/32 3/16 5/16 12 To prevent damage to garage door and opener: • ALWAYS disable locks BEFORE installing and operating the opener. • ONLY operate garage door opener at 120 V, 60 Hz to your door binds, sticks, or is installed, operated, maintained and...
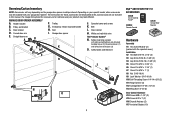
8550 Manual - Page 3

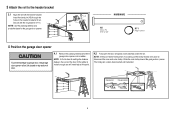
...attached to the accessory and are not included in this manuals are for these accessories will vary depending on your specific model, other accessories may look different. GARAGE DOOR OPENER ASSEMBLY A. Header bracket B. Garage door opener K J. Curved door arm E. Safety reversing sensors with the sprocket cover] Installation H2 Hex Bolt 5/16"-18 x 7/8" (4) H3 Lag Screw 5/16...
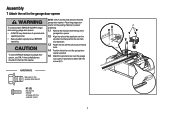
8550 Manual - Page 4

... packing material to prevent H1 To avoid possible SERIOUS INJURY to the garage door opener NOTE: ONLY use ONLY those bolts/fasteners mounted in the garage door opener H1 (3) Hex Screw #8x3/8" (Packed with the sprocket cover) 4 HARDWARE Mounted in the top of sprocket while garage door opener. from moving garage door opener: 1.1 Remove the two bolts from the rail, belt, operating...
8550 Manual - Page 6

...service or maintenance. 14. ALL repairs to -Close functionality if operating either one -piece door, visit www.liftmaster.com for installation instructions. 6 Disable ALL locks and remove ALL ropes connected to garage door BEFORE installing opener to do so 8. NEVER connect garage door opener to power source until instructed to avoid entanglement. 5. Place manual release/safety reverse test...
8550 Manual - Page 7

... mounting header bracket or 2x4 into masonry. • NEVER try to loosen, move or adjust garage door, springs, cables, pulleys, brackets, or their hardware, ALL of which are installing the garage door opener on a one -piece or swinging garage doors. An unbalanced garage door might NOT reverse when required. You can attach it to the ceiling when clearance is...
8550 Manual - Page 9

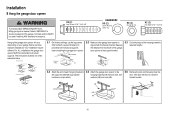
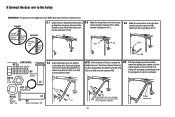
... and rail. H11 H5 HARDWARE H5 Clevis Pin 5/16"x2-3/4" H11 Ring Fastener 4 Position the garage door opener To prevent damage to garage door, rest garage door opener rail on 2x4 placed on top section of door. 4.1 Remove the packing material and lift the garage door opener onto a ladder. If the ladder is raised, pull the trolley release arm down to disconnect...
8550 Manual - Page 10

... finished ceilings, use the lag screws (H3) to attach a support bracket (not provided) to the structural supports before installing the garage door opener. 5.2 Make sure the garage door opener is aligned with the bolts (H2), lock door. Concrete anchors MUST be connected to structural supports. H4 (2) Lag Screw 5/16"- 18x1-5/8" HARDWARE H9 (2) Lock Washer 5/16"-16 H8...
8550 Manual - Page 13

... (H11). trolley will re-engage automatically when the garage door opener is hanging down too far, you may cut 6 inches (15 cm) from the curved door arm. Attach Slide the outer trolley back (away from with the curved door arm. Select two aligned holes (as toward the garage door opener until the far apart as possible) and attach...
8550 Manual - Page 14

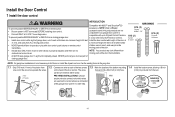
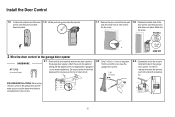
...-WIRED INSTALLATIONS: Choose Wall any other Security+®2.0 door controls. • Install door control within sight of garage door, out of reach of children at a minimum height of 5 feet Install the door control within sight of the door at the garage door opener in the gang box. 1.1 Strip 7/16 inch (11 mm) of insulation from ALL moving parts of closing...
8550 Manual - Page 15

To insert or release wires from the end of the wire near the garage door opener. 7/16" (11 mm) H15 GANG BOX 2.3 Connect the wire to the wall and ceiling with screwdriver tip. Install the Door Control k 1.5 Position the bottom hole of the door control over the screw and slide down into place. Do not pierce the...
8550 Manual - Page 17

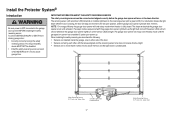
.... To prevent SERIOUS INJURY or DEATH from closing , the door will stop and reverse to the full open position, and the garage door opener lights will turn off and whenever the garage door opener lights turn on either side of the door. • Sensors are facing each other with the garage door opener light bulb; If an obstruction breaks the light beam...
8550 Manual - Page 19

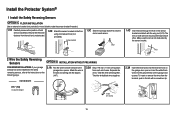
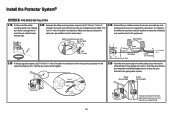
... wires from the terminal, push in the sensor bracket and attach with the staples (H17). 2.2A Strip 7/16 inch (11 mm) of insulation from the wall and unobstructed. 1.2C Attach the sensor brackets to the garage door opener. H13 2 Wire the Safety Reversing Sensors OPTION A INSTALLATION WITHOUT PRE-WIRING PRE-WIRED INSTALLATIONS: If your...
8550 Manual - Page 20

... wires to the sensor wires with a screwdriver tip. 20 Safety reversing sensor wires 7/16" Pre-installed wires (11 mm) 7/16" (11 mm) 2.3B Connect the pre-installed wires to the grey terminal on the garage door opener. Install the Protector System® OPTION B PRE-WIRED INSTALLATION 2.1B Cut the end of the safety reversing sensor...
8550 Manual - Page 28

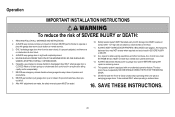
... of SEVERE INJURY or DEATH: 1. Weak or broken springs or unbalanced door could result in an open or closed . 5. NEVER use emergency release handle to pull garage door open door falling rapidly and/or unexpectedly. 7. Garage door MUST reverse on the floor. 11. ALWAYS disconnect electric power to garage door opener BEFORE making ANY repairs or removing covers. 14. NO ONE SHOULD...
8550 Manual - Page 31

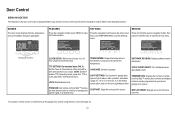
..., choose 12 or 24 hour clock and show /hide the temperature. LANGUAGE: Select a language. DISPLAY ERROR: Displays any errors that have occurred. SERVICE Press and hold the second navigation button, then press the LIGHT button to view the Features menu. TTC SETTINGS (for garage door opener light to view the Settings menu. LOCK: Enable/disable lock. TRANSMITTERS...
8550 Manual - Page 35

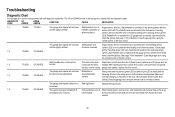
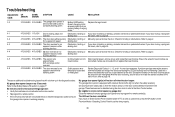
... (staple in wire), replace wire (22 gauge wire) as needed . Close the garage door using the remote control or the door control. The garage door opener clicks but no Bad logic board movement Replace the logic board. 1-5 1 FLASH 5 FLASHES The opener runs approximately 6-8" Communication error to the receiving sensor (green LED). DIAGNOSTIC UP CODE ARROW DOWN ARROW SYMPTOM...
8550 Manual - Page 36

... for no Obstruction, binding or Manually open : The garage door opener is equipped with a feature that will still not activate the door check the diagnostic codes to ensure the garage door opener is okay, reprogram apparent reason or after sticking door touching the floor 4-5 4 FLASHES 5 FLASHES The opener runs Communication error to Disconnect all power, remove cover, and locate...
8550 Manual - Page 37

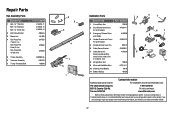
... and sending sensors with 3 feet (.9 m) 2-conductor wire 10 11 8 Straight Door Arm 178B34 9 White and Red/White Wire 41C5141-1 10 3V2016 Lithium Battery 10A19 11 Battery Backup 485LM Contact Information Address repair parts order to your garage door opener while calling. If you have the model number of the garage door opener. Repair Parts Rail Assembly Parts DESCRIPTION 1 Belt...
8550 Manual - Page 38

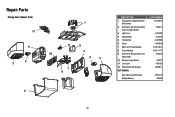
Repair Parts Garage Door Opener Parts 11 9 4 3 1 12 5 2 10 4 3 7 8 6 38 DESCRIPTION 1 Sprocket and Sprocket Cover with Screws 2 End Panel with labels, battery cover and light socket 3 Light Lens 4 Light Socket 5 Transformer 6 Cover 7 Motor and Travel Module 8 Travel Module 9 End Panel with all labels and light socket 10 Receiver Logic Board 11 Line Cord 12 Filter Board...

Similar Questions

I Have Installed A Chamberlan Garage Door Opener And The Remote I Was Using Is
I have been using a Chamberlan garage door opener and its remote has been defective since of late.Pl...
(Posted by donweera42 8 months ago)
Garage Door Opens After Shutting.
My Lift master 8550 inside keypad is Inside wall pad is model #880LM. outside keypad Model # is 877M...
(Posted by BONNIECA92 2 years ago)
Garage Door Wont Close
garage door starts to come down but then stops and lights flash
(Posted by djsyencer 6 years ago)
Replacing Backup Battery In Garage Door Opener.
How do I replace the backup battery in the LiftMaster 3850 garage door opener? Are there instruction...
(Posted by melindanannin 12 years ago)
Ask a New Question
Use the box below to post a new question about this LiftMaster product .
Points & Prizes
  • You can earn points for nearly everything you do on HelpOwl.com
  • You can trade in those points for gift cards at leading retailers such as Amazon.com and Walmart
  • It's that simple!
See How it Works
Create a Free Account

LiftMaster Manuals

Find free LiftMaster 8550 manuals and user guides available at ManualOwl.com. Try out our unique manual viewer allowing you to interact with manuals from directly within your browser!

LiftMaster Reviews

View thousands of LiftMaster user reviews and customer ratings available at ReviewOwl.com.

Contact Information

Complete LiftMaster customer service contact information including steps to reach representatives, hours of operation, customer support links and more from ContactHelp.com.

Scoreboard Ratings

See detailed LiftMaster customer service rankings, employee comments and much more from our sister site.