Get support for LiftMaster 8550

LiftMaster 8550 Support Question

LiftMaster 8550 Support Question

Find answers below for this question about LiftMaster 8550.
Need a LiftMaster 8550 manual? We have 1 online manual for this item!
Question posted by mjmck12 on March 17th, 2022

Era Coad 11

The person who posted this question about this LiftMaster product did not include a detailed explanation. Please use the "Request More Information" button to the right if more details would help you to answer this question.

Current Answers

Answer #1: Posted by SonuKumar on March 18th, 2022 9:59 AM
This answer was accepted by the poster of the original question.
SonuKumar

Member since:
May 9th, 2021

Points: 16,621,300
1,100
points
If you constantly hold the button down it will close. However, the sensor circuit for closing the door is either unconnected (check the connection of the two wires going to the sending/receiving units on bottom of garage door for proper connection and aiming) or the circuit itself has gone south.

https://www.fixya.com/support/t25551897-our_garage_door_will_not_close_say

https://www.justanswer.com/home-improvement/8pl7o-error-code-11-lift-master-panel-garage.html


Please respond to my effort to provide you with the best possible solution by using the "Acceptable Solution" and/or the "Helpful" buttons when the answer has proven to be helpful.

Regards,
Sonu
Your search handyman for all e-support needs!!

Related LiftMaster 8550 Manual Pages

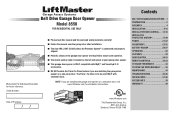
8550 Manual - Page 1

... are required to ensure safe operation. ■ The model number label is located on the left side panel of your garage door opener. ■ This garage door opener is ONLY compatible with sectional doors. Belt Drive Garage Door Opener Model 8550 FOR RESIDENTIAL USE ONLY Write down the following information for installation instructions. . www.liftmaster.com The Chamberlain Group, Inc. 845...
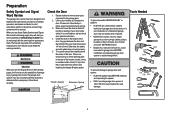
8550 Manual - Page 2

.... • Disable ALL locks and remove ALL ropes connected to garage door BEFORE installation and operating garage door opener to avoid entanglement. 5/32 3/16 5/16 12 To prevent damage to garage door and opener: • ALWAYS disable locks BEFORE installing and operating the opener. • ONLY operate garage door opener at 120 V, 60 Hz to avoid malfunction and damage. 1/2 5/8 1/4 7/16...
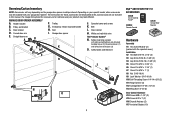
8550 Manual - Page 3

... the accessory and are not included in this manuals are for these accessories will vary depending on your specific model, other accessories may look different. GARAGE DOOR OPENER ASSEMBLY A. Sprocket cover and screws K. White and red/white wire The Protector System® N. Safety reversing sensors with the sprocket cover] Installation H2 Hex Bolt...
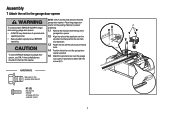
8550 Manual - Page 4

... rail with the sprocket cover) 4 HARDWARE Mounted in the top of sprocket while garage door opener. from moving garage door opener: 1.1 Remove the two bolts from the rail, belt, operating. Assembly 1 Attach the rail to the garage door opener NOTE: ONLY use ONLY those bolts/fasteners mounted in the garage door opener H1 (3) Hex Screw #8x3/8" (Packed with the previously removed bolts...
8550 Manual - Page 6

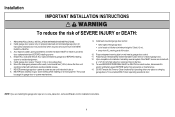
...; within reach, but at least 6 feet (1.83 m) above floor. 6. DO NOT enable the Timer-to garage door control 11. Install garage door opener only on a one -piece or swinging garage doors. They could result in SEVERE INJURY or DEATH. 3. An improperly balanced door may not reverse when required and could be caught in plain view on wall next to...
8550 Manual - Page 7

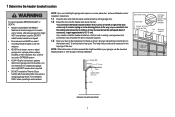
... track 7 To be used if mounting header bracket or 2x4 into masonry. • NEVER try to loosen, move or adjust garage door, springs, cables, pulleys, brackets, or their hardware, ALL of which are installing the garage door opener on wall or ceiling), use lag screws (not provided) to securely fasten the 2x4 to structural supports...
8550 Manual - Page 9

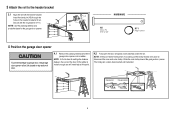
... the clevis pin (H5) through the holes in the header bracket and rail. 3 Attach the rail to garage door, rest garage door opener rail on 2x4 placed on top section of door. 4.1 Remove the packing material and lift the garage door opener onto a ladder. NOTE: Use the packing material as a protective base for setting the distance between the rail...
8550 Manual - Page 10

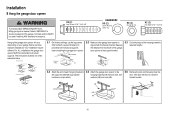
...) to attach a support bracket (not provided) to the structural supports before installing the garage door opener. 5.2 Make sure the garage door opener is aligned with the bolts (H2), lock door. Measure the distance from a falling garage door opener, fasten it SECURELY to structural supports. If the door hits the rail, raise the hardware (not provided). header bracket. (not provided) H2...
8550 Manual - Page 13

... the far apart as possible) and attach using the bolts trolley release arm is activated. . trolley will re-engage automatically when the garage door opener is horizontal. H11 H6 HARDWARE H2 (2) Hex Bolt 5/16"-18x7/8" H8 (2) Nut 5/16"-18 H7 Clevis Pin 5/16"x1" H11 (2) Ring Fastener H9 (2) Lock Washer 5/...
8550 Manual - Page 14

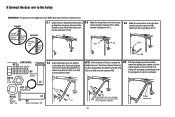
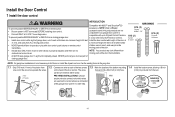
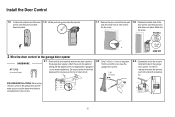
... wires H16 GANG BOX are used so the correct wires are no obstructions to door travel. on the back of insulation from the wall. NOTE: Your product may look different than moving parts of the door at the garage door opener in a later step. HARDWARE H14 (2) Screw 6ABx1-1/4" H15 (2) Screw 6-32x1" H16 (2) Drywall Anchors NOTE...
8550 Manual - Page 15

... ceiling with the staples (H17) (not applicable for the top screw. 1.8 Position the bottom hole of the wire near the garage door opener. 7/16" (11 mm) H15 GANG BOX 2.3 Connect the wire to the garage door opener. Do not pierce the wire with screwdriver tip. To insert or release wires from the terminal, push in the tab...
8550 Manual - Page 17

... aligned correctly before the garage door opener will flash 10 times. To prevent SERIOUS INJURY or DEATH from closing , the door will stop and reverse to the full open position, and the garage door opener lights will move in the down until the garage door opener has completed 5 cycles upon power up. NOTE: For energy efficiency the garage door opener will enter sleep mode...
8550 Manual - Page 19

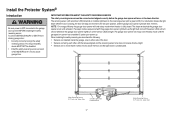
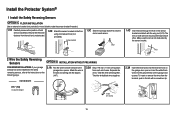
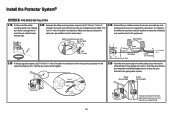
To insert or remove the wires from each set of wires. HARDWARE H17 H17 (10) Insulated Staple 7/16" (11 mm) 2.3A Insert the white wires into the white terminal on the garage door opener. RED WHITE WHITE GREY 19 Twist the white wires together. Insert the white/black wires into the slot on both sensors...
8550 Manual - Page 20

... tip. 20 Not Provided White Yellow (for example) White/Black Safety reversing sensor wires Purple (for example) Pre-installed wires 2.4B At the garage door opener, strip 7/16 inch (11 mm) of insulation from each end of the wires previously chosen for each end. Install the Protector System® OPTION B PRE-WIRED INSTALLATION 2.1B...
8550 Manual - Page 21

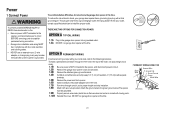
... power cord from electrocution or fire: • Be sure power is grounded. To make it fit outlet. To avoid installation difficulties, do not activate the garage door opener at this time. This plug will only fit into your outlet, contact a qualified electrician to install the proper outlet. Attach the ground wire to the...
8550 Manual - Page 22

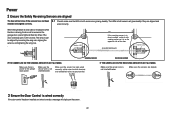
...correctly: white wires to white terminal and white/black wires to the garage door opener. RED WHITE WHITE GREY 3 Ensure the Door Control is not shorted/broken. wired correctly. The sensors can be...THE SENDING SENSOR IS NOT GLOWING: Make sure there is closing, the door will reverse and the garage door opener lights will flash ten times. The LEDs in both sensors are glowing ...
8550 Manual - Page 23

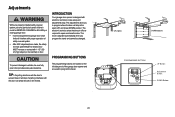
... the travel and cannot be changed. The force is designed with 1-1/2" (3.8 cm) high object (or 2x4 laid flat) on floor. Door MUST reverse on the left side panel of the garage door opener and are made, the safety reversal system MUST be tested. PROGRAMMING BUTTONS The programming buttons are located on contact with electronic...
8550 Manual - Page 28

... operate or play with 1-1/2" high (3.8 cm) object (or a 2x4 laid flat) on contact with garage door control push buttons or remote controls. 3. NEVER use handle to door travel. 4. Garage door MUST reverse on the floor. 11. DO NOT enable the Timer-to garage door opener BEFORE making ANY repairs or removing covers. 14. ALWAYS keep remote controls out of...
8550 Manual - Page 37

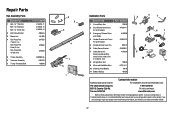
... Sensor Kit 41A5034 8 Receiving and sending sensors with 3 feet (.9 m) 2-conductor wire 10 11 8 Straight Door Arm 178B34 9 White and Red/White Wire 41C5141-1 10 3V2016 Lithium Battery 10A19 11 Battery Backup 485LM Contact Information Address repair parts order to your garage door opener while calling. If you are calling about a Troubleshooting issue, it is recommended that...
8550 Manual - Page 38

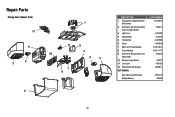
Repair Parts Garage Door Opener Parts 11 9 4 3 1 12 5 2 10 4 3 7 8 6 38 DESCRIPTION 1 Sprocket and Sprocket Cover with Screws 2 End Panel with labels, battery cover and light socket 3 Light Lens 4 Light Socket 5 Transformer 6 Cover 7 Motor and Travel Module 8 Travel Module 9 End Panel with all labels and light socket 10 Receiver Logic Board 11 Line Cord 12 Filter Board...

Similar Questions

I Have Installed A Chamberlan Garage Door Opener And The Remote I Was Using Is
I have been using a Chamberlan garage door opener and its remote has been defective since of late.Pl...
(Posted by donweera42 8 months ago)
Garage Door Opens After Shutting.
My Lift master 8550 inside keypad is Inside wall pad is model #880LM. outside keypad Model # is 877M...
(Posted by BONNIECA92 2 years ago)
Garage Door Wont Close
garage door starts to come down but then stops and lights flash
(Posted by djsyencer 6 years ago)
Noise From Garage Door Opener
I have a liftmaster garage door opener.  It makes a loud screeching noise when the door is lowered....
(Posted by tom19097 11 years ago)
Ask a New Question
Use the box below to post a new question about this LiftMaster product .
Points & Prizes
  • You can earn points for nearly everything you do on HelpOwl.com
  • You can trade in those points for gift cards at leading retailers such as Amazon.com and Walmart
  • It's that simple!
See How it Works
Create a Free Account

LiftMaster Manuals

Find free LiftMaster 8550 manuals and user guides available at ManualOwl.com. Try out our unique manual viewer allowing you to interact with manuals from directly within your browser!

LiftMaster Reviews

View thousands of LiftMaster user reviews and customer ratings available at ReviewOwl.com.

Contact Information

Complete LiftMaster customer service contact information including steps to reach representatives, hours of operation, customer support links and more from ContactHelp.com.

Scoreboard Ratings

See detailed LiftMaster customer service rankings, employee comments and much more from our sister site.